5 BIG CHANGES in Florida Real Estate [2023]
5,499 View

Share this Video
- Publish Date:
- June 30, 2023
- Category:
- Aerial Photography
- Video License
- Standard License
- Imported From:
- Youtube
Tags
5 BIG CHANGES in Florida Real Estate [2023]
►► FREE Lakewood Ranch FL Buyer's Tool →
►► FREE Sarasota Digital Guide →
►► Connect w/ our team →
►► More Free Stuff/Resources →
In today's video, we walk through 5 material changes and shifts to the Florida real estate market for 2023. In my opinion, we have hit a point of no return in several categories, such as: home buyer patience, net migration, luxury real estate over $1.5M, master-planned communities, etc. Really hope you enjoy this take!
Thanks for watching and be sure to check out the helpful links above and below!
___
⚡️HELP BUYING OR SELLING REAL ESTATE -
➡️ [email protected] or
➡️ (941) 205-7484 or
➡️ www.TheSunshineStateCo.com
___
#floridarealestate #sarasotaflorida #lakewoodranch
By: The Florida Relocation Guide
Title: 5 BIG CHANGES in Florida Real Estate [2023]
Sourced From: www.youtube.com/watch?v=BIl7xKFo7Xk
Check out the 3 most popular drones on Amazon in 2022
Frequently Asked Questions
What is the best time to fly a drone?
If there isn’t any activity on the ground, a drone could capture aerial shots during sunrise or sunset.
Drones can capture beautiful photographs of landscapes and the sky over them. Some drones cannot fly at night and you may miss amazing views.
Consider flying at sunrise or sunset to ensure that you are not missing out on any photo opportunities. These times allow for stunning shots of nature and are often more popular because there are fewer cars on roads and fewer people.
You will find it easier to shoot in low light levels.
Furthermore, you don't have to worry about strong winds or rain, snow, fog, or freezing temperatures. All of these factors make daylight perfect to take photos with drones.
But, if you wish to capture nighttime scenes, flying during the moonlit nights is an option. This will offer you a unique view of your cityscape.
Can drones capture night shots?
The answer to that question is yes. It's something we have been doing for years. We've been taking pictures at night for decades.
But there is a catch. Night photography requires specialized equipment. With a camera costing less than $10k, there is no way to do night photography.
When light strikes an object, it bounces back in various wavelengths.
These wavelengths are combined to produce white light at very far distances from their source.
This is why our eyes can see colors even though the sun is millions of miles away.
The opposite is true. When light strikes an object very close to its source it reflects in narrow wavelengths. These wavelengths bounce directly back to us and do not overlap.
That means that the closer the object is, the brighter it appears. This is why objects seem to glow when they are exposed to black light.
The amount of light reflected depends on how much energy the object absorbs. If light hits an object, it may reflect less red light than more blue.
The human eye is sensitive to blue light the most so objects appear brighter when viewed in black light.
This has to do with drones. You need a bright light source if you want to photograph dark objects, such as caves or forests.
A standard lamp will not provide enough illumination to illuminate the whole scene. It will only provide a shadowed view and not much else.
A strobe will give you a great shot. And since you don't want to carry around a huge flashgun, you'll need to buy a small one.
Speedlights are also known for their flashes of light that create a stroboscopic effect.
The light pulses across the screen when "stroboscopic" is used. The better the picture, the faster the rate.
We won't discuss how to set up a Speedlight here. But you can find many tutorials online.
We will tell, for clear pictures, that you need to ensure that the subject is evenly illuminated.
To achieve this, you should aim the beam at a 45-degree angle. The flashgun can be moved to adjust the intensity of the light.
Once you have set the setting that is right for you, hold the gun steady as the shutter release button is pressed.
Next, close to the subject, release the shutter. This will activate the flashgun and fire another burst.
While the first burst illuminates the subject, the second one will capture the moment after the first burst has passed.
This results in a continuous exposure that records both bursts and steady light.
You now know how to take photos during the day. Let's move onto night photography.
So far I have covered all you need to know about taking night photos.
The color balance is the last thing we need to address.
Most people assume that all images taken at nights will be too dark.
That's true, but the same applies to daytime photos.
It doesn’t matter whether you’re shooting at dawn or at dusk. The camera will always record a darker shot.
How do I get started drone photography?
There are many ways you can start taking photos with a drone. A ready-made drone package is the first choice. You'll get everything you need. They vary from $200 up to $500, depending on which model.
You can also build your own drone. It's possible to make a drone that takes decent photos and videos, even though it can be complicated.
Quadcopters are the best option for those looking to build their drone. Quadcopters have four propellers (or rotors) as opposed to two like traditional helicopters.
A quadcopter is easier to assemble and maintain than a helicopter. It is also easier to transport and purchase.
First, you'll need to choose the right parts. Motors, batteries and controllers are all required. Be sure to select the right size and weight.
Next, you need to choose what type of controller to use. Many different types are available, such as joysticks, touch screens, and remote controls. You can attach your drone to the camera with the built-in camera.
Once you've made your selections, you are ready to assemble it. Preassembled kits make life easier. But if you want to build your own drone, there are some steps you will need to follow.
Step 1: Attach your battery pack
For your quadcopter to be built, you'll need the battery pack connected to the motor. To start, remove the cover from the battery pack. Then, slide the battery into place.
Step2: Connect your motors
Next, install the motors into the correct slots. Each motor should be installed in its own slot. When installing motors, ensure that they face forward while remaining perpendicular with the frame.
Step 3: Install your propeller
The propellers will need to be attached to the frame. Remember to position them at equal distances apart.
Now you are ready to test your drone. If there is no movement when the engine turns on, check that the propellers point forward. Also, ensure that there aren’t obstructions between propellers.
Statistics
- 60 second video with branding, captions, contact information, and music Strip / Convenience / Neighborhood / Community Centers pricing per center (up to 400,000 sq ft) PLACE ORDER (dronebase.com)
- Among the biggest improvements, the Skydio 2+ has over the standard 2 is a 20% longer battery life, longer range if you add the Beacon, and a neat AI video creation tool called Keyframe. (thedronegirl.com)
- Greater than 50% throttle stick position generates positive thrust, but less than 50% throttle stick position reverses the direction of the motors, allowing upside-down flying! (photographypro.com)
- Compared to the old days of the Phantom, this drone is super small, but it will likely require you to check a bag, the way a Mini 3 Pro could easily stow away in an oversized pocket. (thedronegirl.com)
- Regional & Super Regional Centers pricing per center (400,000+ sq ft) PLACE ORDER (dronebase.com)
External Links
blog.dronebase.com
- Is aerial drone photography right to use in my commercial building?
- Four Ways Drone Photography can Make Home Buyers Feel More At Home
faa.gov
How To
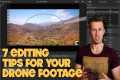
Tips for Beginners on How to Take Outstanding Drone Images
Tips for taking great drone photos:
- It is important to have enough space to safely fly your drone. You should keep it out of buildings, trees, power lines, and other obstructions.
- Before you begin flying, be sure to know where you're going. Drone flying is easy. You could end up in danger if you don't know the exact location of your flight.
- Remember to be safe when you fly! Keep your drone near you so you can see what's going on around you. Flying at night or during poor weather conditions (like heavy rainfall) is not a good idea.
- Bring extra batteries if you plan to do long flights. Always keep spare batteries handy. So you don't run out mid-flight, it is important to always have spare batteries.
- Use good quality lenses. The clearer the image, the higher the resolution. A camera lens with a low resolution, such the one found on most smartphones, may blur the image.
- Start small. Start small with your first video. When you feel confident, you can move on to longer videos.
- Avoid using your drone indoors. Drones are not intended to be used indoors. They can cause damage to walls, furniture, and other objects.
- Practice makes perfect! Try out different things using your drone. You can use your drone to capture different angles on the same scene. Fly outside to practice your flying skills.
- Be creative! Although you might think that you must follow the rules to create great drone images, there are no rules about photography.
- Find out more about the settings of your camera. Cameras today have many advanced features. These settings can help improve the quality of your photographs.
- Be patient! Be patient!
- Have fun. Recall why you bought your drone. Flying your drone with fun can enhance the experience.
- Your work is welcome to be shared! Share your top shots on social media platforms like Facebook, Instagram and Twitter. Let other photographers know how much it was fun!
- Keep learning! Read books and magazines about photography. Online tutorials. 15. Take precautions! Before you head off into the sky, check all safety measures. You must ensure that your drone's battery is charged up and that its landing gear is working properly. Make sure you are following all FAA regulations.
- Find your style! Once you master the basics, your unique style will emerge. Test out different styles and techniques until you find one that works.
- Apps! Many free photo editing applications are available for download on your smartphone. You can easily improve your photos with these tools.
- Keep taking notes! It can be helpful to keep track of what you've learned in this article so that you can remember it. Write down important points in your journal or notebook.