FPV Drones – How to start in 2023? DJI O3
1,033,477 View

Share this Video
- Publish Date:
- September 24, 2023
- Category:
- Aerial Photography
- Video License
- Standard License
- Imported From:
- Youtube
Tags
All music in this video from here –
Use the EARTH50 promo code at checkout to get 1 month for free and additional 2 months with a discount of 50%.
Best FPV KIT for beginners – Cetus FPV Kit ready to fly with mini fpv drone, all that you need:
Cetus FPV Kit, $160 –
More professional Cetus X FPV Kit Ready to fly, $290 –
My favorite FPV drone for travel – (TBS NANO RX)
My FPV Kit:
Drone 1 – (4S, TBS nano RX)
Drone 2 – (TBS NANO RX)
Battery –
DJI Goggles 2 –
Remote –
Charger –
Long Range drone:
iFlight Chimera 7 O3 – (
TBS Crossfire NANO RX)
My favorite long range DJI O3 – (TBS NANO RX)
Best drone for outdoor Mark5 – (6S, TBS nano RX)
Cinewhoop for naked GoPro, my favorite small drone with ducts – (TBS Nano RX)
Mini cinematic drone with ducts with DJI O3 – (TBS CRSF)
FPV Goggles:
New DJI Goggles 2 –
Old one DJI FPV Goggles v2 –
Remote controller:
TBS Tango 2 –
Budget Commando 8 –
Naked Small GoPro for FPV:
GoPro 11 Naked –
Budget Gopro naked 8 –
FPV on Amazon:
Favorite FPVDrone for naked GoPro –
FPV Drone for full GoPro –
Best outdoor drone –
New DJI Goggles 2 –
Budget old one DJI FPV Goggles v2 –
My Instagram –
0:00 – FPV Beginner Guide
1:12 – Best FPV Drone for beginners
1:31 – Best FPV for outdoor – Mark5
4:10 – Best drine for inddor – Cinebot30
7:47 – Long range
10:38 – DJI O3
11:11 – What FPV drone to get
11:51 – Best Camera for FPV
13:21 – Best goggles for FPV
15:13 – Best remote for FPV
#FPV #dji #drone
By: Man From Earth
Title: FPV Drones – How to start in 2023? DJI O3
Sourced From: www.youtube.com/watch?v=YJsnMCcjSbA
Look at the 3 most popular drones on Amazon while they're on sale
Frequently Asked Questions
How do you fly your drone?
It takes practice to fly a drone. Even though drones are very stable compared to regular aircraft, it takes time for pilots to gain experience. If you are a beginner, it is advisable to practice indoors and close to your home.
There are three essential skills that you need to know in order to fly a Drone. These are taking off, hovering, and landing.
Take Off
To take off, simply lift the drone into the sky. The button on the controller should be pressed until the drone moves upward. After the drone reaches an appropriate height, release the button.
Hovering
Hovering means keeping the drone steady in midair. To hover, hold down the left or right trigger while pressing the throttle. Tilt the controller to move the drone. Hold down both triggers.
Landing
Landing is when the drone returns safely to the earth. Release the throttle and turn the controller toward the ground to land. This will cause your drone to slow down until it lands.
Fly your drone as comfortable as possible. Make sure you don't crash into anything.
Is it possible to make money from drone photography?
A lack of products to solve the problems inherent in flying drones is the biggest obstacle for photographers looking to make money from them. It's not easy to enjoy the experience if you don't have quality equipment or software.
Insurance costs and liability are another concern. Most photographers prefer to photograph from the ground. However, there is an entirely new way to take pictures that can potentially earn you a commission.
Drones capture light in a similar way to video cameras. Why not create stunning photos using the same technology?
Companies have already made great strides to create photo-quality images from above. We have already discussed DJI & GoPro. Now, we are seeing more companies join the space.
Although these cameras were designed for aerial photography they can also be used on the ground. Every major manufacturer is investing heavily in the development and maintenance of their imaging technologies.
This means you can eventually buy a drone which shoots 4K videos, and takes amazing photographs. We might already be witnessing this happening. DJI and other companies have released higher resolution versions of their Phantom drones.
DJI recently launched the Inspire 2, a 12-megapixel camera capable of taking photos at 5120x3456 pixels. You can also record RAW files at 30 frames per minute, 8-bit format.
You can certainly make money from drone photos.
What drone type do professionals use for their work?
Drones can be used to take amazing aerial photos. Drones can be used to capture images and record video footage from the sky. Drones can also be useful in surveying land and taking measurements.
These devices are frequently used commercially for mapping large areas and checking construction sites. These devices can be used for many other purposes, however.
Drones, for example, can be a great way to entertain friends and families. There are countless ways to fly these machines and explore new places. Drones also make it easy to take photos and video of special events.
When it comes to drones, the sky is your limit. To learn how to make the most of your drone, read on.
Can drones be used to take night pictures?
Yes. It's something we have been doing for years. For decades, we've been taking photos at night.
There's a catch. Night photography requires specialized equipment. Any camera under $10k is not capable of night photography.
When light strikes an object, it bounces back in various wavelengths.
These wavelengths merge to form white light at long distances from source.
This is why your eyes can see colors even if the sun is many millions of miles away.
However, when light strikes an object near its source, it reflects within a narrow band wavelengths. These wavelengths bounce directly back to us and do not overlap.
This means that objects are brighter if they are closer together. This is how objects glow when exposed to black light.
The energy that an object absorbs will determine how much light is reflected. So when light hits an object, it may reflect more blue light than red light.
Blue light is the most visible to the human eye, so objects will appear more blue if they are seen under black light.
What does all this have to do about drones? If you're trying to photograph something dark, such as a forest or a cave, you need to use a very bright light source.
A normal lamp will not be strong enough to illuminate the whole scene. It will give you only a shadowed picture and nothing else.
You will need a strobe if you want to take great photos. Also, a small flashgun won't be as convenient for you.
Because they produce flashes that are so rapid, these lights are often called speedlights.
The light pulses across the screen when "stroboscopic" is used. The higher the speed, the better the picture.
We won't cover how to set-up a Speedlight. However, there are numerous tutorials online.
We will tell you to make sure that the subject is properly illuminated in order for a clear photograph.
For this to happen, aim the beam at 45°. You can adjust light intensity by moving your flashgun's head.
Once you have chosen the best setting, hold your gun steady while you press the shutter release.
Just before the flashlight reaches your subject, you can press the shutter button again. This will activate the flashgun and fire another burst.
The first burst will illuminate the subject. However, the second burst will capture the moment after it has passed.
The end result is a continuous exposure with both bursts light and recorded.
Now you know how to take pictures during the day, let's move on to night photography.
I've covered everything you need about night photography.
However, there is still one thing that needs to be addressed: the color balance.
Most people assume that any images taken at night will look too dark.
That's true, but the same applies to daytime photos.
It doesn't matter whether you're taking pictures at dawn or dusk; the camera will always record a darker image.
How do I get started drone photography?
There are many ways you can start taking photos with a drone. The first option is to buy a ready-made drone kit. It will come with everything you need in order to get started. They vary in price from $200 to $500 depending upon the model.
The other option is to build your drone. Even though this can be difficult, it is still possible to build a drone that will take decent photos or videos.
We recommend that you start with a quadcopter if you want to build your own drone. As found on conventional helicopters, a quadcopter has four rotors (or propellers) instead of two.
A quadcopter takes less time to assemble, and is more reliable than a traditional helicopter. You can also purchase it cheaper and carry it around easier.
You'll first need to select the right parts. You will need props, motors, batteries controllers and controllers. Make sure you pick the correct size and weight.
Next, you'll need to decide what controller you'd like to use. There are many types of controllers available. We recommend purchasing one with a built-in camera, so you don't have to attach a separate device to your drone.
Once you've made your selections, you are ready to assemble it. A preassembled kit is a great option to save time and make things simpler. If you would prefer to build your drone yourself, there are a few things you need to do.
Step 1: Attach battery pack
To start building your quadcopter you'll first need to connect it to the motor. First, remove the cover plate from the bottom of the battery pack. After that, slide in the battery.
Step2: Connect the motors
Next, you'll need to install the motors in the appropriate slots. Each motor must be placed in the appropriate slot. When mounting the motors, ensure they face forward and are parallel to the frame.
Step3: Install the propeller
Finally, you'll need to attach the propellers to the frame. Place them at an equal distance.
Now you are ready to test your drone. If there is no movement after you turn on your engine, double-check that you have the propellers facing forward. Make sure there aren't any obstructions between the propellers.
Is it worth buying a drone for photography?
If you're serious about starting your own business, you'll eventually realize there's nothing more important than having a great product. If you plan to promote your business, make sure you have a great product.
The problem with most photographers is that they're not selling themselves. They're trying to convince someone else to buy their stuff instead of convincing themselves to do it.
However, if you want to start your own business, you won't have the luxury of waiting for others to allow you to do so. You will have the ability to find customers today.
You will need to tell compelling stories that help them understand why your products are better than others.
The strategy you use to market these products will also be important. Even after all that effort, you may still fail because your product prices are not correct.
You may decide to charge too much. You might decide to charge too much. You could be charging too much or you might make a mistake.
These mistakes can be avoided by thinking like a businessman. It doesn't mean that you should become a capitalist. It means that you need to learn how value your time, money and effort.
You must also develop strategies to measure the success of your company.
Once you are comfortable with pricing, it is possible to focus on building the most effective product. A product that makes sense both financially and creatively.
A product that solves your problems and gives you real benefits.
One that stands apart from the rest.
And once you've built that product, you'll be ready to launch it. Then you can start building your brand.
You should consider buying a drone to take photos. It will make it easier to start your career as a photographer. It will improve your skills. It will also allow you to grow your company.
Are there any good spots to fly a drone and take photos?
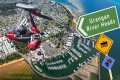
Drones are a great tool for taking stunning photos of nature and landscapes. Drones offer the perfect solution for taking stunning photographs of nature and wildlife, as well as beautiful landscapes.
Drones are best used in mountains, deserts and other locations such as beaches, cities, oceans, rivers, and lakes. Many drone enthusiasts capture stunning views of their local areas and other attractions.
Try shooting at night, when the lights illuminate the landscape. This will allow you to discover new locations. Also, you can shoot in different seasons, particularly winter when snow covers the ground.
Statistics
- Regional & Super Regional Centers pricing per center (400,000+ sq ft) PLACE ORDER (dronebase.com)
- Among the biggest improvements, the Skydio 2+ has over the standard 2 is a 20% longer battery life, longer range if you add the Beacon, and a neat AI video creation tool called Keyframe. (thedronegirl.com)
- 60 second video with branding, captions, contact information, and music Strip / Convenience / Neighborhood / Community Centers pricing per center (up to 400,000 sq ft) PLACE ORDER (dronebase.com)
- Though the Mavic 3 is about 50% heavier than the Mavic Air 2, it's still conveniently sized. (nytimes.com)
- Here's proof: according to an analysis of FAA drone registration numbers by drone market research and data group Drone Industry Insights, DJI had a 76.8% market share in the U.S. (thedronegirl.com)
External Links
[TAG6]
[TAG9]
How To
How to Make a Time-Lapse with a Drone
The two most common types of camera used to make time-lapses are DSLRs (Digital Single Lens Reflex) which are typically more expensive that point-and–shoot digital cameras.
The way light enters DSLR cameras can also make them produce better quality images. They are not ideal for video because they require manual focus, exposure and exposure settings.
Easy to use, point-and shot cameras, like those made by GoPro. The lower resolution makes videos look grainy.
A consumer drone makes the best time-lapse camera. These small flying robots offer a cheaper alternative to professional drones.
A drone is a remotely controlled aircraft that can fly autonomously and without human intervention. Although quadcopter drones might have multiple propellers to fly, a drone uses a single propeller.
A drone can provide aerial footage as well as cinematic shots. Drones can also be equipped with a gimbal stabilizer to shoot smooth handheld footage.
For a time-lapse effect, you can start recording while your drone hovers above the subject. If the sun doesn't directly over the subject, the sky won't look dark during the shot.
To achieve the desired effect you can adjust your shutter speed and aperture. To capture a sunset, you might set the shutter speed at 30 seconds, and open the aperture wide to let in as much natural sunlight as possible.
For night shots, the opposite approach would be taken. You can reduce light entering your camera by slowing the shutter speed to 1/second and closing the aperture. This technique creates a bright image where details are visible.