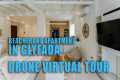
Calgary Real Estate Property Video Tour Production - 303 13 Ave SW #605
226 View

Share this Video
- Publish Date:
- September 10, 2023
- Category:
- Real Estate Drone Videos
- Video License
- Standard License
- Imported From:
- Youtube
Tags
Thoughts on the view from the balcony? Comment below!
Are you subscribed yet? Make sure to turn on our notifications for more real estate video tours of stunning homes in Calgary, Edmonton, and surrounding areas.
303 13 Ave SW #605
This property is listed by
Julie Dempsey
Royal LePage Benchmark
(403) 923-6299
https://www.juliedempsey.ca/
--
FOLLOW US
http://www.instagram.com/sonavisual
http://www.facebook.com/sonavisual
http://www.twitter.com/sonavisual
https://ca.linkedin.com/company/sona-visual
https://www.pinterest.ca/sonavisual
http://www.tiktok.com/@sonavisual
ABOUT US
Sona Visual is an award-winning media company for the real estate and property industry. We proudly serve the Calgary, Edmonton, and Rocky Mountain areas. We understand the importance of media marketing and help residential and commercial clients achieve the exposure they deserve. We provide services such as HDR photography, HD property video tours, custom profile video production, measuring & floor plans, aerial drone cinematography and photography, feature sheets, social media strategy and content, and virtual staging. You can learn more about us on our website SonaVisual.com.
Please contact us at info(at)sonavisual.com to find out how we can help you make a lasting first impression for your property.
Real Estate Video Production by Sona Visual™.
© Sona Visual. All rights reserved.
For more information on presenting your property with high quality HD video, visit https://sonavisual.com/real-estate-videos/
Thank you for watching!
#realestate #calgaryrealestate #videography #videographer #realestatetour #calgaryvideo
By: Sona Visual
Title: Calgary Real Estate Property Video Tour Production - 303 13 Ave SW #605
Sourced From: www.youtube.com/watch?v=AZCybUZ0Ako
Check out the 3 most popular drones on Amazon Today!
Frequently Asked Questions
Which drones can carry DSLRs?
Drones have become more practical for everyday tasks. Already, drones are equipped with cameras capable of aerial photography.
Drones have been around for many years but most people don't use them because they aren’t practical. Most drones are too expensive, noisy, and hard to control.
That's why we've created the Drone-A1. It's the world's first fully autonomous quadcopter designed specifically for photographers.
The Drone-A1 comes with an HD camera that can take stunning photos and videos. Due to its powerful computer onboard, the Drone-A1 will follow a subject seamlessly without any human intervention.
This means you can focus entirely on capturing great images while the Drone-A1 takes care of flying, hovering, and following your subject.
You'll love how easy it is to capture amazing shots with the Drone-A1, thanks to our exclusive Smart Follow feature. Point the Drone-A1 at your subject and it will automatically track and keep you separated.
The Drone-A1 will give you freedom and convenience while shooting. You won't have to worry about being steady or knowing where your subject is.
The Drone- A1 also comes with a GPS built-in that allows you share your photos with friends and family. This way, everyone can view your pictures from anywhere in the world.
The Drone-A 1 is ideal for professionals and hobbyists who love to take pictures.
Is it safe to fly a drone in the night?
Drones have become more and more popular. Drones provide amazing aerial photos of our homes and businesses. They can also be used to survey large areas and deliver goods. However, drones are still subject to very few regulations. Some states have banned drones entirely, while others have placed restrictions on where they can be used.
Drone flying in daylight hours is quite safe. But, at night there are risks. The safety of you and other pilots is at risk when flying drones at night. This is due to the difficulty of spotting hazards and obstacles. A pilot's mistakes could lead to an accident.
Drones become more popular. This means that it is essential to learn how drones can be safely operated. There are currently two types of drones available: fixed-wing as well as rotary-wing. Fixed-wing drones are generally smaller and easier to control compared to rotary-wing models. A fixed-wing model usually has four propellers, whereas a rotary-wing model has a single rotor.
You should be familiarized with all local drone laws to avoid any mishaps. Make sure that your drone comes with lights. This makes it much easier to spot objects that might threaten you. If you intend to photograph, it is important to protect your lens. You should also wear protective goggles if you fly your drone.
Drone flying at night presents a variety of dangers including collisions with power lines and trees as well as buildings. Drones can also get lost or fall out the sky. Avoid obstacles and stay close to your drone. Drones are also vulnerable to sudden weather changes and wind gusts. These factors can disrupt your drone's flight and cause it to crash land.
Drones are becoming more popular but they can pose health risks. These drones can emit noises that can cause hearing loss and headaches. Additionally, drone vibrations can cause injury to the body. Flying drones without a license can result in fines and legal action.
These guidelines will help you avoid any drone accident. Keep your drone within your sight line when flying. You should adhere to any restrictions placed by airport authorities if you fly near airports. You should be extra cautious when flying your drone above water as this increases the likelihood of a collision.
What are the disadvantages of drone photography?
Drone photography allows you to capture stunning images and video. However, there are some downsides to flying small aircraft.
Drones can be expensive. This is the main drawback. You can spend hundreds, thousands or even millions depending on the drone you choose.
To fly a drone safely, you will need certification and training.
Safety is another concern. Drones can be dangerous as they need to be repaired and maintained constantly. If you lose control of your drone while taking photos or filming videos, it could cause serious property damage or injure someone.
It is possible that you spend more time flying a drone than taking photos or filming footage. You may also have restricted airspace in which you can fly your drone.
You may be restricted by local governments as to where your unmanned aerial vehicle can fly. You cannot fly higher than 400 feet, or within five miles of any stadiums, hospitals or schools.
Drones are not for everyone. Flying these machines is not for everyone. Some fear they might fall or crash out of the sky. Others worry that they might accidentally hit another person or object.
You might be uncomfortable flying a drone. Instead, you can try traditional aerial photography or videography.
How do I get started drone photography?
You have many options to begin photographing with a drone. A ready-made drone package is the first choice. This kit will contain everything you need for getting started. They range from $200 to $500, depending on the model.
A drone can also be built. It's possible to make a drone that takes decent photos and videos, even though it can be complicated.
We recommend that you start with a quadcopter if you want to build your own drone. Quadcopters have four propellers (or rotors) as opposed to two like traditional helicopters.
A quadcopter is easier to assemble and maintain than a helicopter. It's also cheaper to purchase and easier to carry around.
First, you'll need to choose the right parts. You'll need motors, batteries, controllers, and props. Be sure to select the right size and weight.
Next, decide which controller you would like to use. Many different types are available, such as joysticks, touch screens, and remote controls. It is recommended to buy one with a builtin camera so that you don't need to attach another device to your drone.
Once you've made your selections, you are ready to assemble it. Pre-assembled kits are recommended to make it easier. You can build your drone on your own by following these steps.
Step 1 Attach the battery pack
For your quadcopter to be built, you'll need the battery pack connected to the motor. To begin, remove the cover plate at the bottom of your battery pack. Then, slide the battery into place.
Step2: Connect your motors
Next, you'll need to install the motors in the appropriate slots. Each motor should be installed in its own slot. When mounting the motors, ensure they face forward and are parallel to the frame.
Step3: Install the propeller
You will then need to attach your propellers onto the frame. You should position them at equal distances.
Now you are ready to test your drone. If the drone doesn't move when you turn it on, make sure the propellers face forward. Also, make sure that there are no obstructions between the propellers.
Statistics
- Compared to the old days of the Phantom, this drone is super small, but it will likely require you to check a bag, the way a Mini 3 Pro could easily stow away in an oversized pocket. (thedronegirl.com)
- Greater than 50% throttle stick position generates positive thrust, but less than 50% throttle stick position reverses the direction of the motors, allowing upside-down flying! (photographypro.com)
- Homes with aerial images sold 68% faster than homes with standard images. (alexdronephotography.com)
- Regional & Super Regional Centers pricing per center (400,000+ sq ft) PLACE ORDER (dronebase.com)
- Here's proof: according to an analysis of FAA drone registration numbers by drone market research and data group Drone Industry Insights, DJI had a 76.8% market share in the U.S. (thedronegirl.com)
External Links
[TAG14]
[TAG17]
How To
How to create a time-lapse using a drone
Time-lapses can be made with two types of cameras: DSLRs (Digital Single Lens Reflex), and which are more expensive than point-and shoot digital cameras.
DSLR cameras produce images that are more high-quality due to how light enters them. Videography is not as easy because you need to manually focus and adjust the exposure.
For beginners, point-and-shoot cameras such as the GoPro are simpler to use. However, videos with lower resolutions look grainy.
Consumer drones are the best choice for time-lapse photography. These tiny flying robots are a popular alternative to professional drones.
A drone is a remotely controlled aircraft that can fly autonomously and without human intervention. Quadcopter drones can have multiple propellers, but a drone usually uses one propeller.
In addition to providing aerial footage, a drone can capture cinematic shots from a bird's eye view. For smooth handheld footage, drones may be outfitted to include a gimbal stabilizer.
For a time-lapse effect, you can start recording while your drone hovers above the subject. If the sun isn’t directly overhead, the sky won’t appear darken during the shot.
You can adjust both the shutter speed or aperture to get the desired effect. To capture a sunset, you might set the shutter speed at 30 seconds, and open the aperture wide to let in as much natural sunlight as possible.
You should use the opposite approach for night shots. For night shots, use a slow shutter speed of 1 sec and close the aperture to reduce light ingress. This creates bright images where details can be clearly seen.
Did you miss our previous article...
https://busybeefilms.com/real-estate-drone-videos/taj-residencia-islamabad-taj-residencia-good-news-for-clients-taj-residencia-latest-update