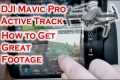
DJI Mini 3 Pro | How To Make Money With Real-Life Uses
7,272 View

Share this Video
- Publish Date:
- July 18, 2023
- Category:
- Real Estate Drone Videos
- Video License
- Standard License
- Imported From:
- Youtube
Tags
In this video, we'll share how you can use the DJI Mini 3 Pro to make money. We'll give you real-life examples of what features work best for different industries.
🛒 DJI Mini 3 Pro: https://store.dji.com/en/product/dji-mini-3-pro-dji-rc?from=dap_product&pbc=IN4xQqec&pm=link
🎬 Jump to Section
0:00 B-Roll Footage & Introduction
1:42 Real Estate
3:13 Journalism
4:23 Construction & Inspection
5:27 Training
6:48 Social Media
7:19 FPV
8:33 Final Thoughts
📨 Become a drone expert and join our free drone industry newsletter w/ 75,000+ subscribers: https://uavcoach.com/news
🖥 Pass the FAA Part 107 test on your first try with our industry-leading test prep course w/ 45,000+ students: https://dronepilotgroundschool.com
🎮 Learn how to fly a drone in 20+ states: https://uavcoach.com/drone-training/
📣 We are an FAA-approved test administrator of The Recreational UAS Safety Test (TRUST) which is now required for recreational drone flyers. The test is free, online, and takes less than 30 minutes to complete: https://uavcoach.com/faa-recreational-drone-training/
✳️ UAV Coach provides industry-leading training, education, and news for professionals and hobbyists in the drone industry. We offer online and in-person training — over 45,000 people have used our flagship training course, Drone Pilot Ground School, to pass the FAA Part 107 remote pilot certification exam. And we've delivered hands-on flight training to more than 1,500+ new drone pilots. Our mission is to help push the drone industry forward by sharing years of knowledge to help drone pilots be safe and smart operators.
By: UAV Coach
Title: DJI Mini 3 Pro | How To Make Money With Real-Life Uses
Sourced From: www.youtube.com/watch?v=dl3j3wK0fes
Look at the 3 best drones on Amazon in 2022
Frequently Asked Questions
How much money do drone photographers make?
A photographer could make more or less than $10k depending upon how long he/she is flying for and where he/she takes photos. If you shoot in remote areas such as national parks or forests, you could earn upwards of $20-30 an hour.
The average person can earn between $15-$25/hour working in retail. If you want to fly drones, you could earn $50-$75. There are plenty of ways to earn more. Most drone pilots fly for companies that require them travel throughout the country, or internationally.
Depending on how long you fly and how far you travel, you can expect to pay $100-$300 per flight. You might find it worthwhile if flying is something you enjoy and you also love taking photos.
Can drones shoot nighttime photos?
Answer: Yes. But it's been a long-standing tradition. We have been taking photos at night for many decades.
There's one problem. Night photography requires special equipment. Any camera under $10k is not capable of night photography.
When light strikes an object, it bounces back in various wavelengths.
These wavelengths are combined to produce white light at very far distances from their source.
This is why you can still see colors in the distance even though the sun may be millions of kilometers away.
The opposite is true. When light strikes an object very close to its source it reflects in narrow wavelengths. These wavelengths bounce directly back to us and do not overlap.
This means that objects appearing brighter are closer together. This is why objects glow under black light.
The amount of light reflected depends on how much energy the object absorbs. Therefore, if light hits an object, it might reflect more blue than red light.
The human eye is sensitive to blue light the most so objects appear brighter when viewed in black light.
This has to do with drones. If you want to photograph something dark like a forest or cave, you will need a very bright source of light.
A normal lamp will not be strong enough to illuminate the whole scene. It will only give you a shadowed image and nothing else.
If you want to get a great picture, you will need a flashgun. And since you don't want to carry around a huge flashgun, you'll need to buy a small one.
Because they produce flashes that are so rapid, these lights are often called speedlights.
If we say "stroboscopic", you can see the light pulse across the screen. The better the picture, the faster the rate.
We won't cover how to set-up a Speedlight. However, there are numerous tutorials online.
We will tell, for clear pictures, that you need to ensure that the subject is evenly illuminated.
To achieve this, you should aim the beam at a 45-degree angle. You can adjust the light's intensity by moving the flashgun's head.
Once you have chosen the best setting, hold your gun steady while you press the shutter release.
Then, just before the light reaches the subject, press the shutter again. This will set off the flashgun to start a second burst.
The subject is illuminated by the first burst, but the second will capture what happens after that burst.
The result is a continuous exposure where both bursts of light are recorded.
You now know how to take photos during the day. Let's move onto night photography.
So far I have covered all you need to know about taking night photos.
There's one more thing to be covered: the color balance.
Most people assume that all the images taken at night will be too dark.
Yes, it is true. However, it can also be applied to daytime shots.
It doesn't matter whether you're taking pictures at dawn or dusk; the camera will always record a darker image.
What are the laws governing drone photography?
Drone flight regulation is regulated by Federal Aviation Administration (FAA). Local laws may also apply in addition to the FAA regulations. Check with your state's transportation department to determine which rules govern drone flights.
Most drone owners will need to apply for a FAA licence. The FAA has established guidelines for licensing. These guidelines are available here.
Some states require drone operators to register their drones with the government. You can find out more in our Guide for Drone Registration.
Which are some great places to use a drone to take photos?
Drones can be used to capture stunning images of landscapes and nature. Drones can be used to take close-up photos of birds and butterflies, or capture stunning scenery.
Mountain, deserts, lakes and oceans are all great places to use drones. Drone enthusiasts often capture scenic views of their hometowns and other local attractions.
To discover new areas, you should shoot at night when the lights illuminate it. It is also possible to shoot in other seasons, such as winter, when snow covers the ground.
What do you need for drone photography?
Drone photography is more than just flying a camera. It is important to plan and execute a successful drone shooting. You need to consider everything, from choosing the best location to how much insurance you will need to conduct a successful aerial shoot.
It is important to check that you have permission for drones to be flown in the area where you intend to shoot. You should check to see if there are restrictions on where and how you can fly your drone. If restrictions exist, you will need to apply a license to fly the drones in those areas.
You also need to check what regulations apply in your country. Some countries require permits to fly drones. Others limit how many flights you can make in a specific time.
To fly drones safely and securely, you must have permission. A lot of local businesses will rent you a landing pad for an hour. This will allow you to store your drone. Alternatively, you could buy a dedicated landing pad.
Before you can even start shooting, you need to choose the drone that you want to use. Different drones have different capabilities and features. Fixed-wing drones are cheaper and easier to control, while multirotors are more powerful, stable, and reliable.
Once you decide which type of drone is best for you, the next step is to determine what equipment you will need. A drone camera usually consists of a gimbal, remote controller, batteries, and memory cards.
A gimbal stabilizes the camera during flight, making it easy to capture sharp images without worrying about shaking hands or dropping the device. To keep the camera stable, the gimbal attaches directly on the drone's body.
Remote controllers make it possible to remotely pilot your drone. These devices include joysticks and buttons that let you move the drone forwards, backward, left, and right and adjust its altitude.
The batteries power the drone's cameras and motors. Memory cards store photos taken by it. You will need to ensure enough battery life so that your drone can take clear photos.
After you have selected the equipment, it is time to decide where you will shoot. Do you prefer to shoot outdoors or indoors? Do you plan to shoot architecture or landscapes? What are you planning to shoot? All these factors influence the way you need to prepare for your shoot.
If you plan to shoot indoors, lighting is an important consideration. Multiple lights are the best way of lighting a room. Try placing one large light above the subject, another near the middle, and a third closer to the floor.
When outdoors, wind conditions are important. Drone pilots may experience problems if they are blown off course by windy conditions. It is best to take off only when it is calm.
Consider whether additional equipment such as stands or tripods is necessary when you select your location. These items will help you keep your drone level stable, so you don't lose quality shots.
Outdoor shoots should be done between 10 and 4 pm. You won't see too many people during this time but you will still have enough light to take great photos.
The conclusion is that drone photography can be more than fun. Follow these simple steps to create stunning images right away!
How do I get started drone photography?
There are many ways you can start taking photos with a drone. First, you can buy a pre-made drone kit. You'll get everything you need. They vary in price from $200 to $500 depending upon the model.
Other options include building your drone. Although this can be a bit complicated, it's still possible to create something that works well enough to take some decent photos and videos.
We recommend that you start with a quadcopter if you want to build your own drone. A quadcopter, like conventional helicopters has four propellers or rotors instead of the usual two.
A quadcopter can be assembled and maintained in a much shorter time than a helicopter. It's also cheaper to purchase and easier to carry around.
First, you need to pick the right parts. Motors, batteries, controllers and props will all be required. Be sure to select the right size and weight.
Next, you need to choose what type of controller to use. You have many choices, including joysticks and touch screens as well as remote controls. A built-in camera is an option, as you don’t need to attach a separate device. We recommend buying one.
After you've selected the right parts, you can begin to assemble the drone. We recommend purchasing a pre-assembled kit to make things easier. However, if you prefer to build your own, you'll need to follow a few steps before assembling your drone.
Step 1: Attach battery pack
To build your quadcopter, you will need to connect the battery pack and the motor. Remove the cover plate on the bottom side of the battery. Then, slide the battery into place.
Step 2: Connect the motors
Next, install the motors into the correct slots. Each motor should be installed in its own slot. When installing motors, ensure that they face forward while remaining perpendicular with the frame.
Step3: Install the propeller
The propellers will need to be attached to the frame. Place them at an equal distance.
You are now ready to test the drone. If the drone doesn't move when you turn it on, make sure the propellers face forward. Make sure the propellers are free from obstructions.
Statistics
- Compared to the old days of the Phantom, this drone is super small, but it will likely require you to check a bag, the way a Mini 3 Pro could easily stow away in an oversized pocket. (thedronegirl.com)
- Greater than 50% throttle stick position generates positive thrust, but less than 50% throttle stick position reverses the direction of the motors, allowing upside-down flying! (photographypro.com)
- 60 second video with branding, captions, contact information, and music Strip / Convenience / Neighborhood / Community Centers pricing per center (up to 400,000 sq ft) PLACE ORDER (dronebase.com)
- Among the biggest improvements, the Skydio 2+ has over the standard 2 is a 20% longer battery life, longer range if you add the Beacon, and a neat AI video creation tool called Keyframe. (thedronegirl.com)
- Homes with aerial images sold 68% faster than homes with standard images. (alexdronephotography.com)
External Links
[TAG11]
- Is aerial drone photography right to use in my commercial building?
- 4 Ways Drone photography can make new home buyers more comfortable
[TAG14]
How To
Tips for Beginners: How To Take Amazing Drone Pictures
Here are some tips for great drone photos
- Make sure you have enough space to fly your drone safely. Keep it away from buildings, trees, power lines, etc.
- Make sure you know where you're going before you start flying! Drone piloting can lead to a lot of confusion. If you don’t know where your drone has flown, you might end up on a cliff edge, or in someone’s backyard.
- Be safe when flying your drone! You should always keep your drone close at hand to monitor what's going on. Never fly at night or under poor weather conditions (like heavy rain).
- Bring extra batteries if you plan to do long flights. It is a good idea to always have spare batteries. This ensures that you never run out of battery power mid-flight.
- Good quality lenses are essential. The clearer the image, the higher the resolution. A camera lens with a low pixel count, such as those found on most smartphones, will blur the image.
- Start small. Make short videos when you are learning how to fly a drone. When you feel confident, you can move on to longer videos.
- Avoid using your drone indoors. Drones were not made to be used in indoor environments. They can damage walls, furniture, and other items.
- Practice makes perfect! Try different things with your drone. For example, use it to capture different angles of the same scene. You can also fly around the house outside.
- Get creative! You may believe you have to follow certain rules in order to take great drone photos, but there are no rules for photography.
- Learn more information about your camera settings. Cameras today have many advanced features. These settings can enhance the quality and appeal of your photos.
- Be patient! You might be tempted to rush, but sometimes you need to wait to get the shot.
- Have fun. Make sure you remember why your drone was purchased. You can enjoy flying your drone.
- Share your work! Send your best photos to social media sites such as Facebook, Instagram, Twitter and Pinterest. Tell others how much you had fun shooting them!
- Keep learning! Explore magazines and books that are about photography. Watch tutorials online. 15. Be safe Before you head off into the sky, check all safety measures. Make sure your drone is fully charged and that the landing gear works properly. Make sure you are following all FAA regulations.
- Find your style Once you have mastered the basics you will be able to create your own style. You can experiment with many styles and techniques until you find the one that works.
- Use apps! There are several free photo editing apps that you can download onto your smartphone. These apps will help you enhance your photos.
- Take note! You can make it easier to remember what you have read in this article by keeping track. Keep important points in a notebook or journal.