Check out my website www.thearizonadrone.com Instagram: @thearizonadrone Twitter @thearizonadrone Thanks for watching and help me get to 100 subscribers!
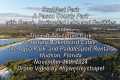
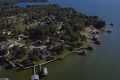
By: The Arizona Drone Title: 500k Listing East Tucson Drone Real Estate Video Sourced From: www.youtube.com/watch?v=K-guilqRNK8
You've got check out the 3 best drones on Amazon while they're on sale
Frequently Asked Questions
How much money do drone photographers make?
A photographer could make more or less than $10k depending upon how long he/she is flying for and where he/she takes photos. Shooting in remote areas, such national parks or forests can bring you upwards to $20-30 an hour.
Retail workers make $15-25 an hour, so you could easily earn $50-$75 flying drones. There are many opportunities to make even more. Most drone pilots fly for companies that require them travel throughout the country, or internationally.
Depending on how long you fly and how far you travel, you can expect to pay $100-$300 per flight. These fees can add up quickly but if you love flying and photography it might be worth it.
Which drone to buy as a beginner?
These drones are great for beginners as they don't require any advanced skills. These include drones that have an FPV (firstperson view) camera. Users can remotely control the drone with a smartphone application.
Some quadcopters are designed specifically for aerial photography. You may choose a multirotor if your goal is to explore advanced features such an autonomous flight mode or obstacle avoidance.
The drones come in two price categories: low-cost ones under $100 and high-end ones over $300.
The cheapest models typically have a limited range or battery life. The most expensive models, however, offer greater performance and longer flight time.
The majority of beginners prefer to start with the cheaper options, as they are more easy to use and manage. If you plan on spending hours flying your drone, you might be interested in a higher-end model.
Can drones shoot nighttime photos?
The answer to that question is yes. But it's been a long-standing tradition. We've been taking pictures at night for decades.
But there's a catch. Night photography requires specialized equipment. There's no way to do it with any camera that costs less than $10k.
When light strikes an object, it bounces back in various wavelengths.
These wavelengths overlap and combine to form white light at very long distances from the source.
This is why you can still see colors in the distance even though the sun may be millions of kilometers away.
On the contrary, when light strikes an object close to its source, it reflects in a narrow band of wavelengths. These wavelengths bounce straight back to us without overlapping.
This means that objects are brighter if they are closer together. This is why objects seem to glow when they are exposed to black light.
The amount of light reflected depends on how much energy the object absorbs. If light hits an object, it may reflect less red light than more blue.
Blue light is the most visible to the human eye, so objects will appear more blue if they are seen under black light.
What does all this have to do about drones? A very bright light source is required if you are trying to capture dark areas, such as a forest, or cave.
A normal lamp won't provide enough light to illuminate the entire scene. It will only create a shadowed scene.
A strobe will give you a great shot. A small flashgun is better than a big one, as you don't need it.
Because they produce flashes that are so rapid, these lights are often called speedlights.
When we say "stroboscopic," you can watch the light pulse across the screen. The picture will be better quality if it moves at a faster rate.
We won’t talk about how to setup a Speedlight. There are many tutorials available online.
We will tell, for clear pictures, that you need to ensure that the subject is evenly illuminated.
The beam should be aimed at a 45° angle in order to achieve this. You can adjust intensity by moving the flashgun head.
Once you've found the perfect setting, keep the gun steady and press the shutter release button.
Once the flash has reached the subject's area, press the shutter yet again. This will activate the flashgun and fire another burst.
While the first burst illuminates the subject, the second one will capture the moment after the first burst has passed.
The result is a continuous exposure where both bursts of light are recorded.
You now know how to take photos during the day. Let's move onto night photography.
So far I have covered all you need to know about taking night photos.
There's one more thing to be covered: the color balance.
Most people assume that all images taken at nights will be too dark.
It's true. But it also applies to daytime photographs.
It doesn’t matter if you’re taking photos at dawn, dusk or both; the camera will always take a darker picture.
What are the disadvantages of drone photography?
Drone photography can be a fun way to capture images or video. There are downsides to flying a small plane.
The main disadvantage to flying drones is their high cost. Depending on the type of drone you purchase, it could set you back hundreds or even thousands of dollars.
Flying a drone requires training and certification, so you'll need to invest time and money to learn how to operate them safely.
Safety is another downside. Drones are inherently dangerous because they require constant maintenance and repair. You could inflict serious injury or property damage if you lose control of your drone when taking photos or filming videos.
You may find yourself spending more time flying your drone than you do actually taking photographs or recording footage. You may also have restricted airspace in which you can fly your drone.
You can only fly your unmanned air vehicle within certain areas. For example, you can not fly above 400ft or within five mile of any local airports, stadiums and hospitals.
Drones are not for everyone. These machines can cause anxiety for some people who fear that they may crash or fall from the skies. Some fear they might hit an object or another person.
If you're not comfortable flying a drone, then maybe you should stick to traditional aerial photography and videography methods instead.
What equipment do you need to take drone photos?
Drone photography goes beyond just using a drone to take pictures. You need to think about many things when planning and executing a drone photography shoot. The right location is key to making sure you have enough insurance to cover your aerial shoot.
It is essential to make sure you have permission to fly drones within the area you are planning to shoot. It is important to find out if there any restrictions on the areas you can fly in and where your drone may be used. If restrictions exist, you will need to apply a license to fly the drones in those areas.
You also need to check what regulations apply in your country. You may need a permit to fly drones in some countries. Others limit the number you can make in a given time period.
A drone pilot license is required. You'll also need to find a safe and secure place to land your drone after every flight. You can often rent a landing pad from local businesses, which will charge you per hour and provide you with storage space. A dedicated landing pad can also be purchased.
Before you even begin shooting, you'll need to decide what drone you'd like to use. Different drones are equipped with different capabilities. Fixed-wing drones are cheaper and easier to control, while multirotors are more powerful, stable, and reliable.
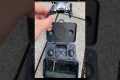
You'll first need to decide what kind of drone to use. Next, you will need to select the equipment that you will require. The basic equipment for a drone camera is a remote controller, gimbal, batteries, memory cards, and remote controller.
The gimbal helps stabilize the camera in flight. It makes it simple to take sharp images and not worry about losing the device. The gimbal attaches directly to the drone's body to keep the camera steady.
Remote controllers let you control your drone remotely. These controllers have joysticks and buttons, which allow you to control the drone's direction, speed, direction, and altitude.
Batteries power the drone’s motors and camera, while memory cards store photos taken with the drone. In order to ensure clear shots, ensure you have enough battery life.
Once you've chosen the equipment that you need, it's time to plan where you want to shoot. Are you going to be shooting indoors or outside? Do you plan to shoot architecture or landscapes? Which part of the world are you going? These are all factors that will affect the preparations you make for your shoot.
You'll need to consider lighting if you're planning to shoot inside. Multiple lights are the best way of lighting a room. Consider placing one large lamp above the subject and another near the center. Another light is close to the floor.
You need to take into account wind conditions when outdoors. Drone pilots who are flying drones on windy days may be at risk of being blown off their course. You should always take off only when the weather is calm.
If you are going to be bringing extra equipment like tripods or stands, consider whether this is something that you will need. These items will allow you to keep your drone level so that you don't lose high-quality shots.
Outdoor shoots can be done between 10 AM and 4 PM. This time there won't many people, but enough light will allow for great photos.
The conclusion is that drone photography can be more than fun. Follow these simple steps to create stunning images right away!
What drone is the best for shooting photos?
Drones can be used for a variety of purposes, including aerial photography, filming movies, and even delivering packages. What is the secret to drones being such a useful tool for us? Drones have two main advantages. Drones are extremely versatile. There are many uses for drones. This means you can use them to do almost any type of task you normally use a camera for. They are easy to use. A quadcopter is very simple to operate if it has been flown before.
Drones can also capture incredible images. Amazing photos can be captured by drones in places you would not normally visit. These include remote locations where you may be exposed to danger.
Drones are simple to use, and anyone can quickly learn to fly one. After you have mastered the basics, your drone can be used to take amazing photos no matter where you are. Check out our drone collection if you want to take better photographs.
Statistics
A grey card is just a piece of thick paper that is a specific shade of grey (18%), which will be the foundation on which we choose our color temperature. (dronegenuity.com)
60 second video with branding, captions, contact information, and music Strip / Convenience / Neighborhood / Community Centers pricing per center (up to 400,000 sq ft) PLACE ORDER (dronebase.com)
Again, no stabilization is applied, and the 50% throttle stick position cuts the power to the motors. (photographypro.com)
Though the Mavic 3 is about 50% heavier than the Mavic Air 2, it's still conveniently sized. (nytimes.com)
Among the biggest improvements, the Skydio 2+ has over the standard 2 is a 20% longer battery life, longer range if you add the Beacon, and a neat AI video creation tool called Keyframe. (thedronegirl.com)
When making time-lapses, there are two main types of cameras commonly used - DSLRs (Digital Single Lens Reflex), which are generally more expensive than point-and-shoot digital cameras.
Because of the way light enters a DSLR camera, it tends to produce higher quality images. Videography is not as easy because you need to manually focus and adjust the exposure.
Point-and-shoot cameras, such as those made by GoPro, are easier to operate for beginners. Videos can look grainy due to the lower resolution.
Consumer drones are the best choice for time-lapse photography. These small flying robots have become very popular as an affordable alternative for professional drones.
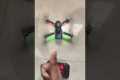
A drone is a remote control aircraft that flies autonomously without human intervention. A drone generally uses one propeller to fly. Quadcopter drones could have multiple propellers.
A drone can also capture aerial footage and cinematic shots from a bird’s eye view. You can equip your drone with a stabiliser to capture smooth handheld footage.
If you want to create a timelapse, record while the drone hovers just above your subject. The sky won't appear dark during the shot if the sun isn't directly overhead.
You can adjust both the shutter speed or aperture to get the desired effect. To capture a sunset, you might set the shutter speed at 30 seconds, and open the aperture wide to let in as much natural sunlight as possible.
The opposite approach should be used for night shots. To reduce light entering the camera, slow the shutter speed to 1 second and then close the aperture. This creates bright images where details can be clearly seen.