By: CHA Consulting Drone Video Channel Title: CHA Consulting Drone Video Channel Live Stream Sourced From: www.youtube.com/watch?v=XNFeBguUAl8
Check out the 3 highest-rated drones on Amazon while they're on sale
Frequently Asked Questions
How much money do drone photographers make?
Photographers can earn more than $10k depending on how long they fly and where they shoot. You could make as much as $20-30 per hour if you are able to shoot in remote areas like national parks and forests.
The average person earns between $15-$25 an hour working in retail, which means you could earn $50-$75 flying drones if you wanted to. However, there are also plenty of opportunities to earn even more. Drone pilots typically fly for companies that require them to travel across the country or even internationally.
Prices for flights can range from $100 to $300 depending on the amount of time spent flying and the distance covered. It can quickly add up, but if your passion is photography and flying, this may be worth it.
What are the essentials for drone photography?
Drone photography requires more than just flying a plane. Planning and executing a successful drone shoot requires a lot of considerations. It all starts with choosing the right place and determining how much insurance is required to make an aerial shoot a success.
It is important to check that you have permission for drones to be flown in the area where you intend to shoot. You should check to see if there are restrictions on where and how you can fly your drone. If there are, you might have to apply for a permit to fly them in the area.
Also, you should check the regulations in your country. Some countries require permits to fly drones. Others limit how many flights you can make in a specific time.
Not only will you need permission to fly drones but also where to safely land your drone after each flight. A lot of local businesses will rent you a landing pad for an hour. This will allow you to store your drone. Or, you can buy a dedicated landing area.
Before you begin shooting, you must decide on the type of drone you want. Different drones come with different features and capabilities. Fixed-wing drones tend not to be as expensive and are easier to operate, while multirotor drones can be more stable and powerful.
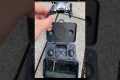
You'll first need to decide what kind of drone to use. Next, you will need to select the equipment that you will require. The equipment required to operate a drone camera includes a remote controller and gimbal as well as batteries and memory cards.
The gimbal helps stabilize the camera in flight. It makes it simple to take sharp images and not worry about losing the device. The gimbal attaches directly to the drone's body to keep the camera steady.
Remote controllers enable you to pilot your drone remotely. These controllers have joysticks and buttons, which allow you to control the drone's direction, speed, direction, and altitude.
The drone's motors, cameras and memory cards power their batteries. They also store the photos that the drone has taken. In order to ensure clear shots, ensure you have enough battery life.
Once you've chosen the equipment that you need, it's time to plan where you want to shoot. Is it indoors or outdoor? Will you be photographing architecture or landscapes in your home? Which area are you going for? These are all factors that will affect the preparations you make for your shoot.
If you plan to shoot indoors, lighting is an important consideration. Multiple lights will help lighten a room. Consider placing one large lamp above the subject and another near the center. Another light is close to the floor.
When outdoors, wind conditions are important. Drone pilots may experience problems if they are blown off course by windy conditions. It is best to take off only when it is calm.
If you are going to be bringing extra equipment like tripods or stands, consider whether this is something that you will need. These items will ensure that your drone is level and stable so you don’t lose any quality shots.
Outdoor shoots can be done between 10 AM and 4 PM. There won't be many people around during this time, but there will still enough light to make great photos.
A drone photographer is not just fun. They are also extremely useful for creating stunning aerial photos. Just follow these steps and you can begin creating stunning images today!
What are the drawbacks to drone photography?
Drone photography is a great way to capture images as well as video. You should be aware of the potential downsides of flying a small aircraft.
Drone flying is expensive. It all depends on what type of drone you choose. You could end up spending hundreds of thousands or even thousands.
A drone pilot must be trained and certified. This means that you will need to invest your time and money in order to learn how to safely fly them.
Safety is another concern. Drones are dangerous due to their constant maintenance and repair. If you lose control of your drone while taking photos or filming videos, it could cause serious property damage or injure someone.
You might find that your time spent flying your drone is more productive than actually taking pictures or recording footage. Additionally, your drone may not be able to fly in the airspace you have.
Some local governments limit where you can fly your unmanned aircraft vehicle. For example, you can not fly above 400ft or within five mile of any local airports, stadiums and hospitals.
Drones may not be for everyone. Flying these machines is not for everyone. Some fear they might fall or crash out of the sky. Some fear they might hit an object or another person.
You might be uncomfortable flying a drone. Instead, you can try traditional aerial photography or videography.
Can drones take night photos?
The answer to that question is yes. But it's been a long-standing tradition. For decades, we've been taking photos at night.
There's one problem. Night photography requires specialized equipment. There's no way to do it with any camera that costs less than $10k.
When light strikes an object, it bounces back in various wavelengths.
These wavelengths combine to create white light at very distant distances from the source.
This is why you can still see colors in the distance even though the sun may be millions of kilometers away.
However, when light strikes an object near its source, it reflects within a narrow band wavelengths. These wavelengths bounce back straight to us, without overlapping.
This means that objects are brighter if they are closer together. This is why objects can glow under black lights.
The energy the object absorbs influences how much light is reflected. The object may reflect more red light than blue light when it is hit by light.
The human eye is more sensitive to blue light than objects, so objects appear bluer when they are viewed under blacklight.
What does this have do with drones, then? Use a very bright light source to photograph dark places, such a forest or cave.
A regular lamp will not be powerful enough for the illumination of the entire scene. You will get a shadowed image, nothing more.
If you want a good picture, you'll need to use a strobe instead. It's not practical to have a bulky flashgun around, so it's best to get a small one.
Speedlights are also known for their flashes of light that create a stroboscopic effect.
When we say "stroboscopic," you can watch the light pulse across the screen. The better the picture, the faster the rate.
We won't be discussing how to set up Speedlights here. There are many tutorials available online.
We'll tell you, to get a clear shot, ensure that your subject is well lit.
You should aim the beam at a 45 degree angle to achieve this. The flashgun can be moved to adjust the intensity of the light.
Once you have selected the correct setting, hold the gun steady and release the shutter release key.
Just before the flashlight reaches your subject, you can press the shutter button again. This will trigger the flashgun to fire another burst of light.
The first burst is the most visible, and the second captures the moment after the burst has ended.
The end result is a continuous exposure with both bursts light and recorded.
Now you know how to take pictures during the day, let's move on to night photography.
I've covered everything you need about night photography.
There's one more thing to be covered: the color balance.
Most people assume that any images taken at night will look too dark.
Yes, it is true. However, it can also be applied to daytime shots.
It doesn't really matter if you take photos at dawn or dusk, the camera will always capture a darker image.
What time of day is best for drone photography?
A drone could capture images from the air during sunset and sunrise hours, even though there is not much activity at ground level.
Drones can be used to capture stunning photos of landscapes or the sky above. Sometimes drones can't fly at night so you might miss spectacular views.
To ensure you don't miss out on any potential photo ops, consider flying during sunrise and sunset hours. These times provide more opportunities to capture stunning shots of nature because there are usually fewer cars on the road and fewer people walking around.
Also, you'll find yourself shooting at lower light levels. This makes it easier to capture images without worrying about overexposing them.
In addition, you won't have to deal with strong winds, rain, snow, or fog. These are all factors that make daylight great for photography with a drone.
But, if you wish to capture nighttime scenes, flying during the moonlit nights is an option. This will allow you to see the cityscape from a different perspective.
How can I fly my drone safely?
The best way to learn how to fly a drone is by practicing. Although drones are much more stable than regular aircraft, pilots still need to get experience. For beginners, we recommend practicing indoors or close to home.
When learning how to fly a drone, you'll need to master three basic skills. These are hovering, landing, and taking off.
Taking Off
The drone will take off by simply being lifted into the air. The button on the controller should be pressed until the drone moves upward. After the drone reaches an appropriate height, release the button.
Hovering
Hovering is a way to keep the drone still in midair. To hover, hold down the right or left trigger while pressing on the throttle. To tilt the drone, hold down both triggers and press the throttle.
Landing
Landing is when the drone returns safely to the earth. To land, release the throttle and tilt the controller downward toward the ground. The drone will slow down and eventually land.
Fly your drone as comfortable as possible. However, be careful not crash into anything.
Is a camera drone worth it?
If you are serious about owning your business, then you will soon realize that a great product is vital. If you plan to promote your business, make sure you have a great product.
The problem with most photographers is that they're not selling themselves. Instead of convincing others to buy their stuff they're trying convince them.
However, if you want to start your own business, you won't have the luxury of waiting for others to allow you to do so. You will have the ability to find customers today.
It is necessary to tell a compelling tale that explains why people should choose your products.
A marketing strategy will be needed to market those products. You might still fail if you don't price your products correctly, even after all this.
You may decide to charge too much. You could decide to charge too low. If you don't know how much you are charging, you could make a costly mistake.
These mistakes can be avoided by thinking like a businessman. This doesn't necessarily mean that you need to be a capitalist. It means that you need to learn how value your time, money and effort.
Also, you must develop strategies to measure your business' success.
Once you understand the pricing of your product, you can then focus on building the best product. A product that makes sense both financially and creatively.
A product that solves your problems and gives you real benefits.
One that is different from all others.
And once you've built that product, you'll be ready to launch it. Your brand will be built.
You can take aerial photos with your drone. It will allow you to get started as an amateur photographer. It will help you improve your skills. It will also help you to grow your business.
Statistics
60 second video with branding, captions, contact information, and music Strip / Convenience / Neighborhood / Community Centers pricing per center (up to 400,000 sq ft) PLACE ORDER (dronebase.com)
A grey card is just a piece of thick paper that is a specific shade of grey (18%), which will be the foundation on which we choose our color temperature. (dronegenuity.com)
Greater than 50% throttle stick position generates positive thrust, but less than 50% throttle stick position reverses the direction of the motors, allowing upside-down flying! (photographypro.com)
Regional & Super Regional Centers pricing per center (400,000+ sq ft) PLACE ORDER (dronebase.com)
Among the biggest improvements, the Skydio 2+ has over the standard 2 is a 20% longer battery life, longer range if you add the Beacon, and a neat AI video creation tool called Keyframe. (thedronegirl.com)
A drone shot is an excellent way to capture amazing images. When done right, you can get a stunning result that is even better than any picture taken with your camera.
You can still improve the image quality. One of them is making sure that you use the best settings for your particular model.
Several apps and tools can be used to edit photos after they are taken. Adobe Photoshop Lightroom software is one of these. This software allows you edit multiple photos at once, and lets you adjust each one separately.
You can also crop out and enhance certain parts of your image. This can include removing unwanted objects, changing lighting and contrast.
Another tool is Snapseed, which offers basic editing features such as cropping, brightness adjustments, and color correction.
The most important aspect in post-processing is to make sure your final product appears professional.
This means that you need to know how to set up your camera properly and how best to position yourself.
You must also ensure that your lens settings are correct. If you are shooting landscapes, you should choose a longer focal length (such 200mm), while for close-ups you should opt for a shorter focal (such 50mm).
Learn how to shoot RAW format, which gives you more control over the final image.
You can create amazing drone images once you have mastered these techniques.