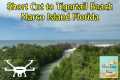
#realestate #realestatevideo #birminghamproperty #ukproperty #drone Video shot on : Drone DJI Avata: Call now your project: (0044) 7426 794 989
By: Mamoon Musaddiq Title: Drone 3D Property Tour, Real Estate, Sourced From: www.youtube.com/watch?v=wmhIIqffewU
Here are the 3 most popular drones on Amazon while they're on sale
Frequently Asked Questions
How do you get started with drone photography
There are many options for starting to photograph with a drone. You can start by buying a drone kit. You will get everything you need to get started. They vary in price from $200 to $500 depending upon the model.
Another option is to build your own drone. It's possible to make a drone that takes decent photos and videos, even though it can be complicated.
A quadcopter is the best choice for anyone who wants to build their own drone. The quadcopter is similar to conventional helicopters but has four rotors (or propellers), instead of just two.
A quadcopter is easier to assemble and maintain than a helicopter. It's also cheaper to purchase and easier to carry around.
First, you'll need to choose the right parts. Motors, batteries and controllers are all required. Pick the correct size, weight and type.
Next, choose the controller that you want to use. There are many options available. These include joysticks, touch screens and remote controls. It is recommended to buy one with a builtin camera so that you don't need to attach another device to your drone.
Once you've made your selections, you are ready to assemble it. To make things easy, we recommend buying a preassembled kit. If you would prefer to build your drone yourself, there are a few things you need to do.
Step 1: Attach battery pack
To build your quadcopter, you will need to connect the battery pack and the motor. First, remove the cover plate from the bottom of the battery pack. After that, slide in the battery.
Step 2: Connect the motors
Next, you will need to place the motors within the proper slots. Each motor must be placed in the appropriate slot. Install the motors facing forward, perpendicular and in the designated slot.
Step3: Install the propeller
You will then need to attach your propellers onto the frame. Place them at an equal distance.
Now you are ready to test your drone. If you see no movement when you turn on the engine, double-check that the propellers are facing forward. Also, ensure that there aren’t obstructions between propellers.
Which drone to buy as a beginner?
The best drones for beginners are those that do not require any special skills to fly them. These drones include those equipped with an FPV camera that allows users to remotely control the drone using a smartphone app.
Some quadcopters are designed specifically for aerial photography. Multirotor models are better suited for advanced features like obstacle avoidance and autonomous flight mode.
In terms of price, there are two types of drones; cheap ones that cost under $100 and expensive ones that cost above $300.
The cheapest models usually come with a limited range and battery life, while the most expensive ones feature better performance and longer flight times.
Many beginners prefer to buy cheaper models because they are easier for them to handle and to learn how to use. However, you may consider purchasing a higher-end model if you plan to spend hours flying your drone.
How much money do drone photographers make?
A photographer makes more than $10k per gig depending on how long he/she flies for and where he/she shoots. Shooting in remote areas, such national parks or forests can bring you upwards to $20-30 an hour.
An average person makes $15-$25 per hour in retail. This means that you could make $50-$75 flying drones, if you so desired. There are plenty of ways to earn more. Many drone pilots work for companies that require them fly across the country and even internationally.
You can charge anywhere from $100 to $300 per flight, depending on the time you spend flying and the distance you cover. Although this can quickly add up, if you are passionate about photography and enjoy flying, it could be worthwhile.
What are some good places to take photos using a drone?
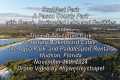
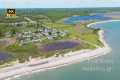
Drones are an extremely useful tool to capture breathtaking shots of nature and landscapes. Whether you want close-up shots of animals like birds and butterflies or to capture beautiful scenery, drones are ideal.
You can use drones in the most beautiful places: mountains, deserts. Drone enthusiasts are known for taking scenic shots of their homes and other local attractions.
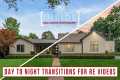
If you want to see new places, it is worth shooting at night as the lights illuminate the surroundings. Also, you can shoot in different seasons, particularly winter when snow covers the ground.
Is it permissible to fly drones at night?
Drones are becoming increasingly popular. Drones offer amazing aerial shots of our houses and businesses. They are also great for delivering goods to large areas or capturing footage of sporting events. However, drones still have very few regulations. Some states in America have banned drones completely, while others have put restrictions on their operation.
Although drones are generally safe to fly during daylight hours, they can be hazardous when used at night. Your safety and that of other pilots may be endangered if you fly your drone at night. It is difficult to spot obstacles or hazards so mistakes by the pilot could result in an accident.
Drones become more popular. This means that it is essential to learn how drones can be safely operated. There are currently two main types of drones: fixed-wing and rotary-wing. Fixed-wing drones are typically smaller and easier to pilot than rotary-wing ones. A fixed-wing aircraft usually has four propellers. A rotary-wing aircraft has one.
To avoid any accidents, it is recommended that you familiarise yourself with local laws regarding drone usage and make sure that you keep your drone within your line of sight at all times. Also, make sure that your drone has lights. This makes it easier to spot potential threats. Protect your camera lens from damage if you intend to take photos. When flying your drone, you should wear protective goggles.
Flying drones at night poses a number of dangers, including collisions with power lines, trees, and buildings. Drones may also lose or fall from the sky. Therefore, you must keep your drone away from obstructions and stay close to the ground. Drones are also susceptible to wind gusts and sudden changes in weather conditions. These factors can disrupt your drone's flight and cause it to crash land.
Drones are becoming more and more popular. However, there are potential health hazards. For example, the noise emitted by these devices can affect hearing and cause headaches. A drone's vibrations can cause physical and emotional damage. You could also face legal action and fines for flying drones without an operator licence.
Follow these guidelines to avoid drone accidents. It is important to keep your drone in your direct view when you fly it. You should adhere to any restrictions placed by airport authorities if you fly near airports. You should be extra cautious when flying your drone above water as this increases the likelihood of a collision.
Can drones capture night shots?
The answer to that question is yes. We've been doing this for many years. We have been taking photos at night for many decades.
But there is a catch. Night photography requires special equipment. You can't do it with a camera that costs less then $10k.
When light hits an object, it bounces back in a series of wavelengths.
These wavelengths combine to create white light at very distant distances from the source.
This is why our eyes can see colors even though the sun is millions of miles away.
However, when light strikes an object near its source, it reflects within a narrow band wavelengths. These wavelengths bounce right back to us without overlapping.
This means that objects appearing brighter are closer together. This is why objects appear to glow under black light.
The amount of light reflected depends on how much energy the object absorbs. Therefore, if light hits an object, it might reflect more blue than red light.
Because the human eye is most sensitive to blue light, objects look bluer when viewed under black light.
This has to do with drones. Use a very bright light source to photograph dark places, such a forest or cave.
An ordinary lamp won't be powerful enough to illuminate the entire scene. It will only give you a shadowed image and nothing else.
If you want to get a great picture, you will need a flashgun. A small flashgun is better than a big one, as you don't need it.
These lights are called speedlights due to the fact that they produce flashes light so fast, they can create a stroboscopic effect.
When we say "stroboscopic," you can watch the light pulse across the screen. The picture will be better quality if it moves at a faster rate.
We won't be discussing how to set up Speedlights here. But you can find many tutorials online.
We will tell you that to capture a clear picture, you must ensure that the subject is illuminated evenly.
You should aim the beam at a 45 degree angle to achieve this. You can adjust intensity by moving the flashgun head.
Once you have set the setting that is right for you, hold the gun steady as the shutter release button is pressed.
Just before the flashlight reaches your subject, you can press the shutter button again. This will activate the flashgun and fire another burst.
The first burst is the most visible, and the second captures the moment after the burst has ended.
This creates a continuous exposure in which both bursts or light are recorded.
Now that you are able to take photographs during the day, let us move on to night photography.
I've covered everything you need about night photography.
The color balance is the last thing we need to address.
Many people believe that images taken at night are too dark.
Yes, it is true. However, it can also be applied to daytime shots.
It doesn’t matter whether you’re shooting at dawn or at dusk. The camera will always record a darker shot.
Statistics
Compared to the old days of the Phantom, this drone is super small, but it will likely require you to check a bag, the way a Mini 3 Pro could easily stow away in an oversized pocket. (thedronegirl.com)
Here's proof: according to an analysis of FAA drone registration numbers by drone market research and data group Drone Industry Insights, DJI had a 76.8% market share in the U.S. (thedronegirl.com)
Again, no stabilization is applied, and the 50% throttle stick position cuts the power to the motors. (photographypro.com)
A grey card is just a piece of thick paper that is a specific shade of grey (18%), which will be the foundation on which we choose our color temperature. (dronegenuity.com)
Though the Mavic 3 is about 50% heavier than the Mavic Air 2, it's still conveniently sized. (nytimes.com)
Two main types of cameras are commonly used when making time-lapses: DSLRs (Digital Single Lens Reflex), that are usually more expensive than point and shoot digital cameras.
Due to the way light enters the camera, DSLR cameras tend to produce better-quality images. Videography is not as easy because you need to manually focus and adjust the exposure.
Point-and-shoot cameras, such as those made by GoPro, are easier to operate for beginners. The lower resolution makes videos look grainy.
A consumer drone makes the best time-lapse camera. These small flying robots are popular because they provide an affordable alternative to professional drones.
A drone can be described as a remote controlled aircraft that is autonomous and does not require human intervention. A drone typically uses a single propeller to fly, although quadcopter drones may have multiple propellers.
A drone can also capture aerial footage and cinematic shots from a bird’s eye view. A gimbal stabilizer can be added to drones for smooth handheld footage.
If you want to create a timelapse, record while the drone hovers just above your subject. If the sun doesn't directly over the subject, the sky won't look dark during the shot.
You can adjust both the shutter speed or aperture to get the desired effect. For example, if you're filming a sunset, the shutter speed could be set to 30 seconds while the aperture is wide open to let in as much natural light as possible.
You should use the opposite approach for night shots. Use a slow shutter speed of 1 second and close the aperture to reduce the amount of light entering the camera. This produces bright images with details clearly visible.