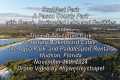
Step into a breathtaking $5 million fully remodeled home in Cherry Hills Village, Colorado, brought to life with cinematic drone footage by Jeeves Drones. As Colorado's #1 drone flythrough company, we specialize in showcasing luxury homes like never before. This video captures every modern detail, from elegant interiors to expansive outdoor spaces, creating the ultimate real estate experience.
Want to elevate your property listings? Visit jeevesdrones.com to discover how we can help you stand out in the luxury real estate market.
By: Jeeves Drones Title: Drone Tour Inside $5M Remodeled Home | Cherry Hills Village, CO | Luxury by Jeeves Drones Sourced From: www.youtube.com/watch?v=rVJ0vlOif54
You've got check out the 3 best drones on Amazon Today!
Frequently Asked Questions
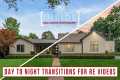
Can drones shoot nighttime photos?
The answer to that question is yes. But we've been doing it for years now. We have been taking photos at night for many decades.
There's a catch. Night photography requires specialized equipment. With a camera costing less than $10k, there is no way to do night photography.
When light hits an object, it bounces back in a series of wavelengths.
These wavelengths merge to form white light at long distances from source.
This is why your eyes can see colors even if the sun is many millions of miles away.
However, when light strikes an object near its source, it reflects within a narrow band wavelengths. These wavelengths bounce directly back to us and do not overlap.
This means that objects appear brighter when they are closer to each other. This is why objects can glow under black lights.
The amount of light reflected depends on how much energy the object absorbs. If light hits an object, it may reflect less red light than more blue.
Blue light is the most visible to the human eye, so objects will appear more blue if they are seen under black light.
What does all this have to do about drones? You need a bright light source if you want to photograph dark objects, such as caves or forests.
A normal lamp won't provide enough light to illuminate the entire scene. It will give you only a shadowed picture and nothing else.
A strobe is better for taking great pictures. And since you don't want to carry around a huge flashgun, you'll need to buy a small one.
These lights are known as speedlights because they produce flashes of light so fast that they create a stroboscopic effect.
You can see the light pulse across your screen when we say "stroboscopic". The picture will be better quality if it moves at a faster rate.
We won't cover how to set-up a Speedlight. There are many tutorials on the internet.
We'll tell you, to get a clear shot, ensure that your subject is well lit.
You should aim the beam at a 45 degree angle to achieve this. You can adjust light intensity by moving your flashgun's head.
Once you have selected the correct setting, hold the gun steady and release the shutter release key.
Once the flash has reached the subject's area, press the shutter yet again. This will set off the flashgun to start a second burst.
The first burst will illuminate the subject. However, the second burst will capture the moment after it has passed.
The end result is a continuous exposure with both bursts light and recorded.
Now that we know how to capture images during the daylight, let's learn how to do night photography.
So far, I have told you everything you need to know about photographing things at night.
The color balance is the last thing we need to address.
Most people assume that any images taken at night will look too dark.
Yes, it is true. However, it can also be applied to daytime shots.
The camera will always record darker images regardless of whether you are taking photos at dawn and dusk.
Which drone is used for aerial photography?
Two options are available if you plan to do aerial photography. You can either rent or buy a large camera package that includes a stabilizer and gimbal, or you could purchase a more expensive camera package.
The first option is great for those who plan to film a video or film. It gives you full control over the final shots. With the second option, you'll have to pay more and be much more dependent on the pilot.
But what happens when you want to ensure that the shot looks perfect, even though you aren't controlling the camera? Drones are perfect for this purpose.
A drone can be described as a tiny, unmanned aircraft that can fly independently and take photos and videos without being directed by its operator.
They are versatile and can fly close to structures and buildings to capture photos or film footage. They can also fly low above crowds to take pictures of people.
Drones have incredible capabilities for aerial photography, videography, and other uses. You can also use them to market your business by creating amazing visuals that don't require much manpower or equipment.
It is easy to place them in strategic spots to capture beautiful imagery. They can be flown remotely which makes them simple to operate.
For example, some companies hire drones for weddings. These wedding photographers can take amazing photos of the bride and groom while their drones fly above the ceremony location.
They can also fly them directly to the guests to capture family portraits. They can also fly them over reception areas, capturing beautiful views of your venue.
These activities are perfect for promotional material and event coverage. Drones can also be used for short films. You could show clients how your company is better than others by using one.
For all these reasons, drones are becoming increasingly popular for aerial photography and videography. If you want to become a professional photographer, then drones might be the best option.
How do you get started with drone photography
You have many options to begin photographing with a drone. First, you can buy a pre-made drone kit. It will come with everything you need in order to get started. They can range from $200 to $500 depending on the model.
The other option is to build your drone. It's possible to make a drone that takes decent photos and videos, even though it can be complicated.
Quadcopters are the best option for those looking to build their drone. Quadcopters have four propellers (or rotors) as opposed to two like traditional helicopters.
A quadcopter is easier to assemble and maintain than a helicopter. It is also more affordable to buy and easier for you to transport.
First, you'll need to choose the right parts. You will need props, motors, batteries controllers and controllers. Pick the correct size, weight and type.
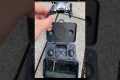
Next, decide which controller you would like to use. You have many choices, including joysticks and touch screens as well as remote controls. A drone with a built in camera is a good choice.
Once you've picked the right parts you can start assembling your drone. We recommend purchasing a pre-assembled kit to make things easier. But if you want to build your own drone, there are some steps you will need to follow.
Step 1: Attach the battery pack
To start building your quadcopter you'll first need to connect it to the motor. First, remove the cover plate from the bottom of the battery pack. Then, slide the battery into place.
Step 2: Connect the motors
Next, you will need to place the motors within the proper slots. Each motor must be in its assigned slot. Install the motors facing forward, perpendicular and in the designated slot.
Step 3: Install the propeller
Finally, you'll need to attach the propellers to the frame. Remember to position them at equal distances apart.
You are now ready to test the drone. If the engine does not move, ensure that the propellers are facing forward. You should also make sure there is no obstruction between the propellers.
Are there any good spots to fly a drone and take photos?
Drones have been a very useful tool in capturing stunning shots of nature. Drones are perfect for both close-up shots and stunning photos of wildlife like butterflies and birds.
Mountains, deserts lakes oceans beaches and cities are the best places to fly drones. Drone enthusiasts are known for taking scenic shots of their homes and other local attractions.
If you want to see new places, it is worth shooting at night as the lights illuminate the surroundings. Also, you can shoot in different seasons, particularly winter when snow covers the ground.
What type of drone does the professional use?
Drones are a great tool for aerial photography. They can capture video footage from above and also take photos. But drones also come in handy when surveying land and taking measurements.
These devices are commonly used commercially, such as to map large areas or check construction sites. These devices can be used for many other purposes, however.
For example, drones can provide great entertainment value for families and friends. There are countless ways to fly these machines and explore new places. Drones are also perfect for taking photos and videos of special events and celebrations.
Drones are truly limitless. To learn how to make the most of your drone, read on.
Statistics
Here's proof: according to an analysis of FAA drone registration numbers by drone market research and data group Drone Industry Insights, DJI had a 76.8% market share in the U.S. (thedronegirl.com)
Regional & Super Regional Centers pricing per center (400,000+ sq ft) PLACE ORDER (dronebase.com)
Compared to the old days of the Phantom, this drone is super small, but it will likely require you to check a bag, the way a Mini 3 Pro could easily stow away in an oversized pocket. (thedronegirl.com)
Greater than 50% throttle stick position generates positive thrust, but less than 50% throttle stick position reverses the direction of the motors, allowing upside-down flying! (photographypro.com)
Though the Mavic 3 is about 50% heavier than the Mavic Air 2, it's still conveniently sized. (nytimes.com)
A drone photo is a great way of capturing amazing images. When done right, you can get a stunning result that is even better than any picture taken with your camera.
There are many ways to improve your images' quality. One is making sure to use the most appropriate settings for your model.
After taking photos, there are a few apps and tools that can help you edit them. These include software such as Adobe Photoshop Lightroom, which lets you import multiple files at once and adjust each shot individually.
You can also crop and improve individual parts of your photo. This includes cropping out unwanted objects and changing lighting and contrast.
Snapseed is another tool that offers basic editing capabilities such as cropping and brightness adjustments.
The most important aspect in post-processing is to make sure your final product appears professional.
This includes knowing how to properly position your camera and how to correctly set it up.
Also, ensure that you select the correct settings for your lens. For example, if you're shooting landscapes, choose a longer focal length (such as 200mm), while if you're shooting close-ups, go for a shorter focal length (such as 50mm).
You can also learn to shoot in RAW format so you have more control over your final image.
Once you master these techniques, you will be able to create stunning drone photos that will impress everyone.