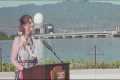
By: The Agency CQ Title: Property Tour | 128 Denison Street, Rockhampton City Sourced From: www.youtube.com/watch?v=vT9YtlRPzps
You've got check out the 3 most popular drones on Amazon while they're on sale
Frequently Asked Questions
Which drone is the best for photography?
Drones can be used for a variety of purposes, including aerial photography, filming movies, and even delivering packages. But what makes drones such an useful tool? Drones are very popular because of two main reasons. Firstly, they are incredibly versatile tools. There are many uses for drones. They can be used for just about any task you might use a regular camera for. Second, they are extremely easy to operate. Quadcopter flying is easy if your experience with quadcopters is good.
Drones also have the ability to capture stunning images. Drones can capture amazing photos in places that you might not normally go. These include remote locations where you may be exposed to danger.
Drones are so easy to operate, so anyone can learn how to pilot one quickly. Once you master the basics, you can use your drone to shoot incredible photos wherever you may be. So if you are interested in taking better photographs, check out our drone range today.
Can drones shoot nighttime photos?
That's the right answer. It's something we have been doing for years. We've been taking pictures at night for decades.
But there's a catch. Night photography requires specialized equipment. Any camera under $10k is not capable of night photography.
When light hits an object, it bounces back in a series of wavelengths.
These wavelengths overlap and combine to form white light at very long distances from the source.
This is why we can see colors even though it is thousands of miles away.
On the contrary, when light strikes an object close to its source, it reflects in a narrow band of wavelengths. These wavelengths bounce directly back to us and do not overlap.
This means that objects are brighter if they are closer together. This is why objects can glow under black lights.
The energy an object absorbs determines how much light it reflects. The object may reflect more red light than blue light when it is hit by light.
The human eye is more sensitive to blue light than objects, so objects appear bluer when they are viewed under blacklight.
What does this have do with drones, then? A very bright light source is required if you are trying to capture dark areas, such as a forest, or cave.
A normal lamp won't provide enough light to illuminate the entire scene. It will give you only a shadowed picture and nothing else.
A strobe is better for taking great pictures. It's not practical to have a bulky flashgun around, so it's best to get a small one.
These lights are called speedlights due to the fact that they produce flashes light so fast, they can create a stroboscopic effect.
Stroboscopic means that the light pulses across the screen. The better the quality of the image, the faster it is.
We won't discuss how to set up a Speedlight here. However, there are numerous tutorials online.
We will tell that it is important to have a bright and even lighting source in order to capture clear images.
This is achieved by aiming the beam at 45 degrees. You can adjust light intensity by moving your flashgun's head.
Once you have chosen the best setting, hold your gun steady while you press the shutter release.
Next, close to the subject, release the shutter. This will cause the flashgun's flash to go off again, causing it to send out another blast of light.
The subject is illuminated by the first burst, but the second will capture what happens after that burst.
The end result is a continuous exposure with both bursts light and recorded.
Now that you are able to take photographs during the day, let us move on to night photography.
So far I have covered all you need to know about taking night photos.
One thing is left to cover, however: the color harmony.
Most people assume that all the images taken at night will be too dark.
That's true, but the same applies to daytime photos.
It doesn't really matter if you take photos at dawn or dusk, the camera will always capture a darker image.
Which drones can carry DSLRs?
Drones can be used for everyday tasks. There are already drones outfitted with cameras that can do aerial photography.
Although drones have existed for many years, they haven't been used much by most people because they aren’t practical. Drones can be too noisy, expensive, and difficult to control.
That's why we've created the Drone-A1. This quadcopter is the first to be fully autonomous and specifically designed for photographers.
The Drone-A1 comes with an HD camera that can take stunning photos and videos. Due to its powerful computer onboard, the Drone-A1 will follow a subject seamlessly without any human intervention.
This allows you to concentrate entirely on capturing amazing images while the Drone-A1 takes over flying, hovering and following along with your subject.
Smart Follow, our exclusive feature that makes it simple to capture stunning shots with the Drone-A1, will amaze you. Point the Drone-A1 towards your subject, and it will automatically track him or her and keep the distance between the two of you constantly.
You'll have complete freedom and ease when shooting with the Drone-A1. There's no need to be a steady hand or know where your subject is.
The Drone- A1 has a GPS integrated that allows you and your family to share your pictures. This allows everyone to view your photos from anywhere on the planet.
The Drone-A 1 is a great choice for anyone who loves to take photos for fun or as a professional photographer.
Which hour is best to photograph drones?
A drone could capture images from the air during sunset and sunrise hours, even though there is not much activity at ground level.
Drones are great for taking beautiful photos of landscapes as well as the sky. Sometimes drones can't fly at night so you might miss spectacular views.
Take advantage of the sunrise and sunset hours to capture great photo opportunities. These times allow for stunning shots of nature and are often more popular because there are fewer cars on roads and fewer people.
It will also be easier to photograph in low light levels.
A drone is also immune to strong winds and rain. All of these factors make daylight perfect to take photos with drones.
You can capture nighttime scenes by flying at night. This will offer you a unique view of your cityscape.
How much money do drone photographers make?
A photographer makes more than $10k per gig depending on how long he/she flies for and where he/she shoots. Shooting in remote areas, such national parks or forests can bring you upwards to $20-30 an hour.
An average person is paid $15-$25 an hr in retail. That means you could fly drones for $50-$75 if that's what you desire. There are many opportunities to make even more. Many drone pilots work for companies that require them fly across the country and even internationally.
Depending on how long you fly and how far you travel, you can expect to pay $100-$300 per flight. These fees can add up quickly but if you love flying and photography it might be worth it.
What should I know about the laws regarding drone photography?
Drone flights can be regulated by Federal Aviation Administration. In addition to the FAA regulations, local laws may also apply. You can check with your state's transport department to find out what rules govern drone flights.
In most cases, drone owners need to get a FAA license. The FAA has established guidelines for licensing. These guidelines can be found here.
Some states require drone operators to register their drones with the government. You can find out more in our Guide for Drone Registration.
What are the disadvantages of drone photography?
Drone photography is an exciting way to capture images and video footage. You should be aware of the potential downsides of flying a small aircraft.
Drones can be expensive. This is the main drawback. You can spend hundreds, thousands or even millions depending on the drone you choose.
To fly a drone safely, you will need certification and training.
Another downside is safety. Drones are inherently dangerous because they require constant maintenance and repair. You could inflict serious injury or property damage if you lose control of your drone when taking photos or filming videos.
You might find that your time spent flying your drone is more productive than actually taking pictures or recording footage. Your drone might not have enough airspace to fly.
You can only fly your unmanned air vehicle within certain areas. For example, you cannot fly above 400 feet or within five miles of airports, stadiums, hospitals, prisons, schools, nuclear power plants, dams, or any military bases.
Drones might not be right for everyone. Flying these machines is not for everyone. Some fear they might fall or crash out of the sky. Some fear they might hit an object or another person.
If you don't feel comfortable flying a helicopter, you may want to stick with traditional aerial photography and videography techniques.
Statistics
Again, no stabilization is applied, and the 50% throttle stick position cuts the power to the motors. (photographypro.com)
Compared to the old days of the Phantom, this drone is super small, but it will likely require you to check a bag, the way a Mini 3 Pro could easily stow away in an oversized pocket. (thedronegirl.com)
Here's proof: according to an analysis of FAA drone registration numbers by drone market research and data group Drone Industry Insights, DJI had a 76.8% market share in the U.S. (thedronegirl.com)
Regional & Super Regional Centers pricing per center (400,000+ sq ft) PLACE ORDER (dronebase.com)
60 second video with branding, captions, contact information, and music Strip / Convenience / Neighborhood / Community Centers pricing per center (up to 400,000 sq ft) PLACE ORDER (dronebase.com)
When making time-lapses, there are two main types of cameras commonly used - DSLRs (Digital Single Lens Reflex), which are generally more expensive than point-and-shoot digital cameras.
Due to the way light enters the camera, DSLR cameras tend to produce better-quality images. However, video requires manual focus and exposure settings.
For beginners, point-and-shoot cameras such as the GoPro are simpler to use. However, the lower resolution means videos look grainy.
A consumer drone is the best camera to time-lapse. These small flying robots are popular because they provide an affordable alternative to professional drones.
A drone is an autonomous remote-controlled aircraft that can fly without the need for human intervention. A drone typically uses a single propeller to fly, although quadcopter drones may have multiple propellers.
A drone can provide aerial footage as well as cinematic shots. To capture smooth handheld footage, drones can be outfitted with a stabilizer.
To create a time-lapse, start recording while the drone hovers above your subject. If the sun is not directly overhead, the sky will not appear dark during the shot.
To achieve the desired effect you can adjust your shutter speed and aperture. If you are filming a sunset, for example, the shutter speed can be set at 30 seconds and the aperture wide open to allow in as much natural lighting as possible.
The opposite approach is recommended for night shots. You can reduce light entering your camera by slowing the shutter speed to 1/second and closing the aperture. This creates bright images where details can be clearly seen.