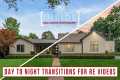
Presenting an Ultra Modern 1 Kanal Furnished House located in the prestigious Sector S, DHA Phase 7, Lahore — a stunning masterpiece by IT Construction.
This house blends luxury, comfort, and cutting-edge design to create the perfect living space for modern families. From high-end finishes to smart architectural planning, every corner of this home speaks elegance and style.
🔹 Property Highlights: -1 Kanal Ultra Modern Design - Premium Quality Finishes - 5 Spacious Bedrooms with Attached Bathrooms - Modern Kitchen & Dirty Kitchen - Stylish Drawing & Dining Area - Wide Car Porch & Beautiful Front Elevation - Servant Quarter - Lush Green Lawn & Terrace Views
💼 Constructed by: IT Construction 📍 Location: Sector S, DHA Phase 7, Lahore 📞 For Details : +92 320 848 0888
Don’t miss this opportunity to own one of the most beautifully designed homes in DHA Lahore! #bestlahorehouse #dha #1kanalhouse #lahore #pakistan #djirs3mini #djiair2s #housetour #designerhouse #houseforsale #SonyA7SIII #luxuryhouse
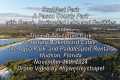
✔️ ABOUT THE PROPERTY : ** Location : DHA Phase 7 - Sector S ** Price: 13 Crore PKR ** Beds : 5 ** Baths : 5 ** Powder Room : 1 ** Area : 1 Kanal 5445 sqft ** Kitchen : 2 + Dirty Kitchen ** Maid Room with Bath ** TV Lounge: 1 ( on each Floor ) ** Built : 2025
Builder : IT Construction Facebook : itconstructionlhr Instagram : itconstructionpakistan Contact : +92 320 848 0888
The content of this channel revolves around videos featuring luxury homes in Pakistan. As an Architectural/Real Estate videographer with over 25 years of extensive experience in video production, I bring a wealth of expertise to the content.
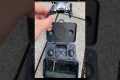
Equipment Used : Camera: Sony A7S III Lenses: - Sigma 16-28mm f/2.8 DG DN - Sony FE 50mm f/1.8 - Sony FE 85mm f1.8 Gimbal: DJI RS3 Mini Drone: DJI Air 2S
For Photography and Videography Connect with us ►Website: www.ahsanstudios.com ►Facebook: ahsanstudiopk ►Instagram: ahsanstudios ►Youtube: ahsanstudios ►Contact: (+92) 300-9495354 ►Email: [email protected]
✅ Subscribe to the channel now to see Luxury Houses of Pakistan
By: Ahsan Studios Title: Ultra Modern Dream House 1 Kanal House for Sale | Sector S DHA Phase 7 | IT Construction Sourced From: www.youtube.com/watch?v=p3MzcbZmhWo
Check out the 3 best drones on Amazon in 2022
Frequently Asked Questions
Is it legal to fly a drone nightly?
Drones are becoming increasingly popular. Drones provide amazing aerial photos of our homes and businesses. They can also be used to survey large areas and deliver goods. There are very few regulations regarding drone use. They have been banned in some US states while others have limited their use.
Although drones are generally safe to fly during daylight hours, they can be hazardous when used at night. The safety of you and other pilots is at risk when flying drones at night. This is because drones are difficult to see obstacles and hazards. Pilot errors could result in an accident.
Drones have become increasingly popular. We need to be able to safely use them. There are two main types: fixed-wing, and rotary wing. Fixed-wing drones tend to be smaller and easier than rotary-wing models. A fixed-wing model typically has four propellers whereas a model with a rotary wing has only one.
It is important to be familiar with the laws in your area regarding drone use. Also, ensure that your drone remains within your sight line at all times. This will help avoid accidents. A key safety tip is to make sure your drone has lights that flash green and red. This makes it easier to spot potential threats. If you intend to photograph, it is important to protect your lens. It is also a good idea to use protective goggles when flying your drone.
Drone flying at night poses several dangers. This includes collisions and damage to power lines, trees, or buildings. Drones may also lose or fall from the sky. Your drone must be kept clear of obstacles and keep close to the ground. Drones are also vulnerable to sudden weather changes and wind gusts. These conditions can cause your drone to lose control and crash land.
Drones are becoming increasingly popular. But they pose potential health risk. For example, the noise emitted by these devices can affect hearing and cause headaches. Furthermore, the vibrations caused by drones can cause damage to the body. Finally, flying drones without an operator license puts you at risk of fines and legal action.
The best way to prevent drone accidents is to follow the above guidelines. You must keep your drone within your direct line of sight when flying it. Avoid flying close to airports. Avoid flying your drone on water because it can increase the chance of a crash.
Can drones capture night shots?
Yes. But it's been a long-standing tradition. We've been taking pictures at night for decades.
There is one catch. Night photography requires special equipment. You can't do it with a camera that costs less then $10k.
When light hits an object, it bounces back in a series of wavelengths.
These wavelengths merge to form white light at long distances from source.
This is why you can still see colors in the distance even though the sun may be millions of kilometers away.
Contrary to popular belief, light that strikes objects close to their source reflects in a narrow range of wavelengths. These wavelengths bounce directly back to us and do not overlap.
It means that the object closer you are, the brighter it will appear. This is why objects seem to glow when they are exposed to black light.
The energy the object absorbs influences how much light is reflected. If light hits an object, it may reflect less red light than more blue.
The human eye is more sensitive to blue light than objects, so objects appear bluer when they are viewed under blacklight.
So what does this have to do with drones? Use a very bright light source to photograph dark places, such a forest or cave.
An ordinary lamp won't be powerful enough to illuminate the entire scene. It will only provide a shadowed view and not much else.
If you want a good picture, you'll need to use a strobe instead. A small flashgun is better than a big one, as you don't need it.
Because they produce flashes that are so rapid, these lights are often called speedlights.
When we say "stroboscopic," you can watch the light pulse across the screen. The better the quality of the image, the faster it is.
This tutorial will not cover how to install a Speedlight. There are many tutorials available online.
We will tell you that to capture a clear picture, you must ensure that the subject is illuminated evenly.
You should aim the beam at a 45 degree angle to achieve this. You can adjust the flashgun's intensity by moving its head.
Once you have chosen the best setting, hold your gun steady while you press the shutter release.
Once the flash has reached the subject's area, press the shutter yet again. This will activate the flashgun and fire another burst.
The subject will be illuminated by the first burst. The second burst will capture that moment.
This results in a continuous exposure that records both bursts and steady light.
Now that we know how to capture images during the daylight, let's learn how to do night photography.
So far, I have told you everything you need to know about photographing things at night.
The color balance is the last thing we need to address.
Many people believe that images taken at night are too dark.
That's true, but the same applies to daytime photos.
It doesn't really matter if you take photos at dawn or dusk, the camera will always capture a darker image.
How much money do drone photographers make?
Photographers can earn more than $10k depending on how long they fly and where they shoot. Photographers who work in remote areas, such as forests or national parks, could make upwards of $20-30 per hour.
Retail workers make $15-25 an hour, so you could easily earn $50-$75 flying drones. There are plenty of ways to earn more. Drone pilots often fly for companies that require them cross-country or international travel.
Depending on how long you fly and how far you travel, you can expect to pay $100-$300 per flight. This can add up quickly, but if you enjoy flying and love photography, it may be worth it for you.
Which drone should a beginner buy?
A drone that doesn't require special skills to fly is the best for beginners. These include drones that have an FPV (firstperson view) camera. Users can remotely control the drone with a smartphone application.
Some quadcopters are specifically made for aerial photography. Multirotor models are better suited for advanced features like obstacle avoidance and autonomous flight mode.
In terms of price, there are two types of drones; cheap ones that cost under $100 and expensive ones that cost above $300.
The cheapest models usually come with a limited range and battery life, while the most expensive ones feature better performance and longer flight times.
Because they are easier to control and operate, most beginners choose to purchase cheaper models. If you plan to fly your drone for many hours, you might consider buying an expensive model.
What are the disadvantages of drone photography?
Drone photography can be a fun way to capture images or video. There are downsides to flying a small plane.
Drone flying is expensive. Depending on the type of drone you purchase, it could set you back hundreds or even thousands of dollars.
Flying a drone requires training and certification, so you'll need to invest time and money to learn how to operate them safely.
Safety is another issue. Drones pose a danger because they are constantly in need of repair and maintenance. If you lose control of your drone while taking photos or filming videos, it could cause serious property damage or injure someone.
You might find yourself spending more time controlling a drone that actually shooting photos or filming. Your drone might not have enough airspace to fly.
Some local governments limit where you can fly your unmanned aircraft vehicle. For example, you can not fly above 400ft or within five mile of any local airports, stadiums and hospitals.
Drones are not for everyone. Drones can make people nervous because they could crash or fall out from the air. Some people worry about accidentally hitting another person or object.
If you're not comfortable flying a drone, then maybe you should stick to traditional aerial photography and videography methods instead.
What type of drone does the professional use?
Drones offer amazing opportunities for aerial photography. They are invaluable for taking aerial photos and recording video footage. They are useful when taking measurements and surveying land.
These devices are used frequently for commercial purposes, such as mapping large areas of land or inspecting construction sites. These devices can be used for many other purposes, however.
Drones, for example, can be a great way to entertain friends and families. There are countless ways to fly these machines and explore new places. Drones can be used to photograph and record special events and celebrations.
The sky is the limit with drones. These amazing tools can be used to your advantage. Continue reading for more information.
Statistics
Among the biggest improvements, the Skydio 2+ has over the standard 2 is a 20% longer battery life, longer range if you add the Beacon, and a neat AI video creation tool called Keyframe. (thedronegirl.com)
Greater than 50% throttle stick position generates positive thrust, but less than 50% throttle stick position reverses the direction of the motors, allowing upside-down flying! (photographypro.com)
A grey card is just a piece of thick paper that is a specific shade of grey (18%), which will be the foundation on which we choose our color temperature. (dronegenuity.com)
Homes with aerial images sold 68% faster than homes with standard images. (alexdronephotography.com)
Again, no stabilization is applied, and the 50% throttle stick position cuts the power to the motors. (photographypro.com)
The two most common types of camera used to make time-lapses are DSLRs (Digital Single Lens Reflex) which are typically more expensive that point-and–shoot digital cameras.
DSLR cameras also tend to produce higher-quality images due to the way light enters the lens. Videography is not as easy because you need to manually focus and adjust the exposure.
For beginners, point-and-shoot cameras such as the GoPro are simpler to use. Videos will look grainy because of the lower resolution.
A consumer drone makes the best time-lapse camera. These small flying robots offer a cheaper alternative to professional drones.
A drone is a remote control aircraft that flies autonomously without human intervention. Quadcopter drones can have multiple propellers, but a drone usually uses one propeller.
A drone can provide aerial footage as well as cinematic shots. A gimbal stabilizer can be added to drones for smooth handheld footage.
For a time-lapse effect, you can start recording while your drone hovers above the subject. If the sun is not directly overhead, the sky will not appear dark during the shot.
The aperture and shutter speed can be adjusted to create the desired effect. If you are filming a sunset, for example, the shutter speed can be set at 30 seconds and the aperture wide open to allow in as much natural lighting as possible.
You should use the opposite approach for night shots. To reduce light entering the camera, slow the shutter speed to 1 second and then close the aperture. This creates bright images that show details.