This video was made with Clipchamp my first time using this new app. So far I like it but haven't figured out if I want to pay the subscription yet! This video is part two of the video before!
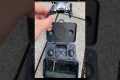
By: Stoic and Resilient /Drone Pilot Title: "4k Drone Photos" St Petersburg FL, Skyway Marina District 03/23/2025 Sourced From: www.youtube.com/watch?v=BOg6t6L6JJw
You've got check out the 3 best drones on Amazon Today!
Frequently Asked Questions
Can drones shoot nighttime photos?
The answer to that question is yes. We've been doing this for many years. For decades, we've been taking photos at night.
But there's a catch. Night photography requires specialized equipment. You can't do it with a camera that costs less then $10k.
The wavelengths of light that bounce back from objects when they are hit by light can vary.
These wavelengths merge to form white light at long distances from source.
This is why your eyes can see colors even if the sun is many millions of miles away.
On the contrary, when light strikes an object close to its source, it reflects in a narrow band of wavelengths. These wavelengths bounce right back to us without overlapping.
That means that the closer the object is, the brighter it appears. This is why objects can glow under black lights.
The energy that an object absorbs will determine how much light is reflected. The object may reflect more red light than blue light when it is hit by light.
Because the human eye is most sensitive to blue light, objects look bluer when viewed under black light.
So what does this have to do with drones? You need a bright light source if you want to photograph dark objects, such as caves or forests.
A normal lamp won't provide enough light to illuminate the entire scene. It will give you only a shadowed picture and nothing else.
If you want to get a great picture, you will need a flashgun. Also, a small flashgun won't be as convenient for you.
Because they produce flashes that are so rapid, these lights are often called speedlights.
You can see the light pulse across your screen when we say "stroboscopic". The better the picture, the faster the rate.
We won't cover how to set-up a Speedlight. There are many tutorials on the internet.
We will tell that it is important to have a bright and even lighting source in order to capture clear images.
You should aim the beam at a 45 degree angle to achieve this. You can adjust intensity by moving the flashgun head.
Once you've found the perfect setting, keep the gun steady and press the shutter release button.
Press the shutter once more, just before the flashlight reaches the subject. This will set off the flashgun to start a second burst.
The first burst will illuminate the subject. However, the second burst will capture the moment after it has passed.
The result is a continuous exposure where both bursts of light are recorded.
You now know how to take photos during the day. Let's move onto night photography.
I have already covered everything you need on night photography.
There's one more thing to be covered: the color balance.
Most people assume that all the images taken at night will be too dark.
Yes, it is true. However, it can also be applied to daytime shots.
The camera will always record darker images regardless of whether you are taking photos at dawn and dusk.
What type of drone are professionals using?
Drones offer amazing opportunities for aerial photography. Drones are extremely useful in capturing aerial images and video footage. But drones also come in handy when surveying land and taking measurements.
These devices are frequently used commercially for mapping large areas and checking construction sites. These devices can be used for many other purposes, however.
Drones are great for entertainment and fun with friends and family. You have many options to fly these machines, and even explore new areas. Drones are also perfect for taking photos and videos of special events and celebrations.
The sky is the limit when it comes to using drones. If you've been wondering how to make the most out of your flying machine, keep reading to learn more about these incredible tools.
How do I get started drone photography?
There are many ways to get started with drone photography. The first is to purchase a ready-made drone set. It will come with everything you need in order to get started. They vary in price from $200 to $500 depending upon the model.
The other option is to build your drone. Although this can be a bit complicated, it's still possible to create something that works well enough to take some decent photos and videos.
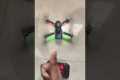
A quadcopter is the best choice for anyone who wants to build their own drone. The quadcopter is similar to conventional helicopters but has four rotors (or propellers), instead of just two.
A quadcopter takes less time to assemble, and is more reliable than a traditional helicopter. It is also easier to transport and purchase.
First, select the right components. Motors, batteries, controllers and props will all be required. Pick the correct size, weight and type.
Next, you'll need to decide what controller you'd like to use. There are many types of controllers available. We recommend purchasing one with a built-in camera, so you don't have to attach a separate device to your drone.
Once you have selected the correct parts, it's time to assemble your drone. Pre-assembled kits are recommended to make it easier. However, you can also build your own drone by following a few steps.
Step 1: Attach the battery pack
You'll need to connect the battery pack to the motor to start building your quadcopter. Remove the cover plate on the bottom side of the battery. Then, slide the battery into place.
Step 2: Connect the motors
Next, you will need to place the motors within the proper slots. Each motor should be installed in its own slot. Install the motors facing forward, perpendicular and in the designated slot.
Step 3: Install the propeller
Attach the propellers to your frame. You should position them at equal distances.
Now you are ready to test your drone. If the engine does not move, ensure that the propellers are facing forward. Also, make sure that there are no obstructions between the propellers.
What are the laws governing drone photography?
Drone flight regulation is regulated by Federal Aviation Administration (FAA). Local laws could also be applicable to drone flights. For details on drone flight regulations, please contact your state's transportation agency.
Most drone owners will need to apply for a FAA licence. Guidelines for licensing have been established by the FAA. You can learn more about these guidelines here.
Drone operators in some states must register their drones to the government. Visit our Guide to Drone Registration to learn what you need to do.
Statistics
Here's proof: according to an analysis of FAA drone registration numbers by drone market research and data group Drone Industry Insights, DJI had a 76.8% market share in the U.S. (thedronegirl.com)
Compared to the old days of the Phantom, this drone is super small, but it will likely require you to check a bag, the way a Mini 3 Pro could easily stow away in an oversized pocket. (thedronegirl.com)
60 second video with branding, captions, contact information, and music Strip / Convenience / Neighborhood / Community Centers pricing per center (up to 400,000 sq ft) PLACE ORDER (dronebase.com)
Regional & Super Regional Centers pricing per center (400,000+ sq ft) PLACE ORDER (dronebase.com)
Again, no stabilization is applied, and the 50% throttle stick position cuts the power to the motors. (photographypro.com)
People fly drones at night for two reasons; because they are curious and they want to capture images of the world around them.
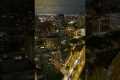
The curiosity aspect is why most people fly drones at night, they enjoy watching the world go by. You can also fly drones at nights to capture photographs of the city landscape.
This is called urban photography and is becoming increasingly popular among drone enthusiasts.
Night photography has many advantages, including better lighting conditions and more detail.
Photographers prefer to shoot at night, to avoid the limitations of photography during the day.
These benefits make urban photography attractive, but people fly drones at night to capture stunning nighttime scenes.
They love the effect of the sunset lights on the sky. Many have begun to post videos online of themselves flying drones at nights.
Although the drone technology isn't the most advanced, the quality imagery is stunning.
The best thing is that you don't need special equipment to make it happen. All you need is a smartphone with a camera.
If you don't have a smartphone, that's perfectly fine. A wide range of high-quality cameras are on the market today, which would make it possible to make great drone videos.
You will find some models that offer night vision capability if you're thinking of buying a DSLR camera.
Canon's EOS5D III has an infrared LED-system that allows it can see in low-light conditions.
Other manufacturers include Sony, Nikon, Olympus, Panasonic, Pentax, and Samsung.
However, not every smartphone can capture drone footage.
iPhones, for example, cannot use their front-facing cameras to capture aerial footage. Instead, they must rely on the iPhone 8 Plus's dual rear cameras.
Once you have determined the type of camera that you want, you need to decide where to record your video.
You can choose to film your drone footage in a fixed place or follow your subject.
Make sure that your subject is visible in the frame when filming drone footage. You should aim your drone at your subject.
If you stick to this range, you will be able get great results.
Remember that the closer you are with your subject, the sharper the details of your drone footage.
Try to make your subject move as fast as you can.
Now that we know how to capture drone footage, let's discuss how to edit it.