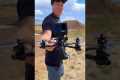
By: DroneDJ Title: A quick look at the @Potensic Atom 2 #dronedj #drone Sourced From: www.youtube.com/watch?v=UXiKtnr48vo
Look at the 3 most popular drones on Amazon Today!
Frequently Asked Questions
What is the best time to fly a drone?
When there's not much activity on ground, a drone can capture aerial images at sunrise and sunset.
Drones are great for taking beautiful photos of landscapes as well as the sky. You might not be able to capture spectacular night views because drones are not allowed to fly at night.
To ensure you don't miss out on any potential photo ops, consider flying during sunrise and sunset hours. These times provide more opportunities to capture stunning shots of nature because there are usually fewer cars on the road and fewer people walking around.
It will also be easier to photograph in low light levels.
Additionally, the drone can withstand strong winds, rain and snow. All these factors make daylight ideal for taking photos with a drone.
You can capture nighttime scenes by flying at night. This will offer you a unique view of your cityscape.
What do you need for drone photography?
Drone photography is more than just flying a camera. There are a lot of things you need to consider when planning and executing an effective drone shoot. From choosing the right location to determining how much insurance you need to carry out a successful aerial shoot.
The most important thing to do is check to see if you have permission. It is important to find out if there any restrictions on the areas you can fly in and where your drone may be used. If there are, you may need to apply for a license to fly them in these areas.
You should also check which regulations are in place in your particular country. Some countries require permits to fly drones, while others limit the number of flights you can make within a set period.
A drone pilot license is required. You'll also need to find a safe and secure place to land your drone after every flight. Local businesses will often offer landing pads for rent at a nominal fee. They also provide storage space and an hourly rate. Or, you can buy a dedicated landing area.
Before you start shooting, it is important to determine what kind of drone you would like to use. Different drones come with different features and capabilities. Fixed-wing drones, for example, are less expensive and more controllable, while multirotor drones, on the other hand, are more powerful and stable.
You'll first need to decide what kind of drone to use. Next, you will need to select the equipment that you will require. The drone camera typically comprises a gimbal with remote controller, batteries, batteries and memory cards.
The gimbal helps stabilize the camera in flight. It makes it simple to take sharp images and not worry about losing the device. The gimbal attaches directly to the drone's body to keep the camera steady.
Remote controllers let you control your drone remotely. These remote controllers include joysticks or buttons that allow you to move your drone forwards, backwards, left, right, and adjust its altitude.
The drone's motors, cameras and memory cards power their batteries. They also store the photos that the drone has taken. You'll need enough battery power to ensure clear pictures.
After you have selected the equipment, it is time to decide where you will shoot. Will you be taking photos indoors or outdoors? Are you going to be shooting landscapes or architecture? Which part of the world are you going? All of these factors affect how you'll need to prepare for your shoot.
If you plan to shoot indoors, lighting is an important consideration. Multiple lights will help lighten a room. You can place one large, centrally located light above your subject and another in the middle of the room. A third is closer to the floor.
Outdoors, you'll need to consider wind conditions. Windy days can cause problems for drone pilots because they can get blown off course. You should always take off only when the weather is calm.
If you are going to be bringing extra equipment like tripods or stands, consider whether this is something that you will need. These items will ensure your drone stays level, so you don’t lose quality shots.
An outdoor shoot should be between 10 am to 4 pm. This time there won't many people, but enough light will allow for great photos.
Let's conclude that drone photography is more than just fun. It can also be extremely useful for taking stunning aerial photos. By following some simple steps, you can start creating amazing images today!
Which drone can carry DSLR?
Drones are becoming more indispensable for daily tasks. Already, drones are equipped with cameras capable of aerial photography.
Drones have been around for many years but most people don't use them because they aren’t practical. Most drones are too expensive, noisy, and hard to control.
The Drone-A1 is a result of this. It's the first quadcopter fully autonomous in the world, specifically designed for photographers.
The Drone-A1 comes with an HD camera that can take stunning photos and videos. With its powerful onboard computer, the Drone-A1 can track a subject and not need human intervention.
This allows you to focus solely on the capture of great images, while Drone-A1 does all the flying, hovering and following your subject.
The Drone-A1's Smart Follow feature makes it easy to take amazing photos. Point the Drone-A1 towards your subject, and it will automatically track him or her and keep the distance between the two of you constantly.
The Drone-A1 allows you to shoot anywhere and at any time. No longer will you need to worry about having a steady hand or knowing exactly where your subject is going.
You can also share your photos with loved ones using the built-in GPS on the Drone- A1. This allows everyone to view your photos from anywhere on the planet.
Whether you're a professional photographer or enjoy taking pictures for fun, the Drone-A 1 is perfect for you.
Can drones shoot nighttime photos?
The answer to that question is yes. But it's been a long-standing tradition. Since decades, we have been taking night shots.
But there's a catch. Night photography requires specialist equipment. It's impossible to achieve night photography with a camera less than $10,000.
Light bounces back when it hits an object in a series wavelengths.
These wavelengths overlap and combine to form white light at very long distances from the source.
This is why your eyes can see colors even if the sun is many millions of miles away.
Contrary to popular belief, light that strikes objects close to their source reflects in a narrow range of wavelengths. These wavelengths bounce right back to us without overlapping.
This means that objects appearing brighter are closer together. This is how objects glow when exposed to black light.
The energy an object absorbs determines how much light it reflects. If light hits an object, it may reflect less red light than more blue.
The human eye is sensitive to blue light the most so objects appear brighter when viewed in black light.
What does all this have to do about drones? A very bright light source is required if you are trying to capture dark areas, such as a forest, or cave.
A normal lamp won't provide enough light to illuminate the entire scene. It will only provide a shadowed view and not much else.
If you want a good picture, you'll need to use a strobe instead. A small flashgun is better than a big one, as you don't need it.
These lights are known as speedlights because they produce flashes of light so fast that they create a stroboscopic effect.
You can see the light pulse across your screen when we say "stroboscopic". The better the picture, the faster the rate.
This tutorial will not cover how to install a Speedlight. There are many tutorials available online.
We will tell that it is important to have a bright and even lighting source in order to capture clear images.
To achieve this, you should aim the beam at a 45-degree angle. You can adjust the light's intensity by moving the flashgun's head.
Once you have chosen the best setting, hold your gun steady while you press the shutter release.
Once the flash has reached the subject's area, press the shutter yet again. This will set off the flashgun to start a second burst.
While the first burst illuminates the subject, the second one will capture the moment after the first burst has passed.
This results in a continuous exposure that records both bursts and steady light.
Now that you're comfortable taking photos during the day let's get to night photography.
I have already covered everything you need on night photography.
But there's still one thing left to cover: the color balance.
Many people believe that images taken at night are too dark.
Yes, it is true. However, it can also be applied to daytime shots.
The camera will always record darker images regardless of whether you are taking photos at dawn and dusk.
How do you get started with drone photography
You have many options to begin photographing with a drone. A ready-made drone package is the first choice. This kit will contain everything you need for getting started. They cost $200 to $500, depending upon which model you choose.
A drone can also be built. Even though this can be difficult, it is still possible to build a drone that will take decent photos or videos.
For those who want to try building their drone, we recommend starting with a quadcopter. Like conventional helicopters, quadcopters have four rotors or propellers.
A quadcopter can be assembled and maintained in a much shorter time than a helicopter. It's also cheaper to purchase and easier to carry around.
First, select the right components. Motors, batteries and controllers are all required. Be sure to select the right size and weight.
Next, decide which controller you would like to use. There are many types of controllers available. We recommend purchasing one with a built-in camera, so you don't have to attach a separate device to your drone.
Once you've chosen the right parts, you're ready to assemble your drone. We recommend purchasing a pre-assembled kit to make things easier. But if you want to build your own drone, there are some steps you will need to follow.
Step1: Attach the battery pack
You'll need to connect the battery pack to the motor to start building your quadcopter. First, remove cover plate from bottom of battery pack. Slide the battery into its place.
Step 2: Connect the motors
Next, mount the motors to the right slots. Each motor must be placed in the appropriate slot. When installing the motors, make sure they face forward and are perpendicular to the frame.
Step3: Install the propeller
Finally, you'll need to attach the propellers to the frame. Make sure they are at the same distance apart.
After completing all these steps, you're finally ready to test your new drone! If the engine does not move, ensure that the propellers are facing forward. Make sure there aren't any obstructions between the propellers.
What are some good places to take photos using a drone?
Drones can be used to capture stunning images of landscapes and nature. Drones can be used to take close-up photos of birds and butterflies, or capture stunning scenery.
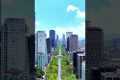
Mountains, deserts lakes oceans beaches and cities are the best places to fly drones. Many drone enthusiasts capture stunning views of their local areas and other attractions.
You should try shooting at night when the lights illuminate the surrounding landscape to explore new places. You might also consider shooting in other seasons, especially during winter when there is snow on the ground.
Statistics
60 second video with branding, captions, contact information, and music Strip / Convenience / Neighborhood / Community Centers pricing per center (up to 400,000 sq ft) PLACE ORDER (dronebase.com)
Among the biggest improvements, the Skydio 2+ has over the standard 2 is a 20% longer battery life, longer range if you add the Beacon, and a neat AI video creation tool called Keyframe. (thedronegirl.com)
Greater than 50% throttle stick position generates positive thrust, but less than 50% throttle stick position reverses the direction of the motors, allowing upside-down flying! (photographypro.com)
Homes with aerial images sold 68% faster than homes with standard images. (alexdronephotography.com)
Regional & Super Regional Centers pricing per center (400,000+ sq ft) PLACE ORDER (dronebase.com)
People fly drones at night for two reasons; because they are curious and they want to capture images of the world around them.
Most people fly drones at nights because of their curiosity. They enjoy looking out at the world. However, drones can also be flown at night to capture photos of the city landscape.
Urban photography is becoming more popular among drone enthusiasts.
There are many benefits to taking photos at night, such as capturing more detail, better lighting conditions, and even the stars.
Many photographers prefer night photography to avoid the constraints of daytime photography.
These advantages make urban photography appealing. But, most people use drones to capture nighttime shots.
They love the way that the lights turn as the sun sinks. So much so that many people have started making videos of themselves flying drones at night and posting them online.
The drone footage's technology isn’t cutting-edge, but the quality is amazing.
The best thing is that you don't need special equipment to make it happen. You only need a smartphone camera.
Of course, if you don't own a smartphone, then that's fine. Plenty of high-quality cameras available on the market today would allow you to produce great drone videos.
You will find some models that offer night vision capability if you're thinking of buying a DSLR camera.
Canon's EOS 5D Mark III camera comes with an infrared LED system, which allows it to see even in low light conditions.
Other manufacturers include Pentax (Pentax), Olympus (Sony), Pentax, Pentax, Pentax, Olympus, Olympus, Panasonic and Olympus.
However, not all smartphones are capable of recording drone footage.
iPhones cannot record aerial footage with their front-facing camera. Instead, they will need to rely on their dual rear cameras from the iPhone 8 Plus.
Once you've decided what kind of camera you'd like to use, you'll need to decide where you want to film your video from.
You could film your drone footage at one location or follow your subject.
When filming your drone footage, you should ensure that your subject is visible in the frame. This means your drone should always be within reach of your subject.
As long as you stay within this range, you should be able to get good results.
It is important to keep in mind that the closer your subject is to you, the sharper your footage will appear.
Try to make your subject move as fast as you can.
Now that you're able to take aerial footage, let us talk about how we can edit it.