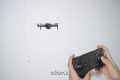
Description: Discover the best drone of 2025 with stunning 4K footage, ultra-stable flight, and cutting-edge features. Whether you're a beginner or a pro, this drone is your perfect flying companion. Watch our in-depth review and flight test to see why it’s the top pick this year!
Tags: best drone, 2025 drone review, drone with 4K camera, drone for beginners, top drones, drone flight test, drone comparison, professional drone, drone photography, drone videography
By: F Pro Shop Title: Best Drone 2025 – Ultimate Aerial Experience! #ytshorts #shortvideo #shorts Sourced From: www.youtube.com/watch?v=6y5U4XIToxk
Look at the 3 most popular drones on Amazon in 2022
Frequently Asked Questions
Can drones shoot nighttime photos?
Yes, that's the answer. But we have been doing it for years. We've been taking pictures at night for decades.
There's one problem. Night photography requires special equipment. It's impossible to achieve night photography with a camera less than $10,000.
Light bounces back when it hits an object in a series wavelengths.
These wavelengths are combined to produce white light at very far distances from their source.
This is how our eyes are able to see colors even when the sun is miles away.
The opposite is true. When light strikes an object very close to its source it reflects in narrow wavelengths. These wavelengths bounce back straight to us, without overlapping.
That means that the closer the object is, the brighter it appears. This is why objects appear to glow under black light.
How much energy the object absorbs affects how much light is reflected. When light hits an object it will reflect more blue light than red.
Blue light is the most visible to the human eye, so objects will appear more blue if they are seen under black light.
This is what drones have to do. You need a bright light source if you want to photograph dark objects, such as caves or forests.
A standard lamp will not provide enough illumination to illuminate the whole scene. It will give you only a shadowed picture and nothing else.
If you want to get a great picture, you will need a flashgun. You won't want to lug around a large flashgun so you will need a smaller one.
Because they produce flashes that are so rapid, these lights are often called speedlights.
The light pulses across the screen when "stroboscopic" is used. The picture will be better quality if it moves at a faster rate.
This tutorial will not cover how to install a Speedlight. However, there are numerous tutorials online.
We will tell you that to capture a clear picture, you must ensure that the subject is illuminated evenly.
The beam should be aimed at a 45° angle in order to achieve this. You can adjust light intensity by moving your flashgun's head.
Once you've found the perfect setting, keep the gun steady and press the shutter release button.
Press the shutter once more, just before the flashlight reaches the subject. This will cause the flashgun's flash to go off again, causing it to send out another blast of light.
The subject is illuminated by the first burst, but the second will capture what happens after that burst.
The result is continuous exposure, where both bursts are recorded.
Now that we know how to capture images during the daylight, let's learn how to do night photography.
I've covered everything you need about night photography.
But there's still one thing left to cover: the color balance.
Most people assume that any images taken at night will look too dark.
And that's true - but it's also true for daytime pictures.
It doesn’t matter whether you’re shooting at dawn or at dusk. The camera will always record a darker shot.
Can drone photography make you money?
A lack of products to solve the problems inherent in flying drones is the biggest obstacle for photographers looking to make money from them. This makes it less fun to fly drones if the equipment and software are not of high quality.
Also, you need to be aware of liability and insurance issues. This is why most photographers opt to take photos from the ground. We're talking about a new way to capture images that could lead to you being paid.
Drones capture light in a similar way to video cameras. Why not create stunning photos using the same technology?
Companies are already making significant progress in the creation of high-quality aerial photos. We've previously discussed DJI and GoPro. We're seeing more companies in the space.
These cameras are great for ground photography even though they were made for aerial photography. Major manufacturers invest heavily in their imaging technology.
This means that you'll eventually be able to buy a drone that shoots 4K videos and takes incredible photographs. We might already be witnessing this happening. DJI is one of the companies that has started to release higher-resolution Phantom series drones.
DJI recently launched the Inspire 2, a 12-megapixel camera capable of taking photos at 5120x3456 pixels. If you prefer to shoot in RAW format you can capture 8-bit files at 30 frames a second.
So yes, you can make money off of drone photos.
What drone type do professionals use for their work?
Drones make amazing tools for aerial photography. Drones can be used to capture images and record video footage from the sky. They can also be used to survey land and take measurements.
These devices are often used commercially to map large areas, or inspect construction sites. There are many uses for these devices beyond their business purposes.
Drones provide entertainment value for friends and families. You have many options to fly these machines, and even explore new areas. Drones are great for photographing and recording special events and celebrations.
The sky is the limit with drones. Continue reading to find out how you can get the most from your drone.
Which drone should a beginner buy?
These drones are great for beginners as they don't require any advanced skills. These include drones with an FPV (first person view) camera. This allows you to remotely control your drone from your smartphone.
Some quadcopters were specifically designed for aerial photography. A multirotor model might be a better choice if you want to explore advanced features, such as obstacle avoidance or autonomous flight mode.
In terms of price, there are two types of drones; cheap ones that cost under $100 and expensive ones that cost above $300.
The cheapest models often have limited range and battery life. But the best models are more reliable and can fly longer distances.
As they are simpler to use and handle, beginners tend to choose the cheapest options. If you plan on spending hours flying your drone, you might be interested in a higher-end model.
What are the essentials for drone photography?
Drone photography goes beyond just using a drone to take pictures. Planning and executing a successful drone shoot requires a lot of considerations. You need to consider everything, from choosing the best location to how much insurance you will need to conduct a successful aerial shoot.
The most important thing you can do is make sure that your drones are allowed to fly in the location you want to photograph. This includes finding out what restrictions apply to where and how your drone can be operated. If you find that there are restrictions, you might need to apply for a license in order to fly them.
You should also check which regulations are in place in your particular country. You may need a permit to fly drones in some countries. Others limit the number you can make in a given time period.
A drone pilot license is required. You'll also need to find a safe and secure place to land your drone after every flight. You can rent a landing spot from local businesses for around $10 per hour. Also, you will have storage space. Alternatively, you could buy a dedicated landing pad.
Before you begin to shoot, you will need to decide which drone you want. Different drones are equipped with different capabilities. For example, fixed-wing drones tend to cost less and are easier to control, whereas multirotor drones are more powerful and stable.
You'll first need to decide what kind of drone to use. Next, you will need to select the equipment that you will require. The basic equipment for a drone camera is a remote controller, gimbal, batteries, memory cards, and remote controller.
A gimbal stabilizes the camera during flight, making it easy to capture sharp images without worrying about shaking hands or dropping the device. To ensure the drone stays stable, the gimbal attaches to its body.
Remote controllers enable you to pilot your drone remotely. These devices include joysticks and buttons that let you move the drone forwards, backward, left, and right and adjust its altitude.
The batteries power the drone's cameras and motors. Memory cards store photos taken by it. To ensure that the drone takes clear pictures, you'll need to ensure sufficient battery life.
Once you've chosen the equipment that you need, it's time to plan where you want to shoot. Do you plan to take photos outdoors or indoors? Do you plan to shoot architecture or landscapes? Which part of the world are you going? All of these factors affect how you'll need to prepare for your shoot.
If you intend to shoot inside, lighting is a must. Multiple lights will help lighten a room. Consider placing one large lamp above the subject and another near the center. Another light is close to the floor.
When outdoors, wind conditions are important. Drone pilots may experience problems if they are blown off course by windy conditions. Avoid taking off during stormy weather.
If you are going to be bringing extra equipment like tripods or stands, consider whether this is something that you will need. These items will help you keep your drone level stable, so you don't lose quality shots.
It is best to shoot outdoors between 10 am and 4pm. This time there won't many people, but enough light will allow for great photos.
A drone photographer is not just fun. They are also extremely useful for creating stunning aerial photos. By following some simple steps, you can start creating amazing images today!
How can I get started in drone photography?
You have many options to begin photographing with a drone. You can start by buying a drone kit. You'll get everything you need. They vary from $200 up to $500, depending on which model.
You can also build your own drone. Although this is not an easy task, it is possible to still create a drone capable of taking decent photos and videos.
A quadcopter is the best choice for anyone who wants to build their own drone. Quadcopters have four propellers (or rotors) as opposed to two like traditional helicopters.
A quadcopter is easier to assemble and maintain than a helicopter. It's also cheaper to purchase and easier to carry around.
First, you'll need to choose the right parts. You'll need to purchase motors and batteries, controllers, as well as props. Make sure you pick the correct size and weight.
Next, decide which controller you would like to use. There are many types of controllers available. A drone with a built in camera is a good choice.
Once you've made your selections, you are ready to assemble it. A preassembled kit is a great option to save time and make things simpler. You can build your drone on your own by following these steps.
Step 1: Attach the battery pack
To build your quadcopter, you will need to connect the battery pack and the motor. Remove the cover plate on the bottom side of the battery. After that, slide in the battery.
Step 2: Connect the motors
Next, place the motors in their appropriate slots. Each motor must be placed in the appropriate slot. When mounting the motors, ensure they face forward and are parallel to the frame.
Step3: Install the propeller
Finally, you'll need to attach the propellers to the frame. You should position them at equal distances.
After completing all these steps, you're finally ready to test your new drone! If the drone doesn't move when you turn it on, make sure the propellers face forward. Make sure the propellers are free from obstructions.
Which hour is best to photograph drones?
A drone could capture aerial images during sunrise and sunset hours when there isn't much activity on the ground.
Drones can be used to capture stunning photos of landscapes or the sky above. But sometimes drones aren't allowed to fly at night, so you miss out on spectacular views.
If you want to make sure that you capture all the photo opportunities, fly during sunset and sunrise hours. Because there are fewer cars and more people on the roads, these times offer stunning opportunities for photos of nature.
Also, you'll find yourself shooting at lower light levels. This makes it easier to capture images without worrying about overexposing them.
Furthermore, you don't have to worry about strong winds or rain, snow, fog, or freezing temperatures. These are all factors that make daylight great for photography with a drone.
Consider flying at night if you want to capture nighttime scenes. This will give you an unrivalled view of the cityscape.
Statistics
A grey card is just a piece of thick paper that is a specific shade of grey (18%), which will be the foundation on which we choose our color temperature. (dronegenuity.com)
Greater than 50% throttle stick position generates positive thrust, but less than 50% throttle stick position reverses the direction of the motors, allowing upside-down flying! (photographypro.com)
Compared to the old days of the Phantom, this drone is super small, but it will likely require you to check a bag, the way a Mini 3 Pro could easily stow away in an oversized pocket. (thedronegirl.com)
Among the biggest improvements, the Skydio 2+ has over the standard 2 is a 20% longer battery life, longer range if you add the Beacon, and a neat AI video creation tool called Keyframe. (thedronegirl.com)
Here's proof: according to an analysis of FAA drone registration numbers by drone market research and data group Drone Industry Insights, DJI had a 76.8% market share in the U.S. (thedronegirl.com)
Tips for Beginners: How to Take Amazing Drone Photos
These are some great tips to take amazing drone photos
Make sure you have enough space to fly your drone safely. Keep it clear of trees and buildings.
Before you fly, ensure you know exactly where you are! Drone flying is easy. You could end up in danger if you don't know the exact location of your flight.
You must be safe while flying. Keep your drone close to your body to keep an eye on what's happening. Never fly at night or under poor weather conditions (like heavy rain).
Bring extra batteries if you plan to do long flights. Extra batteries should always be on hand. This way, you won't run out of juice mid-flight.
High quality lenses are recommended. The clearer the image, the higher the resolution. A camera lens with a low resolution, such the one found on most smartphones, may blur the image.
Start small. Make short videos when you are learning how to fly a drone. You can then move on to longer videos once you feel comfortable with these.
Avoid using your drone indoors. Drones cannot be used indoors. They can cause damage to walls, furniture, or other objects.
Practice makes perfect! Try new things with your drone. You can use your drone to capture different angles on the same scene. You can also fly around the house outside.
Have fun! While you may think you need to stick to the rules to make great drone pictures, there is no rule book about photography.
Learn more about your camera settings. There are many advanced features on today's cameras. These settings can increase the quality of your images.
Be patient! You might be tempted to rush, but sometimes you need to wait to get the shot.
Have fun. Remember why you bought your drone in the first place. Enjoying yourself while flying your drone can add to the experience.
Send us your work! Send your best photos to social media sites such as Facebook, Instagram, Twitter and Pinterest. Let other photographers know how much it was fun!
Keep learning! Explore magazines and books that are about photography. Online tutorials. 15. Stay safe! Make sure you are following all safety precautions before you go. Ensure your drone has enough battery life left and its landing gear is in working condition. Also, make sure that you're following proper FAA regulations.
Find your style After you've mastered the basics, you'll have developed your unique style. You can experiment with many styles and techniques until you find the one that works.
Use apps! You can easily download free photo editing apps to your smartphone. These tools will allow you to easily enhance your photos.
Take notes! Keep track of all the information you have learned from this article to help you remember it. Write down important points in your journal or notebook.