By: Eric Lignini Title: DJI AIR 3 COLOR GRADING PHOTO Pt.2🎨📸 #djiair3 #drone #cinematic #dji Sourced From: www.youtube.com/watch?v=3PE31RtJPoI
Here are the 3 most popular drones on Amazon in 2022
Frequently Asked Questions
How do I get started drone photography?
There are several ways to start photographing using a drone. A ready-made drone package is the first choice. This will include everything you need to get started. They vary in price from $200 to $500 depending upon the model.
Other options include building your drone. It's possible to make a drone that takes decent photos and videos, even though it can be complicated.
A quadcopter is the best choice for anyone who wants to build their own drone. As found on conventional helicopters, a quadcopter has four rotors (or propellers) instead of two.
It is much easier to assemble and maintain a quadcopter than a helicopter. It's also cheaper to purchase and easier to carry around.
First, choose the right parts. You'll need to purchase motors and batteries, controllers, as well as props. Make sure you pick the correct size and weight.
Next, you'll need to decide what controller you'd like to use. You have many choices, including joysticks and touch screens as well as remote controls. You can attach your drone to the camera with the built-in camera.
Once you have selected the correct parts, it's time to assemble your drone. Pre-assembled kits are recommended to make it easier. However, you can also build your own drone by following a few steps.
Step 1: Attach the battery pack
You'll need to connect the battery pack to the motor to start building your quadcopter. First, remove cover plate from bottom of battery pack. Slide the battery into its place.
Step 2 Connect the motors
Next, place the motors in their appropriate slots. Each motor needs to be installed in its respective slot. When mounting the motors, ensure they face forward and are parallel to the frame.
Step 3: Install the propeller
Last, attach the propellers and frame. Make sure they are at the same distance apart.
You are now ready to test the drone. If you see no movement when you turn on the engine, double-check that the propellers are facing forward. Make sure the propellers are free from obstructions.
How do I fly my drone
The best way to learn how to fly a drone is by practicing. It takes time to learn how to fly drones. If you are a beginner, it is advisable to practice indoors and close to your home.
There are three essential skills that you need to know in order to fly a Drone. These are hovering, takingoff, and landing.
Take Off
To take off, simply lift the drone into the sky. Once the drone is moving upward, hold down the button on the controller. Once the drone reaches a certain height, stop pushing the button.
Hovering
Hovering allows the drone to stay in mid-air. To hover, hold down the right or left trigger while pressing on the throttle. You can move the drone by tilting the controller by holding down both triggers.
Landing
Landing is returning the drone safely back to earth. To land, release the throttle and tilt the controller downward toward the ground. The drone will eventually slow down, and then land.
Flying your drone is a matter of comfort. However, be careful not crash into anything.
How much money do drone photographers make?
A photographer could make more or less than $10k depending upon how long he/she is flying for and where he/she takes photos. Shooting in remote areas, such national parks or forests can bring you upwards to $20-30 an hour.
Retail workers make $15-25 an hour, so you could easily earn $50-$75 flying drones. There are many opportunities to make even more. Most drone pilots fly for companies that require them travel throughout the country, or internationally.
You can charge anywhere from $100 to $300 per flight, depending on the time you spend flying and the distance you cover. This can add up quickly, but if you enjoy flying and love photography, it may be worth it for you.
Which drone do you recommend for beginners?
A drone that doesn't require special skills to fly is the best for beginners. These drones include those equipped with an FPV camera that allows users to remotely control the drone using a smartphone app.
Some quadcopters are designed specifically for aerial photography. A multirotor model might be a better choice if you want to explore advanced features, such as obstacle avoidance or autonomous flight mode.
Two types of drones can be distinguished in terms of their price: those that are cheap at $100 or more and those that are expensive at $300.
The cheapest models tend to have a limited range, battery life, and flight time. The more expensive models feature greater performance and longer flight durations.
As they are simpler to use and handle, beginners tend to choose the cheapest options. If you intend to fly your drone for hours, however, you might consider buying a more expensive model.
Which drone can hold a DSLR camera?
Drones are becoming more useful for everyday tasks. Already, drones are equipped with cameras capable of aerial photography.
Drones have been around for many years but most people don't use them because they aren’t practical. Most drones are too expensive, noisy, and hard to control.
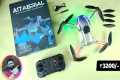
Drone-A1 was born. It is the first quadcopter with fully autonomous flight that was designed especially for photographers.
The Drone-A1 has an HD camera which can capture stunning photos and video. Its powerful onboard computer allows the Drone-A1 to track any subject automatically.
This allows you to concentrate entirely on capturing amazing images while the Drone-A1 takes over flying, hovering and following along with your subject.
Amazing shots can be captured with the Drone-A1 thanks to Smart Follow. Point the Drone-A1 at your subject and it will automatically track and keep you separated.
With the Drone-A1, you'll enjoy freedom and convenience when shooting. There's no need to be a steady hand or know where your subject is.
You can also share your photos with loved ones using the built-in GPS on the Drone- A1. You can share your pictures with anyone around the globe.
The Drone-A 1 is a great choice for anyone who loves to take photos for fun or as a professional photographer.
Can drones be used to take night pictures?
Yes. We've been doing this for many years. For decades, we've been taking photos at night.
But there is a catch. Night photography requires special equipment. Any camera under $10k is not capable of night photography.
When light strikes an object, it bounces back in various wavelengths.
These wavelengths overlap and combine to form white light at very long distances from the source.
This is why your eyes can see colors even if the sun is many millions of miles away.
On the contrary, when light strikes an object close to its source, it reflects in a narrow band of wavelengths. These wavelengths bounce directly back to us and do not overlap.
This means that objects appear brighter when they are closer to each other. This is why objects seem to glow when they are exposed to black light.
The amount of light reflected depends on how much energy the object absorbs. If light hits an object, it may reflect less red light than more blue.
The human eye is more sensitive to blue light than objects, so objects appear bluer when they are viewed under blacklight.
This is what drones have to do. If you want to photograph something dark like a forest or cave, you will need a very bright source of light.
An ordinary lamp won't be powerful enough to illuminate the entire scene. It will only create a shadowed scene.
You will need a strobe if you want to take great photos. You won't want to lug around a large flashgun so you will need a smaller one.
Because they produce flashes that are so rapid, these lights are often called speedlights.
If we say "stroboscopic", you can see the light pulse across the screen. The picture will be better quality if it moves at a faster rate.
We won't be discussing how to set up Speedlights here. But you can find many tutorials online.
We will tell that it is important to have a bright and even lighting source in order to capture clear images.
You should aim the beam at a 45 degree angle to achieve this. You can adjust the light's intensity by moving the flashgun's head.
Once you have chosen the best setting, hold your gun steady while you press the shutter release.
Press the shutter once more, just before the flashlight reaches the subject. This will set off the flashgun to start a second burst.
The first burst is the most visible, and the second captures the moment after the burst has ended.
The result is a continuous exposure where both bursts of light are recorded.
Now you know how to take pictures during the day, let's move on to night photography.
I have already covered everything you need on night photography.
But there's still one thing left to cover: the color balance.
Most people assume that all images taken at nights will be too dark.
It's true. But it also applies to daytime photographs.
The camera will always record darker images regardless of whether you are taking photos at dawn and dusk.
Statistics
Here's proof: according to an analysis of FAA drone registration numbers by drone market research and data group Drone Industry Insights, DJI had a 76.8% market share in the U.S. (thedronegirl.com)
60 second video with branding, captions, contact information, and music Strip / Convenience / Neighborhood / Community Centers pricing per center (up to 400,000 sq ft) PLACE ORDER (dronebase.com)
A grey card is just a piece of thick paper that is a specific shade of grey (18%), which will be the foundation on which we choose our color temperature. (dronegenuity.com)
Homes with aerial images sold 68% faster than homes with standard images. (alexdronephotography.com)
Though the Mavic 3 is about 50% heavier than the Mavic Air 2, it's still conveniently sized. (nytimes.com)
Tips for Beginners: How to Take Amazing Drone Photos
Here are some tips for great drone photos
Space is essential for safe flying of your drone. You should keep it out of buildings, trees, power lines, and other obstructions.
Before you fly, ensure you know exactly where you are! Drone piloting can lead to a lot of confusion. You could end up in danger if you don't know the exact location of your flight.
Keep your drone safe! Always keep your drone close to you to see what's happening around you. Flying at night or during poor weather conditions (like heavy rainfall) is not a good idea.
Bring extra batteries if you plan to do long flights. You should always carry spare batteries with you. This will ensure that you don't run short of power during your flight.
Good quality lenses are essential. Higher resolutions will produce clearer pictures. A camera lens with a low resolution, such the one found on most smartphones, may blur the image.
Start small. When you first learn how to use a drone, try making short videos. Once you feel confident with this, move on to longer videos.
Avoid using your drone indoors. Drones should not be used indoors. They can cause damage to walls, furniture, or other objects.
Practice makes perfect! You can do many things with your drone. Use it to capture different angles in the same scene. Fly outside to practice your flying skills.
Have fun! You might believe you have to adhere to certain rules in order take great drone pictures. However, there is no set rule for photography.
Learn more information about your camera settings. There are many advanced features on today's cameras. These settings can enhance the quality and appeal of your photos.
Be patient! Even though you might want to take the fastest route possible, sometimes it takes time to get the right shot.
Have fun. Recall why you bought your drone. It can be fun to fly your drone.
Please share your work! Share your top shots on social media platforms like Facebook, Instagram and Twitter. Share your photos with others to let them know how much you enjoyed shooting them.
Keep learning! Continue reading magazines and books on photography. Online tutorials. 15. Take precautions! Before you take to the skies, make sure that all safety precautions are taken. Check that your drone has sufficient battery life and that its landing gear functions properly. Also, make sure that you're following proper FAA regulations.
Find your style! You'll be able create your style once you've learned the basics. Test out different styles and techniques until you find one that works.
Use apps! Download free photo editing software to your smartphone. These tools will allow you to easily enhance your photos.
Take notes! Keep track of everything that you read from this article. This will help you remember the information better. Keep important points in a notebook or journal.