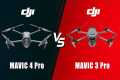
In this in-depth comparison, we test the DJI Mavic 4 Pro side-by-side with the Mavic 3 Pro to find out what’s really new, and whether it’s worth upgrading. From image quality and flight performance to intelligent features and low-light footage – this video covers everything you need to know in under 10 minutes.
DJI Mavic 4 Pro
*Dronios is supported by its audience. When you purchase through links on our site, we may earn an commission
Topics Covered:
00:00 – Intro 00:21 – Unboxing 01:56 – New Gimbal 02:20 – Mavic 4 Pro vs Mavic 3 Pro 04:06 – New CMOS Sensor 05:18 – Mavic 4 Pro vs DJI Air 3S 05:47 – DJI RC 2 Pro Controller 06:30 – Triple Cam Test 07:14 – Night Aerial Footage
By: DRONIOS Title: DJI Mavic 4 Pro vs Mavic 3 Pro – Is the Upgrade Worth It? Sourced From: www.youtube.com/watch?v=z-o74ZIskq4
You've got check out the 3 most popular drones on Amazon in 2022
Frequently Asked Questions
What information should I have about drone photography laws?
Drone flight regulations are controlled by the Federal Aviation Administration. Local laws may also apply in addition to the FAA regulations. Check with your state's transportation department to determine which rules govern drone flights.
Most drone owners will need to apply for a FAA licence. The FAA has set forth guidelines for licensing. You can learn more about these guidelines here.
Drone operators in some states must register their drones to the government. Check out our Guide to Drone Registration for more information.
How to fly my drone?
It takes practice to fly a drone. Although drones are much more stable than regular aircraft, pilots still need to get experience. We recommend that beginners practice indoors or near their home.
You will need to be able to perform three skills when learning to fly a drone. These are hovering, takingoff, and landing.
Take Off
Taking off is simply lifting the drone into the air. Press the button on your controller to cause the drone to move upwards. Once the drone is at a certain height stop pressing the button.
Hovering
Hovering allows the drone to stay in mid-air. To hover, hold down the left or right trigger while pressing the throttle. To tilt the drone, hold down both triggers and press the throttle.
Landing
Landing means returning the drone to earth safely. To land, release the throttle and tilt the controller downward toward the ground. The drone will eventually slow down, and then land.
If you feel confident flying your drone, then take it outside. You must be careful not that your drone crashes into anything.
Can drones shoot nighttime photos?
That's the right answer. We've been doing this for many years. For decades, we've been taking photos at night.
There's one problem. Night photography requires specialized equipment. You can't do it with a camera that costs less then $10k.
Light bounces back when it hits an object in a series wavelengths.
These wavelengths overlap and combine to form white light at very long distances from the source.
This is why our eyes can see colors even though the sun is millions of miles away.
However, when light strikes an object near its source, it reflects within a narrow band wavelengths. These wavelengths bounce back straight to us, without overlapping.
This means that objects appear brighter when they are closer to each other. This is why objects can glow under black lights.
The energy that an object absorbs will determine how much light is reflected. If light hits an object, it may reflect less red light than more blue.
The human eye is sensitive to blue light the most so objects appear brighter when viewed in black light.
What does this have do with drones, then? Use a very bright light source to photograph dark places, such a forest or cave.
A normal lamp won't provide enough light to illuminate the entire scene. It will only provide a shadowed view and not much else.
A strobe is better for taking great pictures. A small flashgun is better than a big one, as you don't need it.
Speedlights are also known for their flashes of light that create a stroboscopic effect.
When we say "stroboscopic," you can watch the light pulse across the screen. The faster the rate, the better quality of the picture.
We won't cover how to set-up a Speedlight. There are many tutorials available online.
We'll tell you, to get a clear shot, ensure that your subject is well lit.
The beam should be aimed at a 45° angle in order to achieve this. You can adjust light intensity by moving your flashgun's head.
Once you have selected the correct setting, hold the gun steady and release the shutter release key.
Next, close to the subject, release the shutter. This will activate the flashgun and fire another burst.
The subject is illuminated by the first burst, but the second will capture what happens after that burst.
This creates a continuous exposure in which both bursts or light are recorded.
Now you know how to take pictures during the day, let's move on to night photography.
I have already covered everything you need on night photography.
The color balance is the last thing we need to address.
Most people assume that any images taken at night will look too dark.
That's true, but the same applies to daytime photos.
It doesn’t matter if you’re taking photos at dawn, dusk or both; the camera will always take a darker picture.
What are some good places to take photos using a drone?
Drones are a great tool for taking stunning photos of nature and landscapes. Drones are great for taking close-up shots or stunning landscapes.
You can use drones in the most beautiful places: mountains, deserts. Drone enthusiasts are known for taking scenic shots of their homes and other local attractions.
To discover new areas, you should shoot at night when the lights illuminate it. Also, you can shoot in different seasons, particularly winter when snow covers the ground.
Statistics
Though the Mavic 3 is about 50% heavier than the Mavic Air 2, it's still conveniently sized. (nytimes.com)
Greater than 50% throttle stick position generates positive thrust, but less than 50% throttle stick position reverses the direction of the motors, allowing upside-down flying! (photographypro.com)
Regional & Super Regional Centers pricing per center (400,000+ sq ft) PLACE ORDER (dronebase.com)
Homes with aerial images sold 68% faster than homes with standard images. (alexdronephotography.com)
60 second video with branding, captions, contact information, and music Strip / Convenience / Neighborhood / Community Centers pricing per center (up to 400,000 sq ft) PLACE ORDER (dronebase.com)
Time-lapses can be made with two types of cameras: DSLRs (Digital Single Lens Reflex), and which are more expensive than point-and shoot digital cameras.
DSLR cameras produce images that are more high-quality due to how light enters them. These cameras aren't great for shooting video as they require manual focus or exposure settings.
Point-and-shoot cameras, such as those made by GoPro, are easier to operate for beginners. However, videos with lower resolutions look grainy.
A consumer drone is the best camera for time-lapsing. These small flying robots have become very popular as an affordable alternative for professional drones.
A drone is an autonomous remote-controlled aircraft that can fly without the need for human intervention. A drone typically uses a single propeller to fly, although quadcopter drones may have multiple propellers.
A drone can also capture aerial footage and cinematic shots from a bird’s eye view. To capture smooth handheld footage, drones can be outfitted with a stabilizer.
You can create a time lapse by recording the drone above your subject. The sky won't appear dark during the shot if the sun isn't directly overhead.
To achieve the desired effect you can adjust your shutter speed and aperture. You could, for instance, set the shutter speed to 30 seconds when you're shooting a sunset and leave the aperture wide open so that as much natural light is allowed in.
Night shots can be shot using the opposite approach. To reduce light entering the camera's sensor, set the shutter speed at 1 second. This creates bright images where details can be clearly seen.