Here are the 3 best drones on Amazon while they're on sale
Frequently Asked Questions
How do I get started drone photography?
There are many ways to get started with drone photography. First, you can buy a pre-made drone kit. This kit will contain everything you need for getting started. They vary from $200 up to $500, depending on which model.
A drone can also be built. Even though this can be difficult, it is still possible to build a drone that will take decent photos or videos.
A quadcopter is the best choice for anyone who wants to build their own drone. Quadcopters have four propellers (or rotors) as opposed to two like traditional helicopters.
A quadcopter is simpler to assemble than a helicopter. It is also more affordable to buy and easier for you to transport.
First, you need to pick the right parts. You will need props, motors, batteries controllers and controllers. Pick the correct size, weight and type.
Next, you'll need to decide what controller you'd like to use. There are many options available. These include joysticks, touch screens and remote controls. A drone with a built in camera is a good choice.
Once you have selected the correct parts, it's time to assemble your drone. We recommend purchasing a pre-assembled kit to make things easier. If you would prefer to build your drone yourself, there are a few things you need to do.
Step1: Attach the battery pack
For your quadcopter to be built, you'll need the battery pack connected to the motor. To start, remove the cover from the battery pack. Next, slide your battery into place.
Step 2: Connect the motors
Next, you will need to place the motors within the proper slots. Each motor should be installed in its own slot. When installing motors, ensure that they face forward while remaining perpendicular with the frame.
Step 3: Install the propeller
Last, attach the propellers and frame. Remember to position them at equal distances apart.
After completing all these steps, you're finally ready to test your new drone! If there is no movement when the engine turns on, check that the propellers point forward. Also, ensure that there aren’t obstructions between propellers.
Can drones take night photos?
The answer to that question is yes. It's something we have been doing for years. Since decades, we have been taking night shots.
There is one catch. Night photography requires specialized equipment. Any camera under $10k is not capable of night photography.
When light strikes an object, it bounces back in various wavelengths.
These wavelengths combine to create white light at very distant distances from the source.
This is how our eyes are able to see colors even when the sun is miles away.
Instead, light reflects narrow bands of wavelengths when it strikes objects that are close to the source. These wavelengths bounce back straight to us, without overlapping.
This means that objects appear brighter when they are closer to each other. This is why objects can glow under black lights.
The amount of light reflected depends on how much energy the object absorbs. When light hits an object it will reflect more blue light than red.
Blue light is the most sensitive for the human eye. Therefore, objects that are viewed under black lights will look more blue.
This has to do with drones. Use a very bright light source to photograph dark places, such a forest or cave.
A regular lamp will not be powerful enough for the illumination of the entire scene. It will give you only a shadowed picture and nothing else.
A strobe is better for taking great pictures. Also, a small flashgun won't be as convenient for you.
Speedlights are also known for their flashes of light that create a stroboscopic effect.
When we say "stroboscopic," you can watch the light pulse across the screen. The better the quality of the image, the faster it is.
We won’t talk about how to setup a Speedlight. But there are plenty of tutorials online.
We will tell, for clear pictures, that you need to ensure that the subject is evenly illuminated.
The beam should be aimed at a 45° angle in order to achieve this. The flashgun can be moved to adjust the intensity of the light.
Once you have chosen the best setting, hold your gun steady while you press the shutter release.
Then, just before the light reaches the subject, press the shutter again. This will set off the flashgun to start a second burst.
While the first burst illuminates the subject, the second one will capture the moment after the first burst has passed.
The result is a continuous exposure where both bursts of light are recorded.
Now that you're comfortable taking photos during the day let's get to night photography.
So far, I have told you everything you need to know about photographing things at night.
However, there is still one thing that needs to be addressed: the color balance.
Most people assume that any images taken at night will look too dark.
That's true, but the same applies to daytime photos.
It doesn't matter whether you're taking pictures at dawn or dusk; the camera will always record a darker image.
Which drone should a beginner buy?
The best drones for beginners are those that do not require any special skills to fly them. These include drones equipped with an FPV (first-person view) camera, allowing users to control the drone via a smartphone app remotely.
Quadcopters can be used for aerial photography. Multirotor models are better suited for advanced features like obstacle avoidance and autonomous flight mode.
There are two types: the cheap drones that cost less than $100 and the more expensive drones that cost over $300.
The cheapest models typically have a limited range or battery life. The most expensive models, however, offer greater performance and longer flight time.
Most beginners prefer to go for cheaper options as these are easier to handle and learn how to operate. If you plan to fly your drone for many hours, you might consider buying an expensive model.
How much money do drone photographers make?
Photographers can earn more than $10k depending on how long they fly and where they shoot. You could make as much as $20-30 per hour if you are able to shoot in remote areas like national parks and forests.
The average person earns between $15-$25 an hour working in retail, which means you could earn $50-$75 flying drones if you wanted to. There are many opportunities to make even more. Many drone pilots work for companies that require them fly across the country and even internationally.
Depending on how long you fly and how far you travel, you can expect to pay $100-$300 per flight. This can add up quickly, but if you enjoy flying and love photography, it may be worth it for you.
What kind of drone do professionals use?
Drones are a great tool for aerial photography. They are incredibly useful for recording video footage and capturing images from above. Drones can also be useful in surveying land and taking measurements.
These devices are commonly used commercially, such as to map large areas or check construction sites. These devices can be used for many other purposes, however.
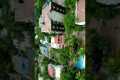
For example, drones can provide great entertainment value for families and friends. These drones can be flown in many ways, allowing you to explore new areas. Drones can also be used to capture photos and videos of special events or celebrations.
Drones are truly limitless. These amazing tools can be used to your advantage. Continue reading for more information.
What are some good places to take photos using a drone?
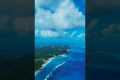
Drones are an extremely useful tool to capture breathtaking shots of nature and landscapes. Drones are perfect for both close-up shots and stunning photos of wildlife like butterflies and birds.
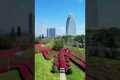
The best locations to use drones include mountains, deserts, lakes, oceans, beaches, and cities. Drone enthusiasts enjoy taking stunning photos of their surroundings and other local attractions.
You should try shooting at night when the lights illuminate the surrounding landscape to explore new places. Also, you can shoot in different seasons, particularly winter when snow covers the ground.
What are the laws concerning drone photography?
Drone flight regulation is regulated by Federal Aviation Administration (FAA). Local laws could also be applicable to drone flights. You can check with your state's transport department to find out what rules govern drone flights.
In most cases, drone owners need to get a FAA license. The FAA has established guidelines for licensing. Learn more about these guidelines by clicking here.
Drone operators in some states must register their drones to the government. You can find out more in our Guide for Drone Registration.
Statistics
Though the Mavic 3 is about 50% heavier than the Mavic Air 2, it's still conveniently sized. (nytimes.com)
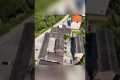
Homes with aerial images sold 68% faster than homes with standard images. (alexdronephotography.com)
Again, no stabilization is applied, and the 50% throttle stick position cuts the power to the motors. (photographypro.com)
Among the biggest improvements, the Skydio 2+ has over the standard 2 is a 20% longer battery life, longer range if you add the Beacon, and a neat AI video creation tool called Keyframe. (thedronegirl.com)
Regional & Super Regional Centers pricing per center (400,000+ sq ft) PLACE ORDER (dronebase.com)
Tips for Beginners on How to Take Outstanding Drone Images
These are the top tips for creating great drone photos
Your drone should have enough room to fly safely. Keep it clear of trees and buildings.
Before you start flying, make sure that you know where it is. Drone flying can be dangerous. If you don’t know where your drone has flown, you might end up on a cliff edge, or in someone’s backyard.
Remember to be safe when you fly! You should always keep your drone close at hand to monitor what's going on. Never fly at night, or in bad weather conditions like heavy rain.
Bring extra batteries if you plan to do long flights. Extra batteries should always be on hand. This way, you won't run out of juice mid-flight.
Use good quality lenses. The higher the resolution, the clearer the picture. An image blurred by a lens with low pixel count such as those on most smartphones will result.
Start small. Start small with your first video. You can then move on to longer videos once you feel comfortable with these.
Avoid using your drone indoors. Drones are not intended to be used indoors. They can cause damage and destruction to furniture and walls.
Practice makes perfect! Try different things when using your drone. Take it with you to capture different angles of the scene. Try flying outside.
You can be creative! It is easy to believe that photography has to be a set of rules.
Learn more about camera settings. There are many advanced features on today's cameras. These settings can be used to improve the quality your photographs.
Be patient! You might be tempted to rush, but sometimes you need to wait to get the shot.
Have fun! Make sure you remember why your drone was purchased. Enjoying yourself while flying your drone can add to the experience.
Your work is welcome to be shared! Share your top shots on social media platforms like Facebook, Instagram and Twitter. Let other people know how much fun they had with them!
Keep learning! Keep learning! Watch tutorials online. 15. Take precautions! Before you take to the skies, make sure that all safety precautions are taken. Make sure your drone is fully charged and that the landing gear works properly. Follow all FAA regulations.
Find your style After you've mastered the basics, you'll have developed your unique style. Explore different styles until you find one that works.
Use apps! Many free photo editing applications are available for download on your smartphone. These tools can be used to enhance your photos.
Take note! Keep track of everything that you read from this article. This will help you remember the information better. Write down important points in your journal or notebook.