By: Yateman Cinematics Title: Spring warm days #cinematic #drone #dji #hyperlapse #cinematography #motionblur Sourced From: www.youtube.com/watch?v=U7sXbRklh4o
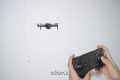
Here are the 3 most popular drones on Amazon in 2022
Frequently Asked Questions
How much money do drone photographers make?
A photographer can make more than $10k per gig, depending on how much time he/she travels and where he/she photographs. Shooting in remote areas, such national parks or forests can bring you upwards to $20-30 an hour.
An average person makes $15-$25 per hour in retail. This means that you could make $50-$75 flying drones, if you so desired. There are plenty of ways to earn more. Companies that require drone pilots to fly all over the country or internationally will often hire them.
It is possible to charge $100 to $300 per flight depending on how many miles you cover and how much time you spent flying. You might find it worthwhile if flying is something you enjoy and you also love taking photos.
What are the disadvantages of drone photography?
Drone photography allows you to capture stunning images and video. You should be aware of the potential downsides of flying a small aircraft.
Drones can be expensive. This is the main drawback. You can spend hundreds, thousands or even millions depending on the drone you choose.
To fly a drone safely, you will need certification and training.
Safety is another concern. Drones are extremely dangerous because they require constant maintenance. Drones can be dangerous because they require constant maintenance and repair.
You may find yourself spending more time flying your drone than you do actually taking photographs or recording footage. Additionally, your drone may not be able to fly in the airspace you have.
You can only fly your unmanned air vehicle within certain areas. For example, you cannot fly above 400 feet or within five miles of airports, stadiums, hospitals, prisons, schools, nuclear power plants, dams, or any military bases.
Finally, drones aren't for everyone. Flying these machines is not for everyone. Some fear they might fall or crash out of the sky. Others are concerned that they may accidentally hit someone or something else.
If you are not confident flying a drone, you can stick with traditional aerial photography methods and videography instead.
How do you get started with drone photography
There are many options for starting to photograph with a drone. The first is to purchase a ready-made drone set. You'll get everything you need. They vary in price from $200 to $500 depending upon the model.
The other option is to build your drone. Although this can be a bit complicated, it's still possible to create something that works well enough to take some decent photos and videos.
For those who want to try building their drone, we recommend starting with a quadcopter. As found on conventional helicopters, a quadcopter has four rotors (or propellers) instead of two.
A quadcopter is easier to assemble and maintain than a helicopter. It is also less expensive to buy and easier to transport.
First, choose the right parts. You'll need to purchase motors and batteries, controllers, as well as props. Pick the correct size, weight and type.
Next, you'll need to decide what controller you'd like to use. There are many types of controllers available. A drone with a built in camera is a good choice.
Once you've made your selections, you are ready to assemble it. Preassembled kits make life easier. You can build your drone on your own by following these steps.
Step 1 Attach the battery pack
To begin building your quadcopter, connect the battery to the motor. First, remove cover plate from bottom of battery pack. Then, slide the battery into place.
Step 2: Connect the motors
Next, mount the motors to the right slots. Each motor must be placed in the appropriate slot. When installing the motors, make sure they face forward and are perpendicular to the frame.
Step3: Install the propeller
Finally, you'll need to attach the propellers to the frame. You should position them at equal distances.
Once you have completed all of these steps, your drone is now ready for testing! If you see no movement when you turn on the engine, double-check that the propellers are facing forward. You should also make sure there is no obstruction between the propellers.
What is the best way to capture drone photography?
Drone photography goes beyond just using a drone to take pictures. It is important to plan and execute a successful drone shooting. From finding the right location to getting enough insurance, a successful drone shoot is possible.
The most important thing to do is check to see if you have permission. This includes finding out what restrictions apply to where and how your drone can be operated. If there are, you might have to apply for a permit to fly them in the area.
You should also check which regulations are in place in your particular country. Some countries require permits to fly drones. Others limit how many flights you can make in a specific time.
A drone pilot license is required. You'll also need to find a safe and secure place to land your drone after every flight. Many local businesses offer landing pads to rent for a fee. You will also get storage space. You could also buy a landing pad.
Before you even begin shooting, you'll need to decide what drone you'd like to use. Different drones offer different capabilities and features. Fixed-wing drones are cheaper and easier to control, while multirotors are more powerful, stable, and reliable.
After deciding what kind of drone you want to use, you'll need to choose what equipment you'll need. The drone camera typically comprises a gimbal with remote controller, batteries, batteries and memory cards.
Gimbals stabilize the camera while it is in flight. This makes it easier to capture sharp images, without having to worry about dropping the device or shaking hands. The gimbal attaches directly to the drone's body to keep the camera steady.
Remote controllers enable you to pilot your drone remotely. These remote controllers include joysticks or buttons that allow you to move your drone forwards, backwards, left, right, and adjust its altitude.
The drone's motors are powered by batteries, and the cameras have memory cards that store images taken by the drone. You'll need enough battery power to ensure clear pictures.
After selecting the equipment you will require, you will need to determine where you will be shooting. Will you be taking photos indoors or outdoors? Will you be photographing architecture or landscapes in your home? What kind of places are you going to be shooting? All of these factors affect how you'll need to prepare for your shoot.
If you intend to shoot inside, lighting is a must. Multiple lights are the best way of lighting a room. One large light should be placed above the subject, one near the middle and another closer to the floor.
Outside, you need to be aware of wind conditions. Drone pilots who are flying drones on windy days may be at risk of being blown off their course. Therefore, you should only take off when the weather is calm.
Consider whether additional equipment such as stands or tripods is necessary when you select your location. These items will allow you to keep your drone level so that you don't lose high-quality shots.
An outdoor shoot should be between 10 am to 4 pm. You won't see too many people during this time but you will still have enough light to take great photos.
To conclude, drone photography isn't just fun and incredibly useful for capturing stunning aerial photographs. By following some simple steps, you can start creating amazing images today!
Statistics
Among the biggest improvements, the Skydio 2+ has over the standard 2 is a 20% longer battery life, longer range if you add the Beacon, and a neat AI video creation tool called Keyframe. (thedronegirl.com)
Homes with aerial images sold 68% faster than homes with standard images. (alexdronephotography.com)
Greater than 50% throttle stick position generates positive thrust, but less than 50% throttle stick position reverses the direction of the motors, allowing upside-down flying! (photographypro.com)
A grey card is just a piece of thick paper that is a specific shade of grey (18%), which will be the foundation on which we choose our color temperature. (dronegenuity.com)
60 second video with branding, captions, contact information, and music Strip / Convenience / Neighborhood / Community Centers pricing per center (up to 400,000 sq ft) PLACE ORDER (dronebase.com)
It is possible to keep a drone at a safe distance if it becomes part of your self. If you start to see the drone as an entity separate from you, it becomes difficult to recognize its physical boundaries.
You can immerse yourself in your surroundings without worrying about the drone's next move.
A close approach to the ground can also have psychological benefits. It allows us to have more control over our surroundings and helps us feel closer with nature.
However, there are also some drawbacks. We can damage drones by flying near the ground. How far can you fly from the ground?
It depends on the drone type you have. You should aim to fly at least 500 feet above the ground if you're trying to capture aerial footage or film landscapes.
You might limit the height of a cityscape to 1,000 feet. You can avoid trees and buildings that could block your view.
Because drones struggle in low-light conditions, this is why. You can decrease the time spent hovering if you fly in darkness by lowering your altitude.
Also, ensure the area you are flying in is clear of any obstacles such as power lines, traffic signs, or tall buildings.
Also, you might consider flying during daylight instead of at nights. This will help you avoid reflections from street lights and shadows.
Another thing to think about is the size of the drone itself. The farther away the drone must be from ground, the larger the drone. A large quadcopter for example requires a height of at least 300 feet.
If you're looking for amazing drone footage, make sure to look for the golden hours.
This is between 3 and 6 p.m. You have the best visibility due to the direct overhead sun.
It is also known for its "magic hour", which is perfect for capturing stunning images.
However, it is important to not fly your drone during sunrise or sunset. These times can cause poor-quality footage.
Once you have these tips, it is time to begin creating incredible drone videos.