Support us on Patreon to gain access to full quality flyover galleries, round-table analysis and more!:
We are now doing weekly aerial flyovers depending on the support that we get. Our cost range from pilot fees to rental fees of the Cessna 172 that is used for the flyovers over the sites.
Come join our Discord!
Other content creator's footage:
ChromeKiwi: Labpadre: Vix:
Video Production Team:
Research and Writing Team: B.J. Vanta Peekaboo Stephanie
Here are the 3 highest-rated drones on Amazon in 2022
Frequently Asked Questions
What type of drone does the professional use?
Drones are an amazing tool for aerial photography. They can capture video footage from above and also take photos. Drones can also be useful in surveying land and taking measurements.
These devices are often used commercially to map large areas, or inspect construction sites. However, there are plenty of uses for them beyond business applications.
Drones provide entertainment value for friends and families. There are countless ways to fly these machines and explore new places. Drones also make it easy to take photos and video of special events.
When it comes to drones, the sky is your limit. You might be wondering how to get the most out your drone. Keep reading to find out more.
What are some of the cons to using drone photography for your photos?
Drone photography offers a unique way to capture photos and video. There are downsides to flying a small plane.
The most obvious disadvantage of flying drones is the cost involved. You can spend hundreds, thousands or even millions depending on the drone you choose.
To fly a drone safely, you will need certification and training.
Safety is another downside. Drones pose a danger because they are constantly in need of repair and maintenance. It is possible to injure or cause property damage by losing control of your drone while you are taking photos.
You might find yourself spending more time controlling a drone that actually shooting photos or filming. You may also have restricted airspace in which you can fly your drone.
Some local governments limit where you can fly your unmanned aircraft vehicle. You can't fly over 400 feet or within 5 miles of stadiums or hospitals, schools, prisons or other military bases, as well as nuclear power plants and dams.
Drones aren’t for everyone. Some people feel uneasy about flying these machines because they fear they might crash or fall out of the sky. Some people worry about accidentally hitting another person or object.
If you're not comfortable flying a drone, then maybe you should stick to traditional aerial photography and videography methods instead.
What time is best for drone photography?
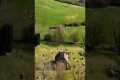
The drone could capture aerial photos during sunrise and dusk hours, when there isn’t much activity on earth.
Drones can capture beautiful photographs of landscapes and the sky over them. Some drones cannot fly at night and you may miss amazing views.
Take advantage of the sunrise and sunset hours to capture great photo opportunities. Because there are fewer cars and more people on the roads, these times offer stunning opportunities for photos of nature.
You will find it easier to shoot in low light levels.
Additionally, the drone can withstand strong winds, rain and snow. All these factors make daylight ideal for taking photos with a drone.
If you are looking for night scenes to capture, then flying at night is a good option. This will give you an unrivalled view of the cityscape.
How do you get started with drone photography
There are many ways you can start taking photos with a drone. You can start by buying a drone kit. It will come with everything you need in order to get started. They cost $200 to $500, depending upon which model you choose.
The other option is to build your drone. Even though this can be difficult, it is still possible to build a drone that will take decent photos or videos.
A quadcopter is the best choice for anyone who wants to build their own drone. The quadcopter is similar to conventional helicopters but has four rotors (or propellers), instead of just two.
A quadcopter is simpler to assemble than a helicopter. It is also easier to transport and purchase.
First, choose the right parts. You will need props, motors, batteries controllers and controllers. You should choose the right size and weight.
Next, choose the controller that you want to use. There are many types of controllers available. We recommend purchasing one with a built-in camera, so you don't have to attach a separate device to your drone.
Once you have selected the correct parts, it's time to assemble your drone. To make things easy, we recommend buying a preassembled kit. However, if you prefer to build your own, you'll need to follow a few steps before assembling your drone.
Step 1: Attach battery pack
To start building your quadcopter you'll first need to connect it to the motor. Remove the cover plate on the bottom side of the battery. Next, slide the battery in place.
Step2: Connect the motors
Next, place the motors in their appropriate slots. Each motor needs to be installed in its respective slot. When installing motors, ensure that they face forward while remaining perpendicular with the frame.
Step 3: Install the propeller
You will then need to attach your propellers onto the frame. Be sure to place them at equal distances.
You are now ready to test the drone. If the drone doesn't move when you turn it on, make sure the propellers face forward. Make sure there aren't any obstructions between the propellers.
Which drones can carry DSLRs?
Drones can be used for everyday tasks. Already, drones are equipped with cameras capable of aerial photography.
Drones aren't something that people use very often, even though they've been around for years. Most drones are too expensive, noisy, and hard to control.
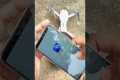
We created the Drone-A1. It's the first quadcopter fully autonomous in the world, specifically designed for photographers.
The Drone-A1 comes with an HD camera that can take stunning photos and videos. Its powerful onboard computer allows the Drone-A1 to track any subject automatically.
This allows you to focus solely on the capture of great images, while Drone-A1 does all the flying, hovering and following your subject.
Amazing shots can be captured with the Drone-A1 thanks to Smart Follow. Point the Drone-A1 towards your subject, and it will automatically track him or her and keep the distance between the two of you constantly.
The Drone-A1 will give you freedom and convenience while shooting. You won't have to worry about being steady or knowing where your subject is.
You can also share your photos with loved ones using the built-in GPS on the Drone- A1. You can share your pictures with anyone around the globe.
The Drone-A 1 is a great choice for anyone who loves to take photos for fun or as a professional photographer.
Statistics
Among the biggest improvements, the Skydio 2+ has over the standard 2 is a 20% longer battery life, longer range if you add the Beacon, and a neat AI video creation tool called Keyframe. (thedronegirl.com)
Compared to the old days of the Phantom, this drone is super small, but it will likely require you to check a bag, the way a Mini 3 Pro could easily stow away in an oversized pocket. (thedronegirl.com)
Though the Mavic 3 is about 50% heavier than the Mavic Air 2, it's still conveniently sized. (nytimes.com)
Homes with aerial images sold 68% faster than homes with standard images. (alexdronephotography.com)
Greater than 50% throttle stick position generates positive thrust, but less than 50% throttle stick position reverses the direction of the motors, allowing upside-down flying! (photographypro.com)
A drone picture is a great way to capture an amazing image. When done right, you can get a stunning result that is even better than any picture taken with your camera.
There are many ways to improve your images' quality. You should make sure that your settings are appropriate for the model you are photographing.
Some tools and apps can help you edit your photos after taking them. Adobe Photoshop Lightroom is one example. It allows you to import multiple files and then adjust each shot individually.
You can also crop and enhance individual parts of your image. This can include removing unwanted objects, changing lighting and contrast.
Snapseed also offers basic editing tools such as cropping or brightness adjustments and color correcting.
The most important aspect in post-processing is to make sure your final product appears professional.
This involves knowing how your camera works and how to position yourself correctly.
Also, ensure that you select the correct settings for your lens. If you are shooting landscapes, you should choose a longer focal length (such 200mm), while for close-ups you should opt for a shorter focal (such 50mm).
Finally, you should learn how to shoot RAW because it gives you greater control over what the final image looks like.
You can create amazing drone images once you have mastered these techniques.