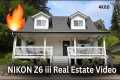
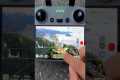
Watch as we unbox the drone, take it for its first flight, and capture some stunning aerial views! 🚁✨ Stay tuned for more tech adventures and drone flying experiences. Subscribe to RoboTech BBaria for more amazing content! 🌟 #DroneLife #DroneFlying #Unboxing #AerialView #Shorts #nazatrc #robotechbbaria
By: RoboTechBBaria Title: Drone Unboxing ✈️ First Flight 🚁 and Stunning Aerial Shots! #Shorts Sourced From: www.youtube.com/watch?v=jsz45FwYoTg
Check out the 3 highest-rated drones on Amazon while they're on sale
Frequently Asked Questions
How much money do drone photographers make?
Photographers make more than $10k a gig depending on the length of their flights and where they are shooting. Photographers who work in remote areas, such as forests or national parks, could make upwards of $20-30 per hour.
The average person can earn between $15-$25/hour working in retail. If you want to fly drones, you could earn $50-$75. There are other opportunities to make more. Drone pilots often fly for companies that require them cross-country or international travel.
You can charge anywhere from $100 to $300 per flight, depending on the time you spend flying and the distance you cover. These fees can add up quickly but if you love flying and photography it might be worth it.
Which drone can be used to carry a DSLR?
Drones can be used for everyday tasks. Drones can already be equipped with cameras to take aerial photos.
Drones have been around since the beginning of time, but they are not practical for most people. Drones are expensive and noisy, making them difficult to control.
We created the Drone-A1. The Drone-A1 is the first quadcopter that can autonomously fly and was specifically made for photographers.
The Drone-A1 features an HD camera that captures stunning videos and photos. Thanks to its powerful onboard processor, the Drone-A1 is able to follow a subject with no human intervention.
This means that you can concentrate on creating great images and the Drone-A1 will do all of the flying, hovering, following, and following your subject.
You'll love how easy it is to capture amazing shots with the Drone-A1, thanks to our exclusive Smart Follow feature. Point the Drone-A1 at your subject and it will automatically track and keep you separated.
The Drone-A1 will give you freedom and convenience while shooting. The Drone-A1 will eliminate the need for you to have a steady hand and know exactly where your subject goes.
The Drone- A1 also has a GPS, which allows you to share photos with family and friends. This way, everyone can view your pictures from anywhere in the world.
The Drone-A 1 drone is great for amateur photographers or for casual photography.
Can drones capture night shots?
Answer: Yes. We've been doing this for many years. For decades, we've been taking photos at night.
There's a catch. Night photography requires specialized equipment. With a camera costing less than $10k, there is no way to do night photography.
The wavelengths of light that bounce back from objects when they are hit by light can vary.
These wavelengths overlap and combine to form white light at very long distances from the source.
This is how our eyes are able to see colors even when the sun is miles away.
However, when light strikes an object near its source, it reflects within a narrow band wavelengths. These wavelengths bounce back straight to us, without overlapping.
This means that objects appear brighter when they are closer to each other. This is how objects glow when exposed to black light.
The energy the object absorbs influences how much light is reflected. Therefore, if light hits an object, it might reflect more blue than red light.
The human eye is sensitive to blue light the most so objects appear brighter when viewed in black light.
What does this have do with drones, then? A very bright light source is required if you are trying to capture dark areas, such as a forest, or cave.
An ordinary lamp won't be powerful enough to illuminate the entire scene. It will give you only a shadowed picture and nothing else.
A strobe will give you a great shot. It's not practical to have a bulky flashgun around, so it's best to get a small one.
Because they produce flashes that are so rapid, these lights are often called speedlights.
If we say "stroboscopic", you can see the light pulse across the screen. The picture will be better quality if it moves at a faster rate.
We won't cover how to set-up a Speedlight. However, there are numerous tutorials online.
We will tell you to make sure that the subject is properly illuminated in order for a clear photograph.
This is achieved by aiming the beam at 45 degrees. You can adjust light intensity by moving your flashgun's head.
Once you have selected the correct setting, hold the gun steady and release the shutter release key.
Next, close to the subject, release the shutter. This will activate the flashgun and fire another burst.
The subject is illuminated by the first burst, but the second will capture what happens after that burst.
This results in a continuous exposure that records both bursts and steady light.
Now that we know how to capture images during the daylight, let's learn how to do night photography.
I have already covered everything you need on night photography.
The color balance is the last thing we need to address.
Most people assume that any images taken at night will look too dark.
This is true even for daytime images.
The camera will always record darker images regardless of whether you are taking photos at dawn and dusk.
What do you need for drone photography?
Drone photography is much more than just taking pictures with a drone. There are a lot of things you need to consider when planning and executing an effective drone shoot. It all starts with choosing the right place and determining how much insurance is required to make an aerial shoot a success.
The most important thing is to ensure you have permission to fly drones in the area you plan to shoot in. This means finding out whether there are any restrictions on where you can fly and where you can operate your drone. You may need to apply to fly your drone in restricted areas if there are.
You should also check which regulations are in place in your particular country. Some countries require drone pilot permits, while others restrict the number of flights that can be made within a certain time frame.
A drone pilot license is required. You'll also need to find a safe and secure place to land your drone after every flight. A lot of local businesses will rent you a landing pad for an hour. This will allow you to store your drone. Another option is to buy a dedicated landing platform.
Before you can even start shooting, you need to choose the drone that you want to use. Different drones have different capabilities and features. Fixed-wing drones are cheaper and easier to control, while multirotors are more powerful, stable, and reliable.
Once you have decided what type of drone you want, you will need the equipment. The equipment required to operate a drone camera includes a remote controller and gimbal as well as batteries and memory cards.
The camera is stabilized by the gimbal during flight. The drone's body attaches to the gimbal to ensure that the camera stays steady.
Remote controllers enable you to pilot your drone remotely. These controllers have joysticks and buttons, which allow you to control the drone's direction, speed, direction, and altitude.
The drone's motors are powered by batteries, and the cameras have memory cards that store images taken by the drone. You'll need enough battery power to ensure clear pictures.
Once you've selected the equipment you'll need, you'll need to figure out where you'll shoot. Do you prefer to shoot outdoors or indoors? Will you be photographing architecture or landscapes in your home? What are you planning to shoot? All of these factors impact how you should prepare for your shoot.
If you intend to shoot inside, lighting is a must. Multiple lights are the best way of lighting a room. One large light should be placed above the subject, one near the middle and another closer to the floor.
Outside, you need to be aware of wind conditions. Drone pilots may experience problems if they are blown off course by windy conditions. Therefore, you should only take off when the weather is calm.
If you are going to be bringing extra equipment like tripods or stands, consider whether this is something that you will need. These items will ensure that your drone is level and stable so you don’t lose any quality shots.
An outdoor shoot should be between 10 am to 4 pm. This time there won't many people, but enough light will allow for great photos.
Let's conclude that drone photography is more than just fun. It can also be extremely useful for taking stunning aerial photos. Follow these simple steps to create stunning images right away!
Is it possible to make money from drone photography?
The biggest problem for any photographer trying to make money off drones is that there aren't any products out there that solve the problems that come with flying them. This makes it less fun to fly drones if the equipment and software are not of high quality.
There are also insurance and liability concerns, so many photographers prefer to take pictures from the ground. However, there is an entirely new way to take pictures that can potentially earn you a commission.
Drones capture light in a similar way to video cameras. Why not create stunning photos using the same technology?
Companies are already making significant progress in the creation of high-quality aerial photos. We've previously discussed DJI and GoPro. Now, we are seeing more companies join the space.
These cameras can be used for aerial photography but are also very useful on the ground. Every major manufacturer is investing heavily in the development and maintenance of their imaging technologies.
You'll soon be able buy a drone capable of taking incredible photos and 4K video. This is possible. Companies like DJI have been releasing higher-resolution versions of their Phantom series of drones.
DJI recently released the Inspire 2, which features a 12-megapixel sensor capable of shooting at 5120 x 3456 pixels. You can also shoot 8-bit RAW files at 30 frames/second if you wish.
So yes, you can make money off of drone photos.
Is it safe to fly a drone in the night?
Drones are becoming increasingly popular. Drones offer amazing aerial shots of our houses and businesses. They are also great for delivering goods to large areas or capturing footage of sporting events. However, drones are still subject to very few regulations. Some states in America have banned drones completely, while others have put restrictions on their operation.
Although drones are generally safe to fly during daylight hours, they can be hazardous when used at night. Flying a drone at night could put you and other pilots in danger. This is due to the difficulty of spotting hazards and obstacles. A pilot's mistakes could lead to an accident.
Drones are becoming increasingly popular; therefore, we must learn how to operate them safely. There are two types of drones currently available: fixed-wing androtary-wing. Fixed-wing drones generally have smaller wings and are easier to control than rotary models. Fixed-wing models usually have four propellers while rotary-wing models only have one rotor.
You should be familiarized with all local drone laws to avoid any mishaps. Make sure that your drone comes with lights. This will make it easier to identify potential dangers. If you intend to photograph, it is important to protect your lens. You should also wear protective goggles if you fly your drone.
Drone flying at night presents a variety of dangers including collisions with power lines and trees as well as buildings. In addition, drones could become lost or fall out of the sky. Your drone must be kept clear of obstacles and keep close to the ground. Drones can also be affected by wind gusts or sudden weather changes. These conditions can cause your drone to lose control and crash land.
Although drones are becoming increasingly popular, they come with potential health risks. These drones can emit noises that can cause hearing loss and headaches. A drone's vibrations can cause physical and emotional damage. Flying drones without a license can result in fines and legal action.
You can prevent accidents by following these guidelines. You must keep your drone within your direct line of sight when flying it. Avoid flying close to airports. Be extra careful when flying your drone over water, as it increases the chances of a collision.
How to fly my drone?
You need to practice flying a drone. Although drones are much more stable than regular aircraft, pilots still need to get experience. Practice indoors or at home is the best option for beginners.
You will need to be able to perform three skills when learning to fly a drone. These are hovering, takingoff, and landing.
Take Off
The drone will take off by simply being lifted into the air. Press the button on your controller to cause the drone to move upwards. When the drone has reached a certain height you can stop pressing the button.
Hovering
Hovering allows the drone to stay in mid-air. Hold down the right or left trigger and press the throttle to hover. You can move the drone by tilting the controller by holding down both triggers.
Landing
Landing means returning the drone to earth safely. To land, release the throttle. Then tilt the controller toward the ground. This will cause the drone's speed to drop and eventually land.
If you feel confident flying your drone, then take it outside. Be careful not to crash into any object.
Statistics
Again, no stabilization is applied, and the 50% throttle stick position cuts the power to the motors. (photographypro.com)
Among the biggest improvements, the Skydio 2+ has over the standard 2 is a 20% longer battery life, longer range if you add the Beacon, and a neat AI video creation tool called Keyframe. (thedronegirl.com)
Here's proof: according to an analysis of FAA drone registration numbers by drone market research and data group Drone Industry Insights, DJI had a 76.8% market share in the U.S. (thedronegirl.com)
Regional & Super Regional Centers pricing per center (400,000+ sq ft) PLACE ORDER (dronebase.com)
Though the Mavic 3 is about 50% heavier than the Mavic Air 2, it's still conveniently sized. (nytimes.com)
Two main types of cameras are commonly used when making time-lapses: DSLRs (Digital Single Lens Reflex), that are usually more expensive than point and shoot digital cameras.
The way light enters DSLR cameras can also make them produce better quality images. They are not ideal for video because they require manual focus, exposure and exposure settings.
Beginners will find it easier to use point-and shoot cameras like the GoPro. Videos can look grainy due to the lower resolution.
A consumer drone is the best camera to time-lapse. These tiny flying robots are a popular alternative to professional drones.
A drone, a remote controlled aircraft, is one that can fly independently of human intervention. Quadcopter drones may use multiple propellers. A drone will typically fly with one propeller.
In addition to providing aerial footage, a drone can capture cinematic shots from a bird's eye view. Drones can also be equipped with a gimbal stabilizer to shoot smooth handheld footage.
To create a time-lapse, start recording while the drone hovers above your subject. If the sun isn’t directly overhead, the sky won’t appear darken during the shot.
To achieve the desired effect you can adjust your shutter speed and aperture. You could, for instance, set the shutter speed to 30 seconds when you're shooting a sunset and leave the aperture wide open so that as much natural light is allowed in.
The opposite approach should be used for night shots. To reduce light entering the camera, slow the shutter speed to 1 second and then close the aperture. This technique creates a bright image where details are visible.