Look at the 3 most popular drones on Amazon in 2022
Frequently Asked Questions
What is the best way to capture drone photography?
Drone photography requires more than just flying a plane. Planning and executing a successful drone shoot requires a lot of considerations. From finding the right location to getting enough insurance, a successful drone shoot is possible.
The most important thing to do is check to see if you have permission. This involves finding out if there are restrictions regarding where you can fly or where your drone can be operated. If you find that there are restrictions, you might need to apply for a license in order to fly them.
You also need to check what regulations apply in your country. Some countries require drone pilot permits, while others restrict the number of flights that can be made within a certain time frame.
You will need permission to fly drones. After each flight, you will also need to locate a safe place to land the drone. Many local businesses offer landing pads to rent for a fee. You will also get storage space. A dedicated landing pad can also be purchased.
Before you start shooting, it is important to determine what kind of drone you would like to use. There are many drones with different capabilities and features. Fixed-wing drones tend not to be as expensive and are easier to operate, while multirotor drones can be more stable and powerful.
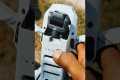
You'll first need to decide what kind of drone to use. Next, you will need to select the equipment that you will require. The basic equipment for a drone camera is a remote controller, gimbal, batteries, memory cards, and remote controller.
A gimbal stabilizes the camera during flight, making it easy to capture sharp images without worrying about shaking hands or dropping the device. The drone's body attaches to the gimbal to ensure that the camera stays steady.
Remote controllers let you control your drone remotely. These controllers have joysticks and buttons, which allow you to control the drone's direction, speed, direction, and altitude.
The batteries power the drone's cameras and motors. Memory cards store photos taken by it. In order to ensure clear shots, ensure you have enough battery life.
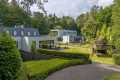
After selecting the equipment you will require, you will need to determine where you will be shooting. Is it indoors or outdoor? Are you going to be shooting landscapes or architecture? What kind of places are you going to be shooting? These factors will influence how you prepare for your shoot.
Lighting is an essential part of indoor photography. The best way to light a room is by using multiple lights. One large light should be placed above the subject, one near the middle and another closer to the floor.
You need to take into account wind conditions when outdoors. Drone pilots may experience problems if they are blown off course by windy conditions. Take off only when the weather permits.
Think about whether extra equipment is needed when choosing your location. These items will help you keep your drone level stable, so you don't lose quality shots.
An outdoor shoot should be between 10 am to 4 pm. You won't see too many people during this time but you will still have enough light to take great photos.
Drone photography is not only fun, but also extremely useful in capturing breathtaking aerial photos. By following some simple steps, you can start creating amazing images today!
Which drone do you recommend for beginners?
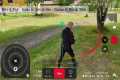
A drone that doesn't require special skills to fly is the best for beginners. These include drones with an FPV (first person view) camera. This allows you to remotely control your drone from your smartphone.
Quadcopters can be used for aerial photography. Multirotor models are better suited for advanced features like obstacle avoidance and autonomous flight mode.
The drones come in two price categories: low-cost ones under $100 and high-end ones over $300.
The cheapest models usually come with a limited range and battery life, while the most expensive ones feature better performance and longer flight times.
Because they are easier to control and operate, most beginners choose to purchase cheaper models. If you plan on spending hours flying your drone, you might be interested in a higher-end model.
What time is best for drone photography?
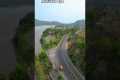
When there's not much activity on ground, a drone can capture aerial images at sunrise and sunset.
Drones are great tools for capturing beautiful photos of landscapes and the sky above them. However, drones may not be allowed to fly at nights so you will miss out on some spectacular views.
If you want to make sure that you capture all the photo opportunities, fly during sunset and sunrise hours. These times allow for stunning shots of nature and are often more popular because there are fewer cars on roads and fewer people.
You'll find that you can shoot at lower levels of light, which makes it easier for you to take pictures without worrying about overexposing.
You won't need to contend with strong winds, rain or snow. These factors make daylight perfect for shooting photos with a drone.
If you are looking for night scenes to capture, then flying at night is a good option. This will give a unique view of the cityscape.
Is it permissible to fly drones at night?
Drones are growing in popularity every day. Drones can provide stunning aerial shots of our homes, businesses, as well as providing amazing video footage of sporting events, as well as being useful in surveying large areas and delivering goods. However, drones are still subject to very few regulations. Some states in America have banned drones completely, while others have put restrictions on their operation.
While flying drones during daylight hours are relatively safe, there are still risks involved when operating them at night. Your safety and that of other pilots may be endangered if you fly your drone at night. This is due to the difficulty of spotting hazards and obstacles. A pilot's mistakes could lead to an accident.
Drones are becoming more and more popular. It is therefore important that we learn how they can be safely operated. There are two types of drones currently available: fixed-wing androtary-wing. Fixed-wing drones are typically smaller and easier to pilot than rotary-wing ones. A fixed-wing model typically has four propellers whereas a model with a rotary wing has only one.
To avoid accidents, you should familiarize yourself with the local laws concerning drone usage. It is also important that you ensure that your drone is within your direct line of sight at all time. A key safety tip is to make sure your drone has lights that flash green and red. This will make it easier for you spot potentially dangerous objects. Your camera lens should be protected against any scratches if you plan to take pictures. Also, it is advisable to wear protective goggles whenever you are flying your drone.
Drone flying at night presents a variety of dangers including collisions with power lines and trees as well as buildings. A drone could also become lost or fall from the skies. Avoid obstacles and stay close to your drone. Drones also are susceptible to sudden weather changes or wind gusts. These factors can disrupt your drone's flight and cause it to crash land.
Drones are becoming more and more popular. However, there are potential health hazards. These devices emit noise that can cause headaches and damage to the ears. Drone vibrations can cause serious damage to the human body. Finally, flying drones without an operator license puts you at risk of fines and legal action.
Follow these guidelines to avoid drone accidents. When flying your drone, you must keep it within your line of sight. You should adhere to any restrictions placed by airport authorities if you fly near airports. Flying your drone over water increases the risk of a collision.
Which drone can be used to carry a DSLR?
Drones are increasingly useful for everyday tasks. Already, drones are equipped with cameras capable of aerial photography.
Drones aren't something that people use very often, even though they've been around for years. Drones are expensive and noisy, making them difficult to control.
We created the Drone-A1. This quadcopter is the first to be fully autonomous and specifically designed for photographers.
The Drone-A1 is equipped with an HD camera capable of taking stunning photos and videos. With its powerful onboard computer, the Drone-A1 can track a subject and not need human intervention.
You can now focus on taking great photos while the Drone-A1 will take care of hovering, flying and following your subject.
You'll love how easy it is to capture amazing shots with the Drone-A1, thanks to our exclusive Smart Follow feature. Point the Drone-A1 towards your subject, and it will automatically track him or her and keep the distance between the two of you constantly.
The Drone-A1 allows you to shoot anywhere and at any time. The Drone-A1 will eliminate the need for you to have a steady hand and know exactly where your subject goes.
The Drone- A1 also has a GPS, which allows you to share photos with family and friends. You can share your pictures with anyone around the globe.
The Drone-A 1 is a great choice for anyone who loves to take photos for fun or as a professional photographer.
Statistics
Homes with aerial images sold 68% faster than homes with standard images. (alexdronephotography.com)
Here's proof: according to an analysis of FAA drone registration numbers by drone market research and data group Drone Industry Insights, DJI had a 76.8% market share in the U.S. (thedronegirl.com)
Greater than 50% throttle stick position generates positive thrust, but less than 50% throttle stick position reverses the direction of the motors, allowing upside-down flying! (photographypro.com)
A grey card is just a piece of thick paper that is a specific shade of grey (18%), which will be the foundation on which we choose our color temperature. (dronegenuity.com)
Though the Mavic 3 is about 50% heavier than the Mavic Air 2, it's still conveniently sized. (nytimes.com)
The two most common types of camera used to make time-lapses are DSLRs (Digital Single Lens Reflex) which are typically more expensive that point-and–shoot digital cameras.
DSLR cameras produce images that are more high-quality due to how light enters them. They are not ideal for video because they require manual focus, exposure and exposure settings.
Easy to use, point-and shot cameras, like those made by GoPro. However, videos with lower resolutions look grainy.
A consumer drone makes the best time-lapse camera. These small flying robots have become very popular as an affordable alternative for professional drones.
A drone is a remotely controlled aircraft that can fly autonomously and without human intervention. A drone generally uses one propeller to fly. Quadcopter drones could have multiple propellers.
A drone can not only capture aerial footage but also cinematic shots with a bird’s-eye view. For smooth handheld footage, drones may be outfitted to include a gimbal stabilizer.
To create a time-lapse, start recording while the drone hovers above your subject. The sky won't appear dark during the shot if the sun isn't directly overhead.
To achieve the desired effect, you can adjust the aperture and shutter speed. For example, you could set your shutter speed to 30 seconds for a sunset shot and keep the aperture wide open in order to capture as much natural daylight as possible.
The opposite approach is recommended for night shots. Use a slow shutter speed of 1 second and close the aperture to reduce the amount of light entering the camera. This technique creates a bright image where details are visible.