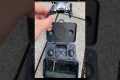
Got the Avata 2 drone to help shoot some real estate content. As my editing skills are weak I found so is my flying in a house. Both will get better.
By: Bryan Miller Title: Real Estate Drone Video Avata 2 Drone Sourced From: www.youtube.com/watch?v=N53HOsIl1TM
Here are the 3 best drones on Amazon in 2022
Frequently Asked Questions
How do I fly my drone?
Flying a drone requires practice. Even though drones are very stable compared to regular aircraft, it takes time for pilots to gain experience. We recommend that you practice indoors, or close to your house, for beginners.
You will need to be able to perform three skills when learning to fly a drone. These are hovering, takingoff, and landing.
Take Off
Taking off is simply lifting the drone into the air. The button on the controller should be pressed until the drone moves upward. When the drone has reached a certain height you can stop pressing the button.
Hovering
Hovering means keeping the drone steady in midair. To hover, hold down the left or right trigger while pressing the throttle. Tilt the controller to move the drone. Hold down both triggers.
Landing
Landing is the act of returning the drone safely to earth. Release the throttle and turn the controller toward the ground to land. The drone will eventually slow down, and then land.
If you feel comfortable flying your drone, take it out of the house. However, be careful not crash into anything.
Which are some great places to use a drone to take photos?
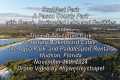
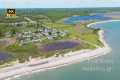
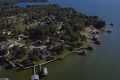
Drones have become extremely useful tools for capturing breathtaking images of nature and landscapes. Whether you want close-up shots of animals like birds and butterflies or to capture beautiful scenery, drones are ideal.
You can use drones in the most beautiful places: mountains, deserts. Drone enthusiasts often capture scenic views of their hometowns and other local attractions.
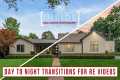
It is a good idea to shoot at night so that the lights can illuminate the surrounding area. This allows you to see new places. You might also consider shooting in other seasons, especially during winter when there is snow on the ground.
What are the advantages of drone photography?
Drone photography offers a unique way to capture photos and video. You must be aware that small aircraft can have their downsides.
The biggest disadvantage of flying drones are their cost. It can cost hundreds to thousands depending on which drone you buy.
To fly a drone safely, you will need certification and training.
Another downside is safety. Drones pose a danger because they are constantly in need of repair and maintenance. You could inflict serious injury or property damage if you lose control of your drone when taking photos or filming videos.
It is possible that you spend more time flying a drone than taking photos or filming footage. Additionally, your drone may not be able to fly in the airspace you have.
You can only fly your unmanned air vehicle within certain areas. You cannot fly higher than 400 feet, or within five miles of any stadiums, hospitals or schools.
Drones may not be for everyone. People feel nervous about flying drones because they fear that they will crash into the ground or fall from the sky. Some fear they might hit an object or another person.
If you don't feel comfortable flying a helicopter, you may want to stick with traditional aerial photography and videography techniques.
What time of day is best for drone photography?
A drone could capture aerial images during sunrise and sunset hours when there isn't much activity on the ground.
Drones are great tools for capturing beautiful photos of landscapes and the sky above them. But sometimes drones aren't allowed to fly at night, so you miss out on spectacular views.
You can capture amazing photos by flying between sunrise and sunset. You have more chances to capture breathtaking shots of nature during these times because there are fewer cars driving and fewer people around.
It will also be easier to photograph in low light levels.
You won't need to contend with strong winds, rain or snow. These are all factors that make daylight great for photography with a drone.
If you are looking for night scenes to capture, then flying at night is a good option. This will give you a unique perspective of the cityscape below.
Is a drone worth the money?
If you're serious in starting your own business, it's essential to have a great product. You must have a great product if you want to be seen.
Photographers are not selling themselves. They are trying to convince others to buy their stuff, rather than convincing themselves.
However, if you want to start your own business, you won't have the luxury of waiting for others to allow you to do so. You will have to find customers now.
It is necessary to tell a compelling tale that explains why people should choose your products.
You'll also need to come up with an effective strategy for marketing those products. You might still fail if you don't price your products correctly, even after all this.
There are two options. You may charge too much. Either way, you're probably making a mistake if you don't know what you're charging.
To avoid these errors, think like a businessman to avoid them. You don't have to become a billionaire. It means that you need to learn how value your time, money and effort.
Additionally, strategies must be developed to measure success in your business.
Once you know the price, you can start building the best product. It should be a product that can make sense creatively and financially.
A product that solves problems and provides real benefits.
One that stands out from the rest.
And once you've built that product, you'll be ready to launch it. Then you can start building your brand.
You can take aerial photos with your drone. It will help you become a better photographer. It will also help you improve your photography skills. It will also help you to grow your business.
What information should I have about drone photography laws?
Drone flights can be regulated by Federal Aviation Administration. Local laws could also be applicable to drone flights. For details on drone flight regulations, please contact your state's transportation agency.
Most drone owners will need to apply for a FAA licence. The FAA has established guidelines for licensing. You can learn more about these guidelines here.
Some states require drone operators to register their drones with the government. To learn more, visit our Guide to Drone Registration.
What kind of drones do professional pilots use?
Drones offer amazing opportunities for aerial photography. Drones can be used to capture images and record video footage from the sky. But drones also come in handy when surveying land and taking measurements.
These devices are often used for commercial purposes such as mapping large areas or checking construction sites. These devices can be used for many other purposes, however.
Drones can also be great entertainment for friends and family. There are countless ways to fly these machines and explore new places. Drones are also perfect for taking photos and videos of special events and celebrations.
Drones can be used in a variety of ways. If you've been wondering how to make the most out of your flying machine, keep reading to learn more about these incredible tools.
Statistics
Greater than 50% throttle stick position generates positive thrust, but less than 50% throttle stick position reverses the direction of the motors, allowing upside-down flying! (photographypro.com)
Here's proof: according to an analysis of FAA drone registration numbers by drone market research and data group Drone Industry Insights, DJI had a 76.8% market share in the U.S. (thedronegirl.com)
Among the biggest improvements, the Skydio 2+ has over the standard 2 is a 20% longer battery life, longer range if you add the Beacon, and a neat AI video creation tool called Keyframe. (thedronegirl.com)
A grey card is just a piece of thick paper that is a specific shade of grey (18%), which will be the foundation on which we choose our color temperature. (dronegenuity.com)
Again, no stabilization is applied, and the 50% throttle stick position cuts the power to the motors. (photographypro.com)
The two most common types of camera used to make time-lapses are DSLRs (Digital Single Lens Reflex) which are typically more expensive that point-and–shoot digital cameras.
Due to the way light enters the camera, DSLR cameras tend to produce better-quality images. However, video requires manual focus and exposure settings.
Point-and-shoot cameras, such as those made by GoPro, are easier to operate for beginners. The lower resolution makes videos look grainy.
A consumer drone is the best camera to time-lapse. These tiny flying robots are a popular alternative to professional drones.
A drone is a remotely controlled aircraft that can fly autonomously and without human intervention. Quadcopter drones may use multiple propellers. A drone will typically fly with one propeller.
A drone can provide aerial footage as well as cinematic shots. You can equip your drone with a stabiliser to capture smooth handheld footage.
For a time-lapse effect, you can start recording while your drone hovers above the subject. The sky won't appear dark during the shot if the sun isn't directly overhead.
To achieve the desired effect, you can adjust the aperture and shutter speed. For example, you could set your shutter speed to 30 seconds for a sunset shot and keep the aperture wide open in order to capture as much natural daylight as possible.
For night shots, the opposite approach would be taken. For night shots, use a slow shutter speed of 1 sec and close the aperture to reduce light ingress. This creates bright images that show details.