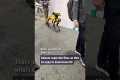
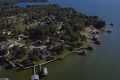
In this video I discuss my favorite drone to use for Real estate photography.
This goes to show you that you don't need to spend thousands of dollars in a drone that you'll probably have an accident. Which it happens.
This is why choosing a cheaper drone can save you a lot of money. Plus the Mavic Air 2 has all the features that you need in order for you to get the job done.
By: Daniel Berganza Title: The Best Drone YOU can get for Real Estate Photography Business (DJI Mavic Air 2) Sourced From: www.youtube.com/watch?v=P184Xd7LxYc
Check out the 3 highest-rated drones on Amazon Today!
Frequently Asked Questions
How much money do drone photographers make?
Photographers make more than $10k a gig depending on the length of their flights and where they are shooting. Shooting in remote areas, such national parks or forests can bring you upwards to $20-30 an hour.
An average person is paid $15-$25 an hr in retail. That means you could fly drones for $50-$75 if that's what you desire. There are still many ways to make even more. Drone pilots typically fly for companies that require them to travel across the country or even internationally.
You can charge anywhere from $100 to $300 per flight, depending on the time you spend flying and the distance you cover. This can add up quickly, but if you enjoy flying and love photography, it may be worth it for you.
What are the laws concerning drone photography?
The Federal Aviation Administration (FAA) regulates drone flights. Local laws and regulations may apply, in addition to those of the FAA. You can check with your state's transport department to find out what rules govern drone flights.
In most cases, drone owners need to get a FAA license. The FAA has guidelines for licensing. These guidelines can be found here.
Some states require drone operators to register their drones with the government. Learn more about drone registration in our Guide to Drone Registration.
Is it worth buying a drone for photography?
A great product is essential if you are serious about your business. If you're going to put yourself out there, you better ensure you've got a killer product.
Most photographers aren't selling their work. Instead of convincing others to buy their stuff they're trying convince them.
However, if you want to start your own business, you won't have the luxury of waiting for others to allow you to do so. You will have to find customers now.
It is necessary to tell a compelling tale that explains why people should choose your products.
Also, you will need to create a strategy for marketing these products. You might still fail if you don't price your products correctly, even after all this.
You might decide to charge too little. Or you may decide to charge too little. You're likely to make a mistake regardless of which way you go.
These mistakes can be avoided by thinking like a businessman. This doesn't necessarily mean that you need to be a capitalist. This simply means that you must learn to value your money, time and effort.
And you need to develop strategies for measuring the success of your business.
Once you are comfortable with pricing, it is possible to focus on building the most effective product. A product that's both profitable and creative.
A product that solves problems and provides real benefits.
One that is unique from the rest.
And once you've built that product, you'll be ready to launch it. And you'll be ready to build your brand.
It doesn't really matter if your goal is to fly a drone or not. Because it will help you get started as a photographer. You will be able to improve your skills. And it will help you grow your business.
Which drone to buy as a beginner?
A drone that doesn't require special skills to fly is the best for beginners. These drones include those equipped with an FPV camera that allows users to remotely control the drone using a smartphone app.
Quadcopters can be used for aerial photography. Multirotor models are better suited for advanced features like obstacle avoidance and autonomous flight mode.
Two types of drones can be distinguished in terms of their price: those that are cheap at $100 or more and those that are expensive at $300.
The cheapest models usually come with a limited range and battery life, while the most expensive ones feature better performance and longer flight times.
As they are simpler to use and handle, beginners tend to choose the cheapest options. However, you may consider purchasing a higher-end model if you plan to spend hours flying your drone.
How do I get started with drone photography?
There are many ways to get started with drone photography. You can start by buying a drone kit. It will come with everything you need in order to get started. They vary in price from $200 to $500 depending upon the model.
You can also build your own drone. Although this can be a bit complicated, it's still possible to create something that works well enough to take some decent photos and videos.
If you are interested in building your drone, we recommend you begin with a quadcopter. A quadcopter, like conventional helicopters has four propellers or rotors instead of the usual two.
A quadcopter takes less time to assemble, and is more reliable than a traditional helicopter. It is also easier to transport and purchase.
First, select the right components. You will need props, motors, batteries controllers and controllers. Be sure to select the right size and weight.
Next, you will need to choose which type of controller you want. Many different types are available, such as joysticks, touch screens, and remote controls. A drone with a built in camera is a good choice.
Once you've chosen the right parts, you're ready to assemble your drone. Pre-assembled kits are recommended to make it easier. You can build your drone on your own by following these steps.
Step1: Attach the battery pack
You'll need to connect the battery pack to the motor to start building your quadcopter. First, remove the cover plate from the bottom of the battery pack. Next, slide the battery in place.
Step2: Connect the motors
Next, you'll need to install the motors in the appropriate slots. Each motor must be in its assigned slot. Make sure the motors are facing forward when installing them.
Step 3: Install the propeller
Attach the propellers to your frame. Be sure to place them at equal distances.
Once you have completed all of these steps, your drone is now ready for testing! If you see no movement when you turn on the engine, double-check that the propellers are facing forward. Make sure there aren't any obstructions between the propellers.
Statistics
60 second video with branding, captions, contact information, and music Strip / Convenience / Neighborhood / Community Centers pricing per center (up to 400,000 sq ft) PLACE ORDER (dronebase.com)
Compared to the old days of the Phantom, this drone is super small, but it will likely require you to check a bag, the way a Mini 3 Pro could easily stow away in an oversized pocket. (thedronegirl.com)
A grey card is just a piece of thick paper that is a specific shade of grey (18%), which will be the foundation on which we choose our color temperature. (dronegenuity.com)
Again, no stabilization is applied, and the 50% throttle stick position cuts the power to the motors. (photographypro.com)
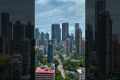
Homes with aerial images sold 68% faster than homes with standard images. (alexdronephotography.com)
Time-lapses can be made with two types of cameras: DSLRs (Digital Single Lens Reflex), and which are more expensive than point-and shoot digital cameras.
Because of the way light enters a DSLR camera, it tends to produce higher quality images. But when shooting video, they aren't ideal because they require manual focus and exposure settings.
Easy to use, point-and shot cameras, like those made by GoPro. Videos can look grainy due to the lower resolution.
A consumer drone is the best camera for time-lapsing. These small flying robots offer a cheaper alternative to professional drones.
A drone is an autonomous remote-controlled aircraft that can fly without the need for human intervention. A drone generally uses one propeller to fly. Quadcopter drones could have multiple propellers.
In addition to providing aerial footage, a drone can capture cinematic shots from a bird's eye view. For smooth handheld footage, drones may be outfitted to include a gimbal stabilizer.
Start recording while the drone hovers over your subject to create a time-lapse. The sky won't appear dark during the shot if the sun isn't directly overhead.
To achieve the desired effect, you can adjust the aperture and shutter speed. For example, you could set your shutter speed to 30 seconds for a sunset shot and keep the aperture wide open in order to capture as much natural daylight as possible.
You should use the opposite approach for night shots. To reduce light entering the camera's sensor, set the shutter speed at 1 second. This produces bright images with details clearly visible.