You've got check out the 3 highest-rated drones on Amazon while they're on sale
Frequently Asked Questions
How do I get started with drone photography?
There are several ways to start photographing using a drone. You can start by buying a drone kit. You'll get everything you need. They can range from $200 to $500 depending on the model.
The other option is to build your drone. Although this is not an easy task, it is possible to still create a drone capable of taking decent photos and videos.
We recommend that you start with a quadcopter if you want to build your own drone. A quadcopter, like conventional helicopters has four propellers or rotors instead of the usual two.
A quadcopter is simpler to assemble than a helicopter. It is also easier to transport and purchase.
First, choose the right parts. Motors, batteries, controllers and props will all be required. It is important to choose the correct size and weight.
Next, choose the controller that you want to use. There are many options available. These include joysticks, touch screens and remote controls. A drone with a built in camera is a good choice.
After you've selected the right parts, you can begin to assemble the drone. A preassembled kit is a great option to save time and make things simpler. You can build your drone on your own by following these steps.
Step 1: Attach battery pack
To build your quadcopter, you will need to connect the battery pack and the motor. To begin, remove the cover plate at the bottom of your battery pack. Next, slide your battery into place.
Step2: Connect your motors
Next, place the motors in their appropriate slots. Each motor must be in its assigned slot. Install the motors facing forward, perpendicular and in the designated slot.
Step3: Installing the propeller
You will then need to attach your propellers onto the frame. You should position them at equal distances.
After completing all these steps, you're finally ready to test your new drone! If there is no movement when the engine turns on, check that the propellers point forward. Make sure the propellers are free from obstructions.
What kind of drone do professionals use?
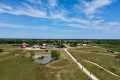
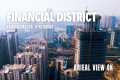
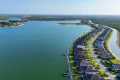
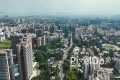
Drones offer amazing opportunities for aerial photography. Drones are extremely useful in capturing aerial images and video footage. Drones can also be useful in surveying land and taking measurements.
These devices are often used commercially to map large areas, or inspect construction sites. However, there are plenty of uses for them beyond business applications.
For example, drones can provide great entertainment value for families and friends. You have many options to fly these machines, and even explore new areas. Drones can also be used to capture photos and videos of special events or celebrations.
The sky is the limit when it comes to using drones. You might be wondering how to get the most out your drone. Keep reading to find out more.
Can drones be used to take night pictures?
That's the right answer. But we have been doing it for years. We have been taking photos at night for many decades.
But there's a catch. Night photography requires special equipment. It's impossible to achieve night photography with a camera less than $10,000.
Light bounces back when it hits an object in a series wavelengths.
These wavelengths overlap and combine to form white light at very long distances from the source.
This is why we can see colors even though it is thousands of miles away.
Instead, light reflects narrow bands of wavelengths when it strikes objects that are close to the source. These wavelengths bounce directly back to us and do not overlap.
It means that the object closer you are, the brighter it will appear. This is why objects seem to glow when they are exposed to black light.
How much energy the object absorbs affects how much light is reflected. When light hits an object it will reflect more blue light than red.
The human eye is more sensitive to blue light than objects, so objects appear bluer when they are viewed under blacklight.
This has to do with drones. A very bright light source is required if you are trying to capture dark areas, such as a forest, or cave.
A standard lamp will not provide enough illumination to illuminate the whole scene. You will get a shadowed image, nothing more.
If you want a good picture, you'll need to use a strobe instead. And since you don't want to carry around a huge flashgun, you'll need to buy a small one.
Speedlights are also known for their flashes of light that create a stroboscopic effect.
You can see the light pulse across your screen when we say "stroboscopic". The faster the rate, the better quality of the picture.
We won't cover how to set-up a Speedlight. But you can find many tutorials online.
We will tell that it is important to have a bright and even lighting source in order to capture clear images.
You should aim the beam at a 45 degree angle to achieve this. The flashgun can be moved to adjust the intensity of the light.
Once you have set the setting that is right for you, hold the gun steady as the shutter release button is pressed.
Next, close to the subject, release the shutter. This will fire another flashgun burst.
The first burst is the most visible, and the second captures the moment after the burst has ended.
The end result is a continuous exposure with both bursts light and recorded.
Now that we know how to capture images during the daylight, let's learn how to do night photography.
So far I have covered all you need to know about taking night photos.
However, there is still one thing that needs to be addressed: the color balance.
Most people assume that nighttime images will not be dark enough.
It's true. But it also applies to daytime photographs.
The camera will always record darker images regardless of whether you are taking photos at dawn and dusk.
What drone can be used to take aerial photos?
Two options are available if you plan to do aerial photography. You can either rent or buy a large camera package that includes a stabilizer and gimbal, or you could purchase a more expensive camera package.
The first option is great if you plan to shoot a video or film because it gives you complete control over how the shots look. The second option is more expensive and more dependent on the pilot.
What happens if you want the shot to look perfect even though the camera isn't in your hands? That's where drones come in.
A drone can be described as a tiny, unmanned aircraft that can fly independently and take photos and videos without being directed by its operator.
They are versatile and can fly close to structures and buildings to capture photos or film footage. They can also fly low over crowds to capture pictures of people.
Drones have incredible capabilities for aerial photography, videography, and other uses. Drones are also great for marketing, as they can be used to create stunning visuals that would otherwise take a lot more manpower and equipment.
They can be placed in strategic places to capture amazing imagery. They can also fly remotely, making them extremely easy to operate.
One example is hiring drones for weddings. These wedding photographers can use their drones to fly above the ceremony area and capture amazing photos of the bride & groom.
They can also fly them over to guests and capture portraits of loved ones. They can fly them to the reception area to capture stunning views.
These activities are perfect for promotional material and event coverage. You can also use drones to create short films. You could use one to show clients why your company is better than yours.
These are all reasons drones have become increasingly popular in aerial photography and videography. So, if you're looking to become a professional photographer, then a drone might be the answer to your prayers.
What drone should I buy for a beginner?
These drones are great for beginners as they don't require any advanced skills. These include drones equipped with an FPV (first-person view) camera, allowing users to control the drone via a smartphone app remotely.
Some quadcopters were specifically designed for aerial photography. You may choose a multirotor if your goal is to explore advanced features such an autonomous flight mode or obstacle avoidance.
There are two types: the cheap drones that cost less than $100 and the more expensive drones that cost over $300.
The cheapest models typically have a limited range or battery life. The most expensive models, however, offer greater performance and longer flight time.
The majority of beginners prefer to start with the cheaper options, as they are more easy to use and manage. If you plan to fly your drone for many hours, you might consider buying an expensive model.
What should I know about the laws regarding drone photography?
Drone flights can be regulated by Federal Aviation Administration. Local laws may also apply in addition to the FAA regulations. For details on drone flight regulations, please contact your state's transportation agency.
In most cases, drone owners are required to obtain a license from the FAA. The FAA has established guidelines for licensing. Learn more about these guidelines by clicking here.
In some states, drone operators must register their drones with the government. Check out our Guide to Drone Registration for more information.
Statistics
Again, no stabilization is applied, and the 50% throttle stick position cuts the power to the motors. (photographypro.com)
Compared to the old days of the Phantom, this drone is super small, but it will likely require you to check a bag, the way a Mini 3 Pro could easily stow away in an oversized pocket. (thedronegirl.com)
60 second video with branding, captions, contact information, and music Strip / Convenience / Neighborhood / Community Centers pricing per center (up to 400,000 sq ft) PLACE ORDER (dronebase.com)
Homes with aerial images sold 68% faster than homes with standard images. (alexdronephotography.com)
Among the biggest improvements, the Skydio 2+ has over the standard 2 is a 20% longer battery life, longer range if you add the Beacon, and a neat AI video creation tool called Keyframe. (thedronegirl.com)
The two most common types of camera used to make time-lapses are DSLRs (Digital Single Lens Reflex) which are typically more expensive that point-and–shoot digital cameras.
DSLR cameras also tend to produce higher-quality images due to the way light enters the lens. However, video requires manual focus and exposure settings.
Point-and-shoot cameras, such as those made by GoPro, are easier to operate for beginners. Videos can look grainy due to the lower resolution.
The best camera for time-lapsing is a consumer drone. These small flying robots make a great alternative to expensive professional drones.
A drone is a remotely controlled aircraft that can fly autonomously and without human intervention. A drone generally uses one propeller to fly. Quadcopter drones could have multiple propellers.
Drones can be used to capture cinematic footage from a bird's-eye view. For smooth handheld footage, drones may be outfitted to include a gimbal stabilizer.
You can create a time lapse by recording the drone above your subject. If the sun is not directly overhead, the sky will not appear dark during the shot.
You can adjust both the shutter speed or aperture to get the desired effect. You could, for instance, set the shutter speed to 30 seconds when you're shooting a sunset and leave the aperture wide open so that as much natural light is allowed in.
The opposite approach should be used for night shots. Use a slow shutter speed of 1 second and close the aperture to reduce the amount of light entering the camera. This creates bright images that show details.