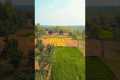
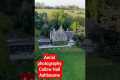
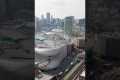
In this episode, I’m showcasing a full gallery of aerial photos captured during Day 3 of flying. No video clips — just clean, high-quality drone photography from unique angles and beautiful locations.
Each shot reflects the progress I’ve made and the breathtaking views I’ve had the chance to capture.
Let me know your favorite photo in the comments, and subscribe for more drone content, flights, and creative visuals!
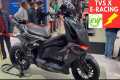
Look at the 3 most popular drones on Amazon in 2022
Frequently Asked Questions
Can drones capture night shots?
Yes, that's the answer. It's something we have been doing for years. Since the 1970s, we have been taking photographs at night.
There is one catch. Night photography requires specialist equipment. You can't do it with a camera that costs less then $10k.
When light strikes an object, it bounces back in various wavelengths.
These wavelengths merge to form white light at long distances from source.
This is why we can see colors even though it is thousands of miles away.
The opposite is true. When light strikes an object very close to its source it reflects in narrow wavelengths. These wavelengths bounce directly back to us and do not overlap.
This means that objects are brighter if they are closer together. This is why objects appear to glow under black light.
The amount of light reflected depends on how much energy the object absorbs. So when light hits an object, it may reflect more blue light than red light.
The human eye is sensitive to blue light the most so objects appear brighter when viewed in black light.
This is what drones have to do. A very bright light source is required if you are trying to capture dark areas, such as a forest, or cave.
A regular lamp will not be powerful enough for the illumination of the entire scene. It will only create a shadowed scene.
If you want a good picture, you'll need to use a strobe instead. You won't want to lug around a large flashgun so you will need a smaller one.
These lights are also known as speedlights, because they emit flashes so fast they create a stroboscopic effect.
You can see the light pulse across your screen when we say "stroboscopic". The faster the rate, the better quality of the picture.
We won't discuss how to set up a Speedlight here. There are many tutorials on the internet.
We will tell you to make sure that the subject is properly illuminated in order for a clear photograph.
To achieve this, you should aim the beam at a 45-degree angle. You can adjust light intensity by moving your flashgun's head.
Once you have chosen the best setting, hold your gun steady while you press the shutter release.
Once the flash has reached the subject's area, press the shutter yet again. This will cause the flashgun's flash to go off again, causing it to send out another blast of light.
The first burst will illuminate the subject. However, the second burst will capture the moment after it has passed.
The end result is a continuous exposure with both bursts light and recorded.
Now that you are able to take photographs during the day, let us move on to night photography.
I have so far covered everything about how to photograph things at night.
But there's still one thing left to cover: the color balance.
Most people assume that any images taken at night will look too dark.
Yes, it is true. However, it can also be applied to daytime shots.
It doesn't matter whether you're taking pictures at dawn or dusk; the camera will always record a darker image.
Which drone to buy as a beginner?
The best drones for beginners are those that do not require any special skills to fly them. These include drones equipped with an FPV (first-person view) camera, allowing users to control the drone via a smartphone app remotely.
Some quadcopters were specifically designed for aerial photography. You may choose a multirotor if your goal is to explore advanced features such an autonomous flight mode or obstacle avoidance.
There are two types in price of drones: cheap drones under $100, and more expensive drones over $300.
The cheapest models have a shorter range and a shorter battery life. However, the best models offer better performance and longer flight times.
The majority of beginners prefer to start with the cheaper options, as they are more easy to use and manage. You might want to spend hours flying your drone, so you might look into purchasing a more expensive model.
What are the drawbacks to drone photography?
Drone photography can be a fun way to capture images or video. However, there are some downsides to flying small aircraft.
Drones can be expensive. This is the main drawback. It can cost hundreds to thousands depending on which drone you buy.
A drone pilot must be trained and certified. This means that you will need to invest your time and money in order to learn how to safely fly them.
Another downside is safety. Drones can be dangerous as they need to be repaired and maintained constantly. It is possible to injure or cause property damage by losing control of your drone while you are taking photos.
It is possible that you spend more time flying a drone than taking photos or filming footage. Additionally, your drone may not be able to fly in the airspace you have.
Some local governments restrict where you can fly your unmanned aerial vehicle. You cannot fly more than 400 feet and within five miles from any airports, stadiums hospitals, schools or prisons.
Drones may not be for everyone. People feel nervous about flying drones because they fear that they will crash into the ground or fall from the sky. Some fear they might hit an object or another person.
If you don't feel comfortable flying a helicopter, you may want to stick with traditional aerial photography and videography techniques.
What kind of drones do professional pilots use?
Drones can be used to take amazing aerial photos. They can capture video footage from above and also take photos. But drones also come in handy when surveying land and taking measurements.
These devices are commonly used commercially, such as to map large areas or check construction sites. There are many uses for these devices beyond their business purposes.
Drones, for example, can be a great way to entertain friends and families. These drones can be flown in many ways, allowing you to explore new areas. Drones can be used to photograph and record special events and celebrations.
Drones are truly limitless. Continue reading to find out how you can get the most from your drone.
What is the best way to capture drone photography?
Drone photography is more than just flying a camera. Planning and executing a successful drone shoot requires a lot of considerations. It all starts with choosing the right place and determining how much insurance is required to make an aerial shoot a success.
The most important thing you can do is make sure that your drones are allowed to fly in the location you want to photograph. This involves finding out if there are restrictions regarding where you can fly or where your drone can be operated. You may need to apply to fly your drone in restricted areas if there are.
Also, you should check the regulations in your country. You may need a permit to fly drones in some countries. Others limit the number you can make in a given time period.
You will need permission to fly drones. After each flight, you will also need to locate a safe place to land the drone. You can rent a landing spot from local businesses for around $10 per hour. Also, you will have storage space. Another option is to buy a dedicated landing platform.
Before you can even start shooting, you need to choose the drone that you want to use. There are many drones with different capabilities and features. Fixed-wing drones are cheaper and easier to control, while multirotors are more powerful, stable, and reliable.
You'll first need to decide what kind of drone to use. Next, you will need to select the equipment that you will require. The basic equipment for a drone camera is a remote controller, gimbal, batteries, memory cards, and remote controller.
Gimbals are used to stabilize the camera when it's in flight. They make it possible to take sharp pictures without worrying about the device falling or being shaken. The drone's body attaches to the gimbal to ensure that the camera stays steady.
Remote controllers let you control your drone remotely. These devices come with joysticks as well as buttons that allow the drone to be moved forward, backward, left, right, or left. You can also adjust its altitude.
Batteries power the drone’s motors and camera, while memory cards store photos taken with the drone. You will need to ensure enough battery life so that your drone can take clear photos.
Once you've selected the equipment you'll need, you'll need to figure out where you'll shoot. Do you prefer to shoot outdoors or indoors? Do you plan to shoot architecture or landscapes? What are you planning to shoot? These are all factors that will affect the preparations you make for your shoot.
Lighting is an essential part of indoor photography. Multiple lights are the best way of lighting a room. Try placing one large light above the subject, another near the middle, and a third closer to the floor.
When outdoors, wind conditions are important. Drone pilots who are flying drones on windy days may be at risk of being blown off their course. Avoid taking off during stormy weather.
If you are going to be bringing extra equipment like tripods or stands, consider whether this is something that you will need. These items will keep your drone stable and allow you to capture high quality images.
For an outdoor shoot, it's advisable to work between 10 am and 4 pm. Although there won’t be as many people around at this time, it will still provide enough light for stunning photos.
To conclude, drone photography isn't just fun and incredibly useful for capturing stunning aerial photographs. By following some simple steps, you can start creating amazing images today!
How do I get started with drone photography?
You have many options to begin photographing with a drone. You can start by buying a drone kit. You will get everything you need to get started. They vary from $200 up to $500, depending on which model.
Another option is to build your own drone. It's possible to make a drone that takes decent photos and videos, even though it can be complicated.
A quadcopter is the best choice for anyone who wants to build their own drone. Like conventional helicopters, quadcopters have four rotors or propellers.
It is much easier to assemble and maintain a quadcopter than a helicopter. It is also easier to transport and purchase.
First, select the right components. You will need props, motors, batteries controllers and controllers. Pick the correct size, weight and type.
Next, decide which controller you would like to use. Many different types are available, such as joysticks, touch screens, and remote controls. A built-in camera is an option, as you don’t need to attach a separate device. We recommend buying one.
Once you've chosen the right parts, you're ready to assemble your drone. A preassembled kit is a great option to save time and make things simpler. However, you can also build your own drone by following a few steps.
Step 1: Attach the battery pack
For your quadcopter to be built, you'll need the battery pack connected to the motor. Remove the cover plate on the bottom side of the battery. Slide the battery into its place.
Step2: Connect the motors
Next, place the motors in their appropriate slots. Each motor should be installed in its own slot. Install the motors facing forward, perpendicular and in the designated slot.
Step3: Installing the propeller
Finally, you'll need to attach the propellers to the frame. Make sure they are at the same distance apart.
Now you are ready to test your drone. If the engine does not move, ensure that the propellers are facing forward. Make sure there aren't any obstructions between the propellers.
Statistics
A grey card is just a piece of thick paper that is a specific shade of grey (18%), which will be the foundation on which we choose our color temperature. (dronegenuity.com)
60 second video with branding, captions, contact information, and music Strip / Convenience / Neighborhood / Community Centers pricing per center (up to 400,000 sq ft) PLACE ORDER (dronebase.com)
Regional & Super Regional Centers pricing per center (400,000+ sq ft) PLACE ORDER (dronebase.com)
Again, no stabilization is applied, and the 50% throttle stick position cuts the power to the motors. (photographypro.com)
Greater than 50% throttle stick position generates positive thrust, but less than 50% throttle stick position reverses the direction of the motors, allowing upside-down flying! (photographypro.com)
Tips for Beginners: How To Take Amazing Drone Pictures
Tips for taking great drone photos:
Space is essential for safe flying of your drone. Keep it away form trees, buildings, and power lines.
Before you begin flying, be sure to know where you're going. Drone flying can make it easy to lose your way. If you don't know where you've flown, you could end up somewhere dangerous, like a cliff edge or in someone's backyard.
Keep your drone safe! Always keep your drone close to you to see what's happening around you. Never fly at night or under poor weather conditions (like heavy rain).
Bring extra batteries if you plan to do long flights. Keep spare batteries on hand in case you need them. You won't run low on juice during flight.
High quality lenses are recommended. Clearer pictures are possible with higher resolution lenses. A camera lens with a low resolution, such the one found on most smartphones, may blur the image.
Start small. Start small with your first video. After feeling confident with these, you can go on to making longer videos.
Avoid using your drone indoors. Drones were not made to be used in indoor environments. They can cause damage on walls, furniture, and many other objects.
Practice makes perfect! Try different things with your drone. You can use your drone to capture different angles on the same scene. Fly outside to practice your flying skills.
Get creative! It is easy to believe that photography has to be a set of rules.
Learn more information about your camera settings. Cameras are equipped with many advanced features. These settings can increase the quality of your images.
Be patient! Be patient!
Have fun! Remember why you bought your drone in the first place. It can be fun to fly your drone.
Your work is welcome to be shared! Post your best shots to social media sites like Facebook, Instagram, Twitter, and Pinterest. Let other photographers know how much it was fun!
Keep learning! Read books and magazines about photography. You can also watch tutorials online. 15. Make sure you are safe Make sure you are following all safety precautions before you go. Check that your drone has sufficient battery life and that its landing gear functions properly. Be sure to follow all FAA regulations.
Find your style! You'll be able create your style once you've learned the basics. Try different styles and techniques until one works for you.
Apps! You can easily download free photo editing apps to your smartphone. These tools will allow you to easily enhance your photos.
Keep taking notes! Keeping track of everything you learn from this article can help you remember it better. Note important points in your notebook or journal.