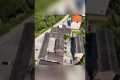
My DJI Mini 4 Pro's first night flight test using its night vision mode was nothing short of spectacular. As the drone ascended into the twilight sky looking at the planet Venus, the night vision mode activated. The downward-facing LED provided a clear view of the ground, ensuring safe navigation even in low-light conditions. The night vision mode captured stunning footage, revealing details that would otherwise be lost in the darkness. The test flight demonstrated the Mini 4 Pro's impressive capabilities, proving it to be an excellent choice for night-time aerial photography and videography
By: Alan in a Hat Title: First flight at night Mini 4 pro Sourced From: www.youtube.com/watch?v=6bIxBEcCK-4
Check out the 3 best drones on Amazon while they're on sale
Frequently Asked Questions
Where are the best places to take photos with a drone?
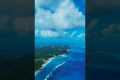
Drones are a great tool for taking stunning photos of nature and landscapes. Whether you want close-up shots of animals like birds and butterflies or to capture beautiful scenery, drones are ideal.
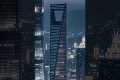
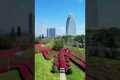
Mountain, deserts, lakes and oceans are all great places to use drones. Drone enthusiasts love to capture picturesque views of their home and other local attractions.
Try shooting at night, when the lights illuminate the landscape. This will allow you to discover new locations. You could also shoot during other seasons, especially winter when snow blankets.
Which drone to buy as a beginner?
These drones are great for beginners as they don't require any advanced skills. These include drones that have an FPV (firstperson view) camera. Users can remotely control the drone with a smartphone application.
Quadcopters can be used for aerial photography. A multirotor model might be a better choice if you want to explore advanced features, such as obstacle avoidance or autonomous flight mode.
In terms of price, there are two types of drones; cheap ones that cost under $100 and expensive ones that cost above $300.
The cheapest models often have limited range and battery life. But the best models are more reliable and can fly longer distances.
As they are simpler to use and handle, beginners tend to choose the cheapest options. If you plan to fly your drone for many hours, you might consider buying an expensive model.
How much money do drone photographers make?
Photographers make more than $10k a gig depending on the length of their flights and where they are shooting. Shooting in remote areas, such national parks or forests can bring you upwards to $20-30 an hour.
Retail workers make $15-25 an hour, so you could easily earn $50-$75 flying drones. There are many opportunities to make even more. Companies that require drone pilots to fly all over the country or internationally will often hire them.
Depending on how long you fly and how far you travel, you can expect to pay $100-$300 per flight. This can add up quickly, but if you enjoy flying and love photography, it may be worth it for you.
How do I fly my drone
The best way to learn how to fly a drone is by practicing. Pilots need to practice flying drones. They are far more stable than regular aircraft. If you are a beginner, it is advisable to practice indoors and close to your home.
You will need to be able to perform three skills when learning to fly a drone. These are taking off, hovering and landing.
Taking Off
You simply lift the drone up into the air by taking off. You can do this by pressing the button on controller until the drone begins moving upward. When the drone has reached a certain height you can stop pressing the button.
Hovering
Hovering is a way to keep the drone still in midair. To hover, hold down the left or right trigger while pressing the throttle. By holding down both triggers, you can tilt the drone to move it.
Landing
Landing means returning the drone to earth safely. To land, release your throttle and tilt the controller down toward the ground. The drone will eventually slow down, and then land.
If you feel comfortable flying your drone, take it out of the house. Be careful not to crash into any object.
Is it worth buying a drone for photography?
If you're serious in starting your own business, it's essential to have a great product. If you plan to promote your business, make sure you have a great product.
The problem with most photographers is that they're not selling themselves. They try to convince someone else to purchase their stuff rather than convincing them to do it.
You won't be allowed to wait for anyone else when you start your own business. You will need to get out there and find customers immediately.
It is necessary to tell a compelling tale that explains why people should choose your products.
The strategy you use to market these products will also be important. You might still fail if you don't price your products correctly, even after all this.
You might decide to charge too little. You may charge too much. Either way, you're probably making a mistake if you don't know what you're charging.
These mistakes can be avoided by thinking like a businessman. That doesn't mean you have to become a capitalist. This simply means that you must learn to value your money, time and effort.
It is important to create strategies that will measure the success and failure of your business.
Once you've got a handle on pricing, you can finally focus on building the best possible product. A product that makes sense both financially and creatively.
Product that solves problems and delivers real benefits.
One that is different from all others.
And once you've built that product, you'll be ready to launch it. Now you are ready to build your business.
So whether or not you want to take pictures with a drone, you'll want to consider getting one. It will help you become a better photographer. It will allow you to enhance your skills. And it will help you grow your business.
Statistics
Regional & Super Regional Centers pricing per center (400,000+ sq ft) PLACE ORDER (dronebase.com)
A grey card is just a piece of thick paper that is a specific shade of grey (18%), which will be the foundation on which we choose our color temperature. (dronegenuity.com)
Compared to the old days of the Phantom, this drone is super small, but it will likely require you to check a bag, the way a Mini 3 Pro could easily stow away in an oversized pocket. (thedronegirl.com)
Again, no stabilization is applied, and the 50% throttle stick position cuts the power to the motors. (photographypro.com)
60 second video with branding, captions, contact information, and music Strip / Convenience / Neighborhood / Community Centers pricing per center (up to 400,000 sq ft) PLACE ORDER (dronebase.com)
Time-lapses can be made with two types of cameras: DSLRs (Digital Single Lens Reflex), and which are more expensive than point-and shoot digital cameras.
DSLR cameras produce images that are more high-quality due to how light enters them. Videography is not as easy because you need to manually focus and adjust the exposure.
Beginners will find it easier to use point-and shoot cameras like the GoPro. However, the lower resolution means videos look grainy.
A consumer drone makes the best time-lapse camera. These tiny flying robots are a popular alternative to professional drones.
A drone, a remote controlled aircraft, is one that can fly independently of human intervention. Quadcopter drones may use multiple propellers. A drone will typically fly with one propeller.
A drone can also capture aerial footage and cinematic shots from a bird’s eye view. To capture smooth handheld footage, drones can be outfitted with a stabilizer.
To create a time-lapse, start recording while the drone hovers above your subject. The sky won't appear dark during the shot if the sun isn't directly overhead.
You can adjust both the shutter speed or aperture to get the desired effect. For example, you could set your shutter speed to 30 seconds for a sunset shot and keep the aperture wide open in order to capture as much natural daylight as possible.
You should use the opposite approach for night shots. To reduce light entering the camera's sensor, set the shutter speed at 1 second. This produces a bright image that makes details visible.