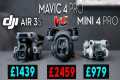
You've got check out the 3 highest-rated drones on Amazon Today!
Frequently Asked Questions
Can drones take night photos?
The answer to that question is yes. It's something we have been doing for years. We have been taking photos at night for many decades.
But there is a catch. Night photography requires specialized equipment. There's no way to do it with any camera that costs less than $10k.
A series of wavelengths are created when light hits an object.
These wavelengths combine to create white light at very distant distances from the source.
This is how our eyes are able to see colors even when the sun is miles away.
Contrary to popular belief, light that strikes objects close to their source reflects in a narrow range of wavelengths. These wavelengths bounce back straight to us, without overlapping.
This means that objects appearing brighter are closer together. This is how objects glow when exposed to black light.
The energy that an object absorbs will determine how much light is reflected. If light hits an object, it may reflect less red light than more blue.
The human eye is more sensitive to blue light than objects, so objects appear bluer when they are viewed under blacklight.
This is what drones have to do. If you're trying to photograph something dark, such as a forest or a cave, you need to use a very bright light source.
A standard lamp will not provide enough illumination to illuminate the whole scene. It will only give you a shadowed image and nothing else.
If you want a good picture, you'll need to use a strobe instead. A small flashgun is better than a big one, as you don't need it.
These lights are called speedlights due to the fact that they produce flashes light so fast, they can create a stroboscopic effect.
You can see the light pulse across your screen when we say "stroboscopic". The better the picture, the faster the rate.
We won't cover how to set-up a Speedlight. But there are plenty of tutorials online.
We will tell you that to capture a clear picture, you must ensure that the subject is illuminated evenly.
To achieve this, you should aim the beam at a 45-degree angle. You can adjust light intensity by moving your flashgun's head.
Once you have chosen the best setting, hold your gun steady while you press the shutter release.
Once the flash has reached the subject's area, press the shutter yet again. This will fire another flashgun burst.
The first burst will illuminate the subject. However, the second burst will capture the moment after it has passed.
The result is continuous exposure, where both bursts are recorded.
Now that you're comfortable taking photos during the day let's get to night photography.
So far, I have told you everything you need to know about photographing things at night.
The color balance is the last thing we need to address.
Most people assume that any images taken at night will look too dark.
That's true, but the same applies to daytime photos.
It doesn't really matter if you take photos at dawn or dusk, the camera will always capture a darker image.
Which drone is best for photography
Drones can be used for a variety of purposes, including aerial photography, filming movies, and even delivering packages. But what makes drones such useful tool? Drones are becoming increasingly popular due to two main reasons. Drones are extremely versatile. There are thousands of ways to use drones. This means you can use them to do almost any type of task you normally use a camera for. They are also very simple to operate. A quadcopter is very simple to operate if it has been flown before.
Amazing images can also be captured by drones. You can take stunning photos from places you wouldn’t normally go with a drone. These photos include remote areas where you might be in dangerous situations.
Drones have a simple operation, so anyone can fly them. Once you learn the basics, you will be able to use your drone to capture amazing photos from anywhere you happen to be. Check out our drone collection if you want to take better photographs.
What time is best for drone photography?
The drone could capture aerial photos during sunrise and dusk hours, when there isn’t much activity on earth.
Drones make great tools for photographing beautiful landscapes and the skies above them. You might not be able to capture spectacular night views because drones are not allowed to fly at night.
Take advantage of the sunrise and sunset hours to capture great photo opportunities. Because there are fewer cars and more people on the roads, these times offer stunning opportunities for photos of nature.
You'll also find yourself shooting in lower light levels, making it easier to shoot without worrying about overexposing your image.
Furthermore, you don't have to worry about strong winds or rain, snow, fog, or freezing temperatures. All of these factors make daylight perfect to take photos with drones.
If you are looking for night scenes to capture, then flying at night is a good option. This will allow you to see the cityscape from a different perspective.
What drone can take a DSLR?
Drones have become more practical for everyday tasks. Already, drones are equipped with cameras capable of aerial photography.
Drones have been around for many years but most people don't use them because they aren’t practical. Drones are difficult to control, noisy and expensive.
The Drone-A1 is a result of this. The Drone-A1 is the first quadcopter that can autonomously fly and was specifically made for photographers.
The Drone-A1 features an HD camera that captures stunning videos and photos. The Drone-A1 can follow a subject without human intervention thanks to its powerful onboard computer.
You can now focus on taking great photos while the Drone-A1 will take care of hovering, flying and following your subject.
Amazing shots can be captured with the Drone-A1 thanks to Smart Follow. The Drone-A1 can be pointed towards the subject and it will automatically track the person and keep the distance between them.
The Drone-A1 will give you freedom and convenience while shooting. There's no need to be a steady hand or know where your subject is.
The Drone- A1 also features a built-in GPS that allows you to share your photographs with friends and family. This allows everyone to view your photos from anywhere on the planet.
Whether you're a professional photographer or enjoy taking pictures for fun, the Drone-A 1 is perfect for you.
What are the essentials for drone photography?
Drone photography requires more than just flying a plane. Planning and executing a successful drone shoot requires a lot of considerations. It all starts with choosing the right place and determining how much insurance is required to make an aerial shoot a success.
The most important thing you can do is make sure that your drones are allowed to fly in the location you want to photograph. This involves finding out if there are restrictions regarding where you can fly or where your drone can be operated. If there are, you might have to apply for a permit to fly them in the area.
It is also important to verify the laws in your country. Some countries require permits to fly drones. Others limit how many flights you can make in a specific time.
In addition to obtaining permission to fly drones, you'll need to find somewhere safe and secure to land your drone after each flight. Local businesses will often offer landing pads for rent at a nominal fee. They also provide storage space and an hourly rate. Alternatively, you could buy a dedicated landing pad.
Before you begin shooting, you must decide on the type of drone you want. Different drones have different capabilities and features. Fixed-wing drones, for example, are less expensive and more controllable, while multirotor drones, on the other hand, are more powerful and stable.
After deciding what kind of drone you want to use, you'll need to choose what equipment you'll need. A drone camera usually consists of a gimbal, remote controller, batteries, and memory cards.
The camera is stabilized by the gimbal during flight. The drone's gimbal is attached directly to its body to help keep it steady.
Remote controllers enable you to pilot your drone remotely. These controllers have joysticks and buttons, which allow you to control the drone's direction, speed, direction, and altitude.
The drone's motors, cameras and memory cards power their batteries. They also store the photos that the drone has taken. You will need to ensure enough battery life so that your drone can take clear photos.
Once you've selected the equipment you'll need, you'll need to figure out where you'll shoot. Do you prefer to shoot outdoors or indoors? Do you plan to shoot architecture or landscapes? What are you planning to shoot? These factors will influence how you prepare for your shoot.
If you are planning on shooting inside, lighting will be an issue. Multiple lights are the best way to illuminate a room. You can place one large, centrally located light above your subject and another in the middle of the room. A third is closer to the floor.
Wind conditions are an important consideration when you are outdoors. Drone pilots who are flying drones on windy days may be at risk of being blown off their course. Therefore, you should only take off when the weather is calm.
Think about whether extra equipment is needed when choosing your location. These items will keep your drone stable and allow you to capture high quality images.
For an outdoor shoot, it's advisable to work between 10 am and 4 pm. There won't be many people around during this time, but there will still enough light to make great photos.
Let's conclude that drone photography is more than just fun. It can also be extremely useful for taking stunning aerial photos. Just follow these steps and you can begin creating stunning images today!
Statistics
Among the biggest improvements, the Skydio 2+ has over the standard 2 is a 20% longer battery life, longer range if you add the Beacon, and a neat AI video creation tool called Keyframe. (thedronegirl.com)
Greater than 50% throttle stick position generates positive thrust, but less than 50% throttle stick position reverses the direction of the motors, allowing upside-down flying! (photographypro.com)
Here's proof: according to an analysis of FAA drone registration numbers by drone market research and data group Drone Industry Insights, DJI had a 76.8% market share in the U.S. (thedronegirl.com)
Though the Mavic 3 is about 50% heavier than the Mavic Air 2, it's still conveniently sized. (nytimes.com)
Again, no stabilization is applied, and the 50% throttle stick position cuts the power to the motors. (photographypro.com)
How to Take Great Drone Photos: Tips for Beginners
Tips to capture great drone shots
You must ensure that you have enough space for your drone to fly safely. Keep it clear of trees and buildings.
Before you start flying, make sure that you know where it is. Drone piloting can lead to a lot of confusion. You could end up in danger if you don't know the exact location of your flight.
You must be safe while flying. To see what's around you, always keep your drone close by. Never fly at night, or in bad weather conditions like heavy rain.
Bring extra batteries if you plan to do long flights. Keep spare batteries on hand in case you need them. This way, you won't run out of juice mid-flight.
Use high quality lenses. Clearer images are made with higher resolution lenses. A camera lens with a low resolution, such the one found on most smartphones, may blur the image.
Start small. When you first learn how to use a drone, try making short videos. After you feel confident enough with these videos, you can start making longer videos.
Avoid using your drone indoors. Drones were not made to be used in indoor environments. They can cause damage and destruction to furniture and walls.
Practice makes perfect! Try out different things using your drone. Use it to capture different angles in the same scene. Fly outside to practice your flying skills.
You can be creative! You might believe you have to adhere to certain rules in order take great drone pictures. However, there is no set rule for photography.
Learn more about your camera settings. Cameras are equipped with many advanced features. These settings can enhance the quality and appeal of your photos.
Be patient! Sometimes it takes patience, even though you want to go the fastest route.
Have fun. Make sure you remember why your drone was purchased. The experience can be enhanced by enjoying the flight of your drone.
Share your work! Post your best shots to social media sites like Facebook, Instagram, Twitter, and Pinterest. Let other photographers know how much it was fun!
Keep learning! Read books and magazines about photography. You can watch tutorials online. 15. Be safe Before you take to the skies, make sure that all safety precautions are taken. Ensure your drone has enough battery life left and its landing gear is in working condition. Be sure to follow all FAA regulations.
Find your style! Once you master the basics, your unique style will emerge. You can experiment with many styles and techniques until you find the one that works.
Apps! Get free photo editing tools for your smartphone. These tools can be used to enhance your photos.
Take notes! Keep track of everything that you read from this article. This will help you remember the information better. Notate important points and write them down in your journal.