The DJI Mini 3 is the best new drone for social media content creation, especially for beginners who know nothing about drone photography & videography.
Post super creative content on Instagram Reels, YouTube Shorts, TikTok.
#shorts #djimini3 #dji
By: Umar Naqshbandi Title: The BEST Drone for beginners! - DJI Mini 3 (Instagram Reels & TikTok) Sourced From: www.youtube.com/watch?v=qwOhJQDzQm0
Here are the 3 best drones on Amazon in 2022
Frequently Asked Questions
Are drone photos a good way to make money?
For photographers trying to make money with drones, the biggest problem is that there aren’t any products that can solve the problems associated with them. The experience is less enjoyable if there's no quality software and equipment.
Insurance costs and liability are another concern. Most photographers prefer to photograph from the ground. We're talking about a new way to capture images that could lead to you being paid.
Drones work in the same way that video cameras do by capturing light. Use the same technology to take amazing photos.
Companies are making huge strides towards creating high-quality photos taken from the sky. We have already discussed DJI & GoPro. We are starting to see more companies entering the space.
Although these cameras were designed for aerial photography they can also be used on the ground. All the major manufacturers are investing heavily to develop their imaging technologies.
This means you will eventually be able purchase a drone that can shoot 4K videos and take amazing photos. We may already be seeing this happen. DJI and other companies have released higher resolution versions of their Phantom drones.
DJI recently released the Inspire 2, which features a 12-megapixel sensor capable of shooting at 5120 x 3456 pixels. You can also shoot 8-bit RAW files at 30 frames/second if you wish.
Yes, drone photos can be a great way to make some extra cash.
What time is best for drone photography?
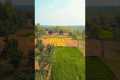
If there isn’t any activity on the ground, a drone could capture aerial shots during sunrise or sunset.
Drones make great tools for photographing beautiful landscapes and the skies above them. Sometimes drones can't fly at night so you might miss spectacular views.
To ensure you don't miss out on any potential photo ops, consider flying during sunrise and sunset hours. These times provide more opportunities to capture stunning shots of nature because there are usually fewer cars on the road and fewer people walking around.
You will find it easier to shoot in low light levels.
A drone is also immune to strong winds and rain. All these factors make daylight ideal for taking photos with a drone.
However, if you want to capture some nighttime scenes, consider flying during moonlit nights. This will give you a unique perspective of the cityscape below.
How can I get started with drone photography
There are many ways you can start taking photos with a drone. The first is to purchase a ready-made drone set. You will get everything you need to get started. They vary from $200 up to $500, depending on which model.
The other option is to build your drone. Although this is not an easy task, it is possible to still create a drone capable of taking decent photos and videos.
If you are interested in building your drone, we recommend you begin with a quadcopter. As found on conventional helicopters, a quadcopter has four rotors (or propellers) instead of two.
A quadcopter takes less time to assemble, and is more reliable than a traditional helicopter. You can also purchase it cheaper and carry it around easier.
First, select the right components. You'll need motors, batteries, controllers, and props. You should choose the right size and weight.
Next, choose the controller that you want to use. Many different types are available, such as joysticks, touch screens, and remote controls. You can attach your drone to the camera with the built-in camera.
Once you've chosen the right parts, you're ready to assemble your drone. A preassembled kit is a great option to save time and make things simpler. But if you want to build your own drone, there are some steps you will need to follow.
Step 1: Attach your battery pack
To begin building your quadcopter, connect the battery to the motor. Remove the cover plate on the bottom side of the battery. Then, slide the battery into place.
Step 2 Connect the motors
Next, place the motors in their appropriate slots. Each motor should be installed in its own slot. Make sure the motors are facing forward when installing them.
Step3: Install the propeller
You will then need to attach your propellers onto the frame. Be sure to place them at equal distances.
Now it's time to test your new drone. If there is no movement after you turn on your engine, double-check that you have the propellers facing forward. Also, make sure that there are no obstructions between the propellers.
Statistics
Among the biggest improvements, the Skydio 2+ has over the standard 2 is a 20% longer battery life, longer range if you add the Beacon, and a neat AI video creation tool called Keyframe. (thedronegirl.com)
Compared to the old days of the Phantom, this drone is super small, but it will likely require you to check a bag, the way a Mini 3 Pro could easily stow away in an oversized pocket. (thedronegirl.com)
A grey card is just a piece of thick paper that is a specific shade of grey (18%), which will be the foundation on which we choose our color temperature. (dronegenuity.com)
Here's proof: according to an analysis of FAA drone registration numbers by drone market research and data group Drone Industry Insights, DJI had a 76.8% market share in the U.S. (thedronegirl.com)
If a drone becomes an extension of your body, then it's considered to be at a good distance. The drone becomes an extension of you and you lose sight its physical boundaries.
A drone that is able to fly at a reasonable distance will allow you to be fully immersed in the surrounding environment without worrying about its next destination.
It also has psychological benefits. This gives us more control over our environment, which makes us feel closer to nature.
There is however a downside. If we fly close to ground, wind and other weather conditions can cause damage to our drones. How far are you able to fly?
It depends on the drone type you have. It is a good idea to maintain a minimum of 500 feet above the ground when you are trying to capture aerial footage.
For example, if you are filming a cityscape, you might want to keep it at 1,000 feet. This will allow you to avoid obstructions like trees and buildings.
This is because drones tend to struggle with low-light conditions. By lowering the altitude, you can reduce time hovering in the dark.
Also, make sure that there is no obstruction such as traffic signs, power lines, or tall buildings in the area you're flying.
It may be a good idea to fly during the day, rather than at night. This will help you avoid reflections from street lights and shadows.
Also, consider the size and weight of the drone. The further it is from the ground the bigger the drone. For example, a large quadcopter will usually require a minimum height of 300ft.
If you're looking for amazing drone footage, make sure to look for the golden hours.
This is between 3 and 6 p.m. This is the time when you have maximum visibility because of direct overhead sunlight.
It is also known for its "magic hour", which is perfect for capturing stunning images.
You should not fly your drone between sunset and sunrise. These times can cause poor-quality footage.
Now that you've got all these tips, it's time to start creating amazing drone videos.