Step inside this stunning home at 102 Menendez Rd, located in one of St. Augustine’s most sought-after neighborhoods. Blending historic charm with modern upgrades, this property offers timeless character, spacious living, and unbeatable access to downtown, beaches, and everything the Nation’s Oldest City has to offer.
✨ Highlights Include: • Spacious, light-filled living spaces • Private backyard perfect for entertaining • Prime location minutes from historic downtown
Whether you’re searching for your forever home, a vacation retreat, or an investment opportunity, 102 Menendez Rd is a rare find in the heart of St. Augustine.
📞 For more information or to schedule a private tour, contact the Shelby Hodges Group at (904) 671-6552 or visit https://shelbyhodgesgroup.com/
👉 Don’t forget to like, comment, and subscribe for more exclusive property tours!
By: Tyler Drew Title: 4K Real Estate Feature Video Sourced From: www.youtube.com/watch?v=U_jAzcNG1tU
You've got check out the 3 most popular drones on Amazon in 2022
Frequently Asked Questions
Can drones take night photos?
Yes, that's the answer. We've been doing this for many years. Since decades, we have been taking night shots.
But there is a catch. Night photography requires sophisticated equipment. Any camera under $10k is not capable of night photography.
When light hits an object, it bounces back in a series of wavelengths.
These wavelengths are combined to produce white light at very far distances from their source.
This is why our eyes can see colors even though the sun is millions of miles away.
However, when light strikes an object near its source, it reflects within a narrow band wavelengths. These wavelengths bounce directly back to us and do not overlap.
This means that objects are brighter if they are closer together. This is why objects seem to glow when they are exposed to black light.
The energy that an object absorbs will determine how much light is reflected. Therefore, if light hits an object, it might reflect more blue than red light.
Blue light is the most sensitive for the human eye. Therefore, objects that are viewed under black lights will look more blue.
This is what drones have to do. If you're trying to photograph something dark, such as a forest or a cave, you need to use a very bright light source.
A standard lamp will not provide enough illumination to illuminate the whole scene. It will only give you a shadowed image and nothing else.
You will need a strobe if you want to take great photos. And since you don't want to carry around a huge flashgun, you'll need to buy a small one.
These lights are known as speedlights because they produce flashes of light so fast that they create a stroboscopic effect.
You can see the light pulse across your screen when we say "stroboscopic". The better the picture, the faster the rate.
We won't cover how to set-up a Speedlight. There are many tutorials on the internet.
We'll tell you, to get a clear shot, ensure that your subject is well lit.
You should aim the beam at a 45 degree angle to achieve this. You can adjust light intensity by moving your flashgun's head.
Once you have found the right setting, hold the gun steady while pressing the shutter release button.
Next, close to the subject, release the shutter. This will trigger the flashgun to fire another burst of light.
The first burst will illuminate the subject. However, the second burst will capture the moment after it has passed.
This creates a continuous exposure in which both bursts or light are recorded.
Now that we know how to capture images during the daylight, let's learn how to do night photography.
I've covered everything you need about night photography.
One thing is left to cover, however: the color harmony.
Most people assume that any images taken at night will look too dark.
That's true, but the same applies to daytime photos.
The camera will always record darker images regardless of whether you are taking photos at dawn and dusk.
Which drone can hold a DSLR camera?
Drones can be used for everyday tasks. Drones can already be equipped with cameras to take aerial photos.
Although drones have existed for many years, they haven't been used much by most people because they aren’t practical. Drones are difficult to control, noisy and expensive.
That's why we've created the Drone-A1. It's the first quadcopter fully autonomous in the world, specifically designed for photographers.
The Drone-A1 has an HD camera which can capture stunning photos and video. Due to its powerful computer onboard, the Drone-A1 will follow a subject seamlessly without any human intervention.
You can now focus on taking great photos while the Drone-A1 will take care of hovering, flying and following your subject.
Smart Follow makes it easy to get amazing shots using the Drone-A1. The Drone-A1 will track your subject and maintain a constant distance between you and them if you point it towards him or her.
You will have more freedom and greater convenience shooting with the Drone-A1. No longer will you need to worry about having a steady hand or knowing exactly where your subject is going.
The Drone- A1 also features a built-in GPS that allows you to share your photographs with friends and family. This way, everyone can view your pictures from anywhere in the world.
Whether you're a professional photographer or enjoy taking pictures for fun, the Drone-A 1 is perfect for you.
How much money do drone photographers make?
Photographers make more than $10k a gig depending on the length of their flights and where they are shooting. If you shoot in remote areas such as national parks or forests, you could earn upwards of $20-30 an hour.
An average person is paid $15-$25 an hr in retail. That means you could fly drones for $50-$75 if that's what you desire. There are still many ways to make even more. Companies that require drone pilots to fly all over the country or internationally will often hire them.
The cost of a flight can vary depending on how much time you spend flying and how far you travel. It can quickly add up, but if your passion is photography and flying, this may be worth it.
What drone is best for aerial photography?
You have two choices if your goal is to fly. Either buy an expensive camera package with a gimbal stabilizer or rent a small remote-controlled helicopter.
The first option is great for those who plan to film a video or film. It gives you full control over the final shots. The second option requires you to pay more and be dependent on the pilot.
What happens if you want the shot to look perfect even though the camera isn't in your hands? This is where drones come into play.
A drone is tiny, autonomous aircraft that can fly without the input of an operator and take photos or videos.
They can fly very close and capture images or footage of buildings. They can also fly low in the air over crowds to capture photographs of people.
Drones are incredibly useful for aerial photography and videography. Drones are also great for marketing, as they can be used to create stunning visuals that would otherwise take a lot more manpower and equipment.
These can be easily placed in strategic areas to capture breathtaking imagery. You can fly them remotely, which makes it easy to operate.
Companies may hire drones for their weddings. These wedding photographers can use their drones to fly above the ceremony area and capture amazing photos of the bride & groom.
They can also fly the cameras to relatives to capture portraits. They can also fly them over reception areas, capturing beautiful views of your venue.
These activities can be used to create promotional material and event coverage. You can also make short films with drones. One could be used to demonstrate to clients that your company is superior.
For all these reasons, drones are becoming increasingly popular for aerial photography and videography. A drone could be your answer to professional photography.
Which drone should a beginner buy?
These drones are great for beginners as they don't require any advanced skills. These include drones with an FPV (first person view) camera. This allows you to remotely control your drone from your smartphone.
Quadcopters can be used for aerial photography. Multirotor models are better suited for advanced features like obstacle avoidance and autonomous flight mode.
The drones come in two price categories: low-cost ones under $100 and high-end ones over $300.
The cheapest models have a shorter range and a shorter battery life. However, the best models offer better performance and longer flight times.
Many beginners prefer to buy cheaper models because they are easier for them to handle and to learn how to use. If you plan on spending hours flying your drone, you might be interested in a higher-end model.
Which drone is the best for photography?
Drones are an exciting technology used in various ways, from aerial photography to filming movies and even delivering packages. What is the secret to drones being such a useful tool for us? Well, there are two main reasons why drones are so popular now. They can be used in so many different ways. Drones can be used for thousands of purposes. Drones can be used to perform almost every type of task that a camera is capable of. They are also easy to operate. Quadcopter flying is easy if your experience with quadcopters is good.
Drones can also capture incredible images. You can take stunning photos from places you wouldn’t normally go with a drone. These include remote areas where you could potentially fall into dangerous situations.
Drones are so easy to operate, so anyone can learn how to pilot one quickly. Once you've mastered the basics you can fly your drone and take stunning photos no matter where it takes you. Check out our drone collection if you want to take better photographs.
How can I get started in drone photography?
There are many ways you can start taking photos with a drone. You can start by buying a drone kit. This will include everything you need to get started. They range from $200 to $500, depending on the model.
You can also build your own drone. Although this can be a bit complicated, it's still possible to create something that works well enough to take some decent photos and videos.
For those who want to try building their drone, we recommend starting with a quadcopter. Quadcopters have four propellers (or rotors) as opposed to two like traditional helicopters.
It is much easier to assemble and maintain a quadcopter than a helicopter. It is also more affordable to buy and easier for you to transport.
You'll first need to select the right parts. Motors, batteries and controllers are all required. Pick the correct size, weight and type.
Next, choose the controller that you want to use. There are many types of controllers available. We recommend purchasing one with a built-in camera, so you don't have to attach a separate device to your drone.
Once you've chosen the right parts, you're ready to assemble your drone. Pre-assembled kits are recommended to make it easier. However, if you prefer to build your own, you'll need to follow a few steps before assembling your drone.
Step 1: Attach your battery pack
You'll need to connect the battery pack to the motor to start building your quadcopter. To start, remove the cover from the battery pack. After that, slide in the battery.
Step 2: Connect the motors
Next, you'll need to install the motors in the appropriate slots. Each motor must be in its assigned slot. When mounting the motors, ensure they face forward and are parallel to the frame.
Step 3: Install the propeller
The propellers will need to be attached to the frame. Make sure they are at the same distance apart.
Now you are ready to test your drone. If the engine does not move, ensure that the propellers are facing forward. Also, make sure that there are no obstructions between the propellers.
Statistics
Here's proof: according to an analysis of FAA drone registration numbers by drone market research and data group Drone Industry Insights, DJI had a 76.8% market share in the U.S. (thedronegirl.com)
Compared to the old days of the Phantom, this drone is super small, but it will likely require you to check a bag, the way a Mini 3 Pro could easily stow away in an oversized pocket. (thedronegirl.com)
Regional & Super Regional Centers pricing per center (400,000+ sq ft) PLACE ORDER (dronebase.com)
Greater than 50% throttle stick position generates positive thrust, but less than 50% throttle stick position reverses the direction of the motors, allowing upside-down flying! (photographypro.com)
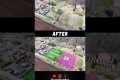
Homes with aerial images sold 68% faster than homes with standard images. (alexdronephotography.com)
Tips for Beginners: How to Take Amazing Drone Photos
These are some great tips to take amazing drone photos
You must ensure that you have enough space for your drone to fly safely. Keep it away from buildings, trees, power lines, etc.
Make sure you know where you're going before you start flying! Drone piloting can lead to a lot of confusion. If you don't know where you've flown, you could end up somewhere dangerous, like a cliff edge or in someone's backyard.
Don't forget to stay safe while flying! Keep your drone near you so you can see what's going on around you. Avoid flying at night and in adverse weather conditions (such as heavy rain).
Bring extra batteries if you plan to do long flights. Always keep spare batteries handy. This will ensure that you don't run short of power during your flight.
High quality lenses are recommended. The clearer the image, the higher the resolution. An image blurred by a lens with low pixel count such as those on most smartphones will result.
Start small. When you first learn how to use a drone, try making short videos. Once you feel confident with this, move on to longer videos.
Avoid using your drone indoors. Drones are not designed to be used inside. They can cause damage on walls, furniture, and many other objects.
Practice makes perfect! You can do many things with your drone. For example, use it to capture different angles of the same scene. You can also fly around the house outside.
Be creative! You may believe you have to follow certain rules in order to take great drone photos, but there are no rules for photography.
Find out more about the settings of your camera. There are many advanced features available on cameras today. These settings can enhance the quality and appeal of your photos.
Be patient! Sometimes it takes patience, even though you want to go the fastest route.
Have fun. Make sure you remember why your drone was purchased. Flying your drone with fun can enhance the experience.
Send us your work! Share your favorite photos on social media such as Facebook, Instagram Twitter, Pinterest, and Twitter. Let other people know how much fun they had with them!
Keep learning! Explore magazines and books that are about photography. You can watch tutorials online. 15. Take precautions! Before you take to the skies, make sure that all safety precautions are taken. Check that your drone has sufficient battery life and that its landing gear functions properly. Follow all FAA regulations.
Find your style Once you know the basics, you can start to develop your own style. Try different styles and techniques until one works for you.
Use apps! Download free photo editing software to your smartphone. You can easily improve your photos with these tools.
Notes! Keep track of all the information you have learned from this article to help you remember it. You can write down the most important points in a journal or notebook.