By: Peter McKinnon Title: $5,000.00 Drone Fine - NEVER flying drones again? Sourced From: www.youtube.com/watch?v=wDZAGJh8N-M
You've got check out the 3 highest-rated drones on Amazon while they're on sale
Frequently Asked Questions
What laws should I be aware of regarding drone photography?
Drone flight regulation is regulated by Federal Aviation Administration (FAA). In addition to the FAA regulations, local laws may also apply. To find out which drone flight rules apply to your state, check with the transportation department.
Most drone owners will need to apply for a FAA licence. The FAA has guidelines for licensing. These guidelines can be found here.
In some states, drone operators must register their drones with the government. You can find out more in our Guide for Drone Registration.
Can drones take pictures at night?
The answer to that question is yes. It's something we have been doing for years. For decades, we've been taking photos at night.
There is one catch. Night photography requires specialist equipment. There's no way to do it with any camera that costs less than $10k.
The wavelengths of light that bounce back from objects when they are hit by light can vary.
These wavelengths merge to form white light at long distances from source.
This is why our eyes can see colors even though the sun is millions of miles away.
Instead, light reflects narrow bands of wavelengths when it strikes objects that are close to the source. These wavelengths bounce directly back to us and do not overlap.
This means that objects appearing brighter are closer together. This is why objects can glow under black lights.
The energy that an object absorbs will determine how much light is reflected. So when light hits an object, it may reflect more blue light than red light.
Blue light is the most sensitive for the human eye. Therefore, objects that are viewed under black lights will look more blue.
This has to do with drones. Use a very bright light source to photograph dark places, such a forest or cave.
A standard lamp will not provide enough illumination to illuminate the whole scene. It will only provide a shadowed view and not much else.
If you want to get a great picture, you will need a flashgun. You won't want to lug around a large flashgun so you will need a smaller one.
These lights are known as speedlights because they produce flashes of light so fast that they create a stroboscopic effect.
When we say "stroboscopic," you can watch the light pulse across the screen. The picture will be better quality if it moves at a faster rate.
We won't be discussing how to set up Speedlights here. There are many tutorials on the internet.
We will tell, for clear pictures, that you need to ensure that the subject is evenly illuminated.
This is achieved by aiming the beam at 45 degrees. You can adjust intensity by moving the flashgun head.
Once you have selected the correct setting, hold the gun steady and release the shutter release key.
Next, close to the subject, release the shutter. This will set off the flashgun to start a second burst.
While the first burst illuminates the subject, the second one will capture the moment after the first burst has passed.
This creates a continuous exposure in which both bursts or light are recorded.
Now that we know how to capture images during the daylight, let's learn how to do night photography.
I've covered everything you need about night photography.
One thing is left to cover, however: the color harmony.
Most people assume that all images taken at nights will be too dark.
And that's true - but it's also true for daytime pictures.
It doesn't matter whether you're taking pictures at dawn or dusk; the camera will always record a darker image.
How can I get started in drone photography?
There are several ways to start photographing using a drone. You can start by buying a drone kit. This will include everything you need to get started. They cost $200 to $500, depending upon which model you choose.
Other options include building your drone. Although this is not an easy task, it is possible to still create a drone capable of taking decent photos and videos.
We recommend that you start with a quadcopter if you want to build your own drone. Like conventional helicopters, quadcopters have four rotors or propellers.
A quadcopter is easier to assemble and maintain than a helicopter. It is also less expensive to buy and easier to transport.
First, choose the right parts. Motors, batteries, controllers and props will all be required. Make sure you pick the correct size and weight.
Next, you need to choose what type of controller to use. There are many options available. These include joysticks, touch screens and remote controls. It is recommended to buy one with a builtin camera so that you don't need to attach another device to your drone.
Once you've chosen the right parts, you're ready to assemble your drone. To make things easy, we recommend buying a preassembled kit. If you would prefer to build your drone yourself, there are a few things you need to do.
Step1: Attach the battery pack
To build your quadcopter, you will need to connect the battery pack and the motor. To begin, remove the cover plate at the bottom of your battery pack. Then, slide the battery into place.
Step 2: Connect the motors
Next, you will need to place the motors within the proper slots. Each motor must be in its assigned slot. When mounting the motors, ensure they face forward and are parallel to the frame.
Step3: Install the propeller
The propellers will need to be attached to the frame. You should position them at equal distances.
You are now ready to test the drone. If there is no movement after you turn on your engine, double-check that you have the propellers facing forward. You should also make sure there is no obstruction between the propellers.
Is it worth buying a drone for photography?
A great product is essential if you are serious about your business. A killer product is essential if you are going to market yourself.
Many photographers don't know how to sell themselves. Instead of convincing others to buy their stuff they're trying convince them.
When you own your company, however, you can't wait for permission from someone else. You'll have to go out and find customers right now.
This means that you will need to tell a compelling story to convince them why they should choose your products over others.
A marketing strategy will be needed to market those products. However, you might fail to properly price your products even after all that.
You may decide to charge too much. You could decide to charge too low. Either way, if you don’t know what your charges are, you’re most likely making a mistake.
To avoid these errors, think like a businessman to avoid them. It doesn't mean that you should become a capitalist. You must learn to value your effort, time, and money.
Additionally, strategies must be developed to measure success in your business.
Once you know the price, you can start building the best product. It should be a product that can make sense creatively and financially.
It solves problems, and it provides real benefits.
One that stands apart from the rest.
Once you've finished building the product, launch it. Now you are ready to build your business.
You should consider buying a drone to take photos. It will make it easier to start your career as a photographer. It will also help you improve your photography skills. It will also allow you to grow your company.
How to fly my drone?
It takes practice to fly a drone. Pilots need to practice flying drones. They are far more stable than regular aircraft. We recommend that beginners practice indoors or near their home.
To fly a drone you will need to have three fundamental skills. These are hovering, takingoff, and landing.
Take off
To take off, simply lift the drone into the sky. Once the drone is moving upward, hold down the button on the controller. After the drone reaches an appropriate height, release the button.
Hovering
Hovering means keeping the drone steady in midair. Holding down either the left or right triggers while pressing the throttle will allow you to hover. You can move the drone by tilting the controller by holding down both triggers.
Landing
Landing is returning the drone safely back to earth. To land, let go of the throttle and gently tilt the controller towards the ground. This will cause the drone to slow down and eventually land.
Fly your drone as comfortable as possible. You must be careful not that your drone crashes into anything.
Which drone can be used to carry a DSLR?
Drones are becoming more indispensable for daily tasks. Already, drones are equipped with cameras capable of aerial photography.
Although drones have existed for many years, they haven't been used much by most people because they aren’t practical. Drones are expensive and noisy, making them difficult to control.
That's why we've created the Drone-A1. It's the first quadcopter fully autonomous in the world, specifically designed for photographers.
The Drone-A1 comes with an HD camera that can take stunning photos and videos. Due to its powerful computer onboard, the Drone-A1 will follow a subject seamlessly without any human intervention.
This allows you to focus solely on the capture of great images, while Drone-A1 does all the flying, hovering and following your subject.
You'll love how easy it is to capture amazing shots with the Drone-A1, thanks to our exclusive Smart Follow feature. Point the Drone-A1 at your subject and it will automatically track and keep you separated.
With the Drone-A1, you'll enjoy freedom and convenience when shooting. It's no longer necessary to worry about holding the camera steady or knowing exactly where your subject will be.
The Drone- A1 also features a built-in GPS that allows you to share your photographs with friends and family. This way, everyone can view your pictures from anywhere in the world.
The Drone-A 1 is ideal for professionals and hobbyists who love to take pictures.
Statistics
Again, no stabilization is applied, and the 50% throttle stick position cuts the power to the motors. (photographypro.com)
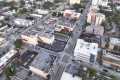
Homes with aerial images sold 68% faster than homes with standard images. (alexdronephotography.com)
Regional & Super Regional Centers pricing per center (400,000+ sq ft) PLACE ORDER (dronebase.com)
Though the Mavic 3 is about 50% heavier than the Mavic Air 2, it's still conveniently sized. (nytimes.com)
Greater than 50% throttle stick position generates positive thrust, but less than 50% throttle stick position reverses the direction of the motors, allowing upside-down flying! (photographypro.com)
A drone shot is an excellent way to capture amazing images. But when you do it right, the result can be even more impressive than any photo taken with a camera.
You can still improve the image quality. You can do this by making sure you are using the right settings for your model.
You can edit your photos with some apps and tools. Adobe Photoshop Lightroom is one example. It allows you to import multiple files and then adjust each shot individually.
You can also crop and improve individual parts of your photo. This can include removing unwanted objects, changing lighting and contrast.
Snapseed offers another editing tool, with basic features like cropping, brightness adjustments and color correction.
The most important aspect of post-processing, however, is ensuring that your final product looks professional.
This includes knowing how to properly position your camera and how to correctly set it up.
Make sure you choose the right settings for your lens. If you are shooting landscapes, you should choose a longer focal length (such 200mm), while for close-ups you should opt for a shorter focal (such 50mm).
Finally, you should learn how to shoot RAW because it gives you greater control over what the final image looks like.
Once you've mastered these techniques, you can create stunning drone images that will turn heads.