Witness the elegance of luxury estates overlooking Folsom Lake, CA, in this 24-second drone tour! My expertly crafted aerial videography showcases stunning lake views and premium properties, designed to attract top-dollar offers for sellers. I’m Mark Divittorio, your tech-savvy Realtor at Divittorio Real Estate, leveraging cutting-edge drone technology and AI-driven marketing to maximize your home’s value. With deep community ties and extensive experience, I’m the trusted choice for Folsom Lake’s elite listings. Call 530 957 1577, email [email protected], or visit Divittoriorealestate.com to list your luxury property or schedule a tour. Subscribe for more exclusive tours! #markdivittorio #DivittorioRealEstate #FolsomLakeLuxury #LuxuryEstates #DroneTour #FolsomLakeHomes #TechSavvyRealtor #CaliforniaLuxury #AerialVideography #SellForTopDollar
By: Mark Divittorio Title: Captivating Drone Tour of Luxury Estates Overlooking Folsom Lake, CA Sourced From: www.youtube.com/watch?v=nB_YXe5QVfo
Here are the 3 highest-rated drones on Amazon Today!
Frequently Asked Questions
What is the best time to fly a drone?
A drone could capture aerial images during sunrise and sunset hours when there isn't much activity on the ground.
Drones can capture beautiful photographs of landscapes and the sky over them. But sometimes drones aren't allowed to fly at night, so you miss out on spectacular views.
You can capture amazing photos by flying between sunrise and sunset. These times provide more opportunities to capture stunning shots of nature because there are usually fewer cars on the road and fewer people walking around.
Also, you'll find yourself shooting at lower light levels. This makes it easier to capture images without worrying about overexposing them.
Additionally, the drone can withstand strong winds, rain and snow. These are all factors that make daylight great for photography with a drone.
If you are looking for night scenes to capture, then flying at night is a good option. This will give you an unrivalled view of the cityscape.
How do you fly your drone?
The best way to learn how to fly a drone is by practicing. Even though drones are very stable compared to regular aircraft, it takes time for pilots to gain experience. Practice indoors or at home is the best option for beginners.
You will need to be able to perform three skills when learning to fly a drone. These skills include hovering, taking off and landing.
Take Off
Simply lift the drone in the air to take off. Once the drone is moving upward, hold down the button on the controller. After the drone reaches an appropriate height, release the button.
Hovering
Hovering means keeping the drone steady in midair. Hold down the right or left trigger and press the throttle to hover. The drone can be tilted by pressing the throttle and both triggers.
Landing
Landing is when the drone returns safely to the earth. To land, release your throttle and tilt the controller down toward the ground. The drone will eventually slow down, and then land.
Flying your drone is a matter of comfort. But be careful not to crash into anything.
Which drone is best for photography
Drones are an exciting technology used in various ways, from aerial photography to filming movies and even delivering packages. What is the secret to drones being such a useful tool for us? Drones are becoming increasingly popular due to two main reasons. They are versatile and easy to use. There are many uses for drones. Drones can be used to perform almost every type of task that a camera is capable of. Secondly, they are very easy to operate. It is very easy to fly a quadcopter if you have ever flown one.
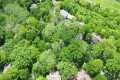
Drones can also capture incredible images. A drone can easily capture stunning photos of places you wouldn't usually go. These photos include remote areas where you might be in dangerous situations.
Drones are so easy to operate, so anyone can learn how to pilot one quickly. After you have mastered the basics, your drone can be used to take amazing photos no matter where you are. So if you are interested in taking better photographs, check out our drone range today.
How can I get started with drone photography
There are many options for starting to photograph with a drone. The first option is to buy a ready-made drone kit. You will get everything you need to get started. They vary from $200 up to $500, depending on which model.
Other options include building your drone. Even though this can be difficult, it is still possible to build a drone that will take decent photos or videos.
We recommend that you start with a quadcopter if you want to build your own drone. Quadcopters have four propellers (or rotors) as opposed to two like traditional helicopters.
It is much easier to assemble and maintain a quadcopter than a helicopter. It is also more affordable to buy and easier for you to transport.
First, you need to pick the right parts. Motors, batteries and controllers are all required. You should choose the right size and weight.
Next, choose the controller that you want to use. There are many different options, including touch screens, joysticks, and remote controllers. You can attach your drone to the camera with the built-in camera.
Once you have selected the correct parts, it's time to assemble your drone. Pre-assembled kits are recommended to make it easier. You can build your drone on your own by following these steps.
Step 1: Attach your battery pack
To build your quadcopter, you will need to connect the battery pack and the motor. First, remove cover plate from bottom of battery pack. After that, slide in the battery.
Step 2 Connect the motors
Next, place the motors in their appropriate slots. Each motor should be installed in its own slot. When installing motors, ensure that they face forward while remaining perpendicular with the frame.
Step 3: Install the propeller
Last, attach the propellers and frame. Place them at an equal distance.
After completing all these steps, you're finally ready to test your new drone! If the engine does not move, ensure that the propellers are facing forward. Also, ensure that there aren’t obstructions between propellers.
What drone is best for aerial photography?
Two options are available if you plan to do aerial photography. You have two options: either buy a high-end camera package with a stabilizer, or rent a small remote controlled helicopter.
If you are planning to shoot a film or video, the first option is ideal because you have complete control over how your shots look. You'll need to pay more, and you will be more dependent upon the pilot.
What happens if you want the shot to look perfect even though the camera isn't in your hands? Drones are perfect for this purpose.
A drone, a small flying aircraft, can take photos and video by itself without having to be controlled by an operator.
They are extremely versatile and can fly very close to buildings to capture images and record footage. They can also fly low over crowds to capture pictures of people.
Drones are extremely useful for aerial photography as well as videography. You can also use them to market your business by creating amazing visuals that don't require much manpower or equipment.
They can be placed in strategic places to capture amazing imagery. They can be flown remotely which makes them simple to operate.
For example, some companies hire drones for weddings. These drone pilots can fly over the ceremony area to capture incredible photographs of the groom and bride.
They can also fly them to family members to take portraits. Or they can fly them over reception areas to capture beautiful views of the venue.
These activities are perfect to make promotional material or event coverage. You can also use drones to create short films. A drone could be used by you to show clients your company is better than theirs.
Drones are increasingly becoming popular for aerial photography and videography. If you want to become a professional photographer, then drones might be the best option.
Statistics
Compared to the old days of the Phantom, this drone is super small, but it will likely require you to check a bag, the way a Mini 3 Pro could easily stow away in an oversized pocket. (thedronegirl.com)
60 second video with branding, captions, contact information, and music Strip / Convenience / Neighborhood / Community Centers pricing per center (up to 400,000 sq ft) PLACE ORDER (dronebase.com)
Among the biggest improvements, the Skydio 2+ has over the standard 2 is a 20% longer battery life, longer range if you add the Beacon, and a neat AI video creation tool called Keyframe. (thedronegirl.com)
Greater than 50% throttle stick position generates positive thrust, but less than 50% throttle stick position reverses the direction of the motors, allowing upside-down flying! (photographypro.com)
Again, no stabilization is applied, and the 50% throttle stick position cuts the power to the motors. (photographypro.com)
A drone shot is an excellent way to capture amazing images. But when you do it right, the result can be even more impressive than any photo taken with a camera.
There are many ways to improve your images' quality. One is making sure to use the most appropriate settings for your model.
After taking photos, there are a few apps and tools that can help you edit them. Adobe Photoshop Lightroom software is one of these. This software allows you edit multiple photos at once, and lets you adjust each one separately.
You can also crop out and enhance certain parts of your image. This can include removing unwanted objects, changing lighting and contrast.
Snapseed offers another editing tool, with basic features like cropping, brightness adjustments and color correction.
The most important aspect in post-processing is to make sure your final product appears professional.
This includes knowing how to properly position your camera and how to correctly set it up.
Make sure you choose the right settings for your lens. For example, if shooting landscapes, go for a longer focal point (e.g. 200mm), but if you are shooting close-ups (e.g. 50mm), you can choose a shorter focal.
Finally, learn how you can shoot in RAW format. This gives you more control over the final images.
Once you master these techniques, you will be able to create stunning drone photos that will impress everyone.