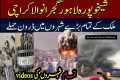
Get an exclusive aerial look at the booming Activation Area of Dholera Smart City, India's first planned smart industrial hub! This drone video showcases the massive infrastructure development, road networks, and industrial plots that are quickly transforming the landscape.
Whether you're an investor, tech enthusiast, or just curious about India's smart city revolution — this is footage you don't want to miss.
🔔 Subscribe for more real estate updates and drone videos from Dholera Smart City and major Indian infrastructure projects!
By: BookMyAssets Title: Dholera Activation Area 30 April 2025! 🚀 Drone Captures Unbelievable Growth! #BookMyAssets Sourced From: www.youtube.com/watch?v=G5Ms2tm4Ugo
Look at the 3 most popular drones on Amazon while they're on sale
Frequently Asked Questions
Which drone do you recommend for beginners?
Drones that are easy to fly for beginners are the best. These drones are equipped with an "FPV" camera which allows the user to control the drone remotely via a smartphone app.
Some quadcopters were specifically designed for aerial photography. Multirotor models are better suited for advanced features like obstacle avoidance and autonomous flight mode.
In terms of price, there are two types of drones; cheap ones that cost under $100 and expensive ones that cost above $300.
The cheapest models have a shorter range and a shorter battery life. However, the best models offer better performance and longer flight times.
Many beginners prefer to buy cheaper models because they are easier for them to handle and to learn how to use. You might want to spend hours flying your drone, so you might look into purchasing a more expensive model.
What are some good places to take photos using a drone?
Drones have been a very useful tool in capturing stunning shots of nature. Drones are perfect for both close-up shots and stunning photos of wildlife like butterflies and birds.
You can use drones in the most beautiful places: mountains, deserts. Drone enthusiasts enjoy taking stunning photos of their surroundings and other local attractions.
Try shooting at night, when the lights illuminate the landscape. This will allow you to discover new locations. You might also consider shooting in other seasons, especially during winter when there is snow on the ground.
What is the best way to capture drone photography?
Drone photography requires more than just flying a plane. It is important to plan and execute a successful drone shooting. From choosing the right location to determining how much insurance you need to carry out a successful aerial shoot.
It is important to check that you have permission for drones to be flown in the area where you intend to shoot. This involves finding out if there are restrictions regarding where you can fly or where your drone can be operated. You may need to apply to fly your drone in restricted areas if there are.
Also, you should check the regulations in your country. You may need a permit to fly drones in some countries. Others limit the number you can make in a given time period.
Not only will you need permission to fly drones but also where to safely land your drone after each flight. Many local businesses offer landing pads to rent for a fee. You will also get storage space. A dedicated landing pad can also be purchased.
Before you can even start shooting, you need to choose the drone that you want to use. Different drones are equipped with different capabilities. For example, fixed-wing drones are typically less expensive and easier to handle, while multirotors have more power and stability.
You will first have to decide on the type of drone that you want. Then, you need to decide what equipment you need. The drone camera typically comprises a gimbal with remote controller, batteries, batteries and memory cards.
A gimbal stabilizes the camera during flight, making it easy to capture sharp images without worrying about shaking hands or dropping the device. To ensure the drone stays stable, the gimbal attaches to its body.
Remote controllers let you control your drone remotely. These devices come with joysticks as well as buttons that allow the drone to be moved forward, backward, left, right, or left. You can also adjust its altitude.
Batteries power the drone’s motors and camera, while memory cards store photos taken with the drone. You'll need enough battery power to ensure clear pictures.
After selecting the equipment you will require, you will need to determine where you will be shooting. Do you plan to take photos outdoors or indoors? Are you going to be shooting landscapes or architecture? What are you planning to shoot? All these factors influence the way you need to prepare for your shoot.
If you plan to shoot indoors, lighting is an important consideration. The best way to light a room is by using multiple lights. One large light should be placed above the subject, one near the middle and another closer to the floor.
Outside, you need to be aware of wind conditions. Drone pilots who are flying drones on windy days may be at risk of being blown off their course. Avoid taking off during stormy weather.
Think about whether extra equipment is needed when choosing your location. These items will help you keep your drone level stable, so you don't lose quality shots.
An outdoor shoot should be between 10 am to 4 pm. During this time, there won't be too many people around, but there will still be enough light to create great photos.
Let's conclude that drone photography is more than just fun. It can also be extremely useful for taking stunning aerial photos. You can create amazing images by following a few simple steps.
Statistics
Regional & Super Regional Centers pricing per center (400,000+ sq ft) PLACE ORDER (dronebase.com)
Compared to the old days of the Phantom, this drone is super small, but it will likely require you to check a bag, the way a Mini 3 Pro could easily stow away in an oversized pocket. (thedronegirl.com)
Among the biggest improvements, the Skydio 2+ has over the standard 2 is a 20% longer battery life, longer range if you add the Beacon, and a neat AI video creation tool called Keyframe. (thedronegirl.com)
Homes with aerial images sold 68% faster than homes with standard images. (alexdronephotography.com)
A grey card is just a piece of thick paper that is a specific shade of grey (18%), which will be the foundation on which we choose our color temperature. (dronegenuity.com)
The best distance for a drone to travel is when it becomes an extension or part of you. The drone becomes an extension of you and you lose sight its physical boundaries.
The drone can be positioned at a good distance so you can fully immerse in the surroundings and not worry about where it is going next.
It also has psychological benefits. Flying close to the ground gives you a greater sense of control and makes it easier to feel connected to nature.
There is however a downside. We can damage drones by flying near the ground. How far are you able to fly?
It all depends on the drone that you are flying. The rule of thumb for aerial footage and filming landscapes is to hover at least 500ft above the ground.
If you're shooting a cityscape, for example, it might be advisable to keep the distance at 1,000 feet. You can avoid trees and buildings that could block your view.
Low-light conditions can make drones less agile. If you are flying in the dark, you can reduce the time you spend hovering by lowering the altitude.
Make sure there are no obstructions like power lines, traffic signs, tall buildings, etc.
It may be a good idea to fly during the day, rather than at night. This helps you avoid reflections caused by street lights and shadows.
A second thing to consider is the drone's actual size. The closer the drone is to the ground, the greater its size. A large quadcopter, for example, requires a minimum height requirement of 300 feet.
The golden hour is the best time to capture drone footage.
This is the time between 3 and 6 PM. During this time, you have maximum visibility due to direct overhead sunlight.
It is also known by the "magic hours", which makes it ideal for creating beautiful images.
You should not fly your drone between sunset and sunrise. These times are notorious for producing poor-quality footage.
Now that you've got all these tips, it's time to start creating amazing drone videos.