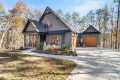
Stunning 4K aerial drone footage of Porirua's coastline, real estate, and construction progress. Contact Moses Controls for drone filming services. #DroneFootage #Porirua #Construction #Realestate
By: Ver2Go Films Title: Porirua Drone Showreel 2025 – Construction & Real Estate Aerial Filming Sourced From: www.youtube.com/watch?v=x9NckXiUxrg
Here are the 3 most popular drones on Amazon Today!
Frequently Asked Questions
What are the advantages of drone photography?
Drone photography is an exciting way to capture images and video footage. You should be aware of the potential downsides of flying a small aircraft.
Drone flying is expensive. It can cost hundreds to thousands depending on which drone you buy.
Flying a drone requires training and certification, so you'll need to invest time and money to learn how to operate them safely.
Safety is another concern. Drones are extremely dangerous because they require constant maintenance. It is possible to injure or cause property damage by losing control of your drone while you are taking photos.
You may find yourself spending more time flying your drone than you do actually taking photographs or recording footage. Your drone might not have enough airspace to fly.
Some local governments have restrictions on where you can fly an unmanned aerial vehicle. You cannot fly more than 400 feet and within five miles from any airports, stadiums hospitals, schools or prisons.
Drones may not be for everyone. Some people feel uneasy about flying these machines because they fear they might crash or fall out of the sky. Others are concerned that they may accidentally hit someone or something else.
If you are not confident flying a drone, you can stick with traditional aerial photography methods and videography instead.
How much money do drone photographers make?
A photographer makes more than $10k per gig depending on how long he/she flies for and where he/she shoots. Photographers who work in remote areas, such as forests or national parks, could make upwards of $20-30 per hour.
Retail workers make $15-25 an hour, so you could easily earn $50-$75 flying drones. However, there are also plenty of opportunities to earn even more. Drone pilots often fly for companies that require them cross-country or international travel.
Depending on how long you fly and how far you travel, you can expect to pay $100-$300 per flight. This can add up quickly, but if you enjoy flying and love photography, it may be worth it for you.
How can I get started in drone photography?
You have many options to begin photographing with a drone. The first is to purchase a ready-made drone set. This kit will contain everything you need for getting started. They vary in price from $200 to $500 depending upon the model.
You can also build your own drone. Although this can be a bit complicated, it's still possible to create something that works well enough to take some decent photos and videos.
For those who want to try building their drone, we recommend starting with a quadcopter. As found on conventional helicopters, a quadcopter has four rotors (or propellers) instead of two.
It is much easier to assemble and maintain a quadcopter than a helicopter. It's also cheaper to purchase and easier to carry around.
First, choose the right parts. You'll need motors, batteries, controllers, and props. Make sure you pick the correct size and weight.
Next, you need to choose what type of controller to use. There are many different options, including touch screens, joysticks, and remote controllers. A built-in camera is an option, as you don’t need to attach a separate device. We recommend buying one.
Once you've made your selections, you are ready to assemble it. We recommend purchasing a pre-assembled kit to make things easier. If you would prefer to build your drone yourself, there are a few things you need to do.
Step1: Attach the battery pack
For your quadcopter to be built, you'll need the battery pack connected to the motor. To start, remove the cover from the battery pack. Slide the battery into its place.
Step2: Connect your motors
Next, you will need to place the motors within the proper slots. Each motor must be in its assigned slot. Make sure the motors are facing forward when installing them.
Step3: Installing the propeller
The propellers will need to be attached to the frame. Be sure to place them at equal distances.
Now you are ready to test your drone. If there is no movement after you turn on your engine, double-check that you have the propellers facing forward. Make sure the propellers are free from obstructions.
Can drones take pictures at night?
Answer: Yes. But we've been doing it for years now. We've been taking pictures at night for decades.
There's a catch. Night photography requires special equipment. You can't do it with a camera that costs less then $10k.
When light strikes an object, it bounces back in various wavelengths.
These wavelengths combine to create white light at very distant distances from the source.
This is why we can see colors even though it is thousands of miles away.
Contrary to popular belief, light that strikes objects close to their source reflects in a narrow range of wavelengths. These wavelengths bounce back directly to us without any overlap.
It means that the object closer you are, the brighter it will appear. This is why objects can glow under black lights.
The amount of light reflected depends on how much energy the object absorbs. The object may reflect more red light than blue light when it is hit by light.
Blue light is the most sensitive for the human eye. Therefore, objects that are viewed under black lights will look more blue.
What does all this have to do about drones? If you're trying to photograph something dark, such as a forest or a cave, you need to use a very bright light source.
A normal lamp won't provide enough light to illuminate the entire scene. It will only create a shadowed scene.
A strobe will give you a great shot. You won't want to lug around a large flashgun so you will need a smaller one.
Speedlights are also known for their flashes of light that create a stroboscopic effect.
You can see the light pulse across your screen when we say "stroboscopic". The better the picture, the faster the rate.
We won't be discussing how to set up Speedlights here. There are many tutorials on the internet.
We'll tell you, to get a clear shot, ensure that your subject is well lit.
The beam should be aimed at a 45° angle in order to achieve this. You can adjust light intensity by moving your flashgun's head.
Once you have set the setting that is right for you, hold the gun steady as the shutter release button is pressed.
Just before the flashlight reaches your subject, you can press the shutter button again. This will trigger the flashgun to fire another burst of light.
The first burst is the most visible, and the second captures the moment after the burst has ended.
This creates a continuous exposure in which both bursts or light are recorded.
Now that you're comfortable taking photos during the day let's get to night photography.
I have so far covered everything about how to photograph things at night.
The color balance is the last thing we need to address.
Many people believe that images taken at night are too dark.
Yes, it is true. However, it can also be applied to daytime shots.
It doesn't really matter if you take photos at dawn or dusk, the camera will always capture a darker image.
Statistics
A grey card is just a piece of thick paper that is a specific shade of grey (18%), which will be the foundation on which we choose our color temperature. (dronegenuity.com)
Regional & Super Regional Centers pricing per center (400,000+ sq ft) PLACE ORDER (dronebase.com)
Again, no stabilization is applied, and the 50% throttle stick position cuts the power to the motors. (photographypro.com)
60 second video with branding, captions, contact information, and music Strip / Convenience / Neighborhood / Community Centers pricing per center (up to 400,000 sq ft) PLACE ORDER (dronebase.com)
Here's proof: according to an analysis of FAA drone registration numbers by drone market research and data group Drone Industry Insights, DJI had a 76.8% market share in the U.S. (thedronegirl.com)
The two most common types of camera used to make time-lapses are DSLRs (Digital Single Lens Reflex) which are typically more expensive that point-and–shoot digital cameras.
DSLR cameras also tend to produce higher-quality images due to the way light enters the lens. But when shooting video, they aren't ideal because they require manual focus and exposure settings.
For beginners, point-and-shoot cameras such as the GoPro are simpler to use. However, the lower resolution means videos look grainy.
A consumer drone is the best camera to time-lapse. These tiny flying robots are a popular alternative to professional drones.
A drone is a remote control aircraft that flies autonomously without human intervention. Quadcopter drones may use multiple propellers. A drone will typically fly with one propeller.
In addition to providing aerial footage, a drone can capture cinematic shots from a bird's eye view. A gimbal stabilizer can be added to drones for smooth handheld footage.
To create a time-lapse, start recording while the drone hovers above your subject. If the sun doesn't directly over the subject, the sky won't look dark during the shot.
To achieve the desired effect you can adjust your shutter speed and aperture. If you are filming a sunset, for example, the shutter speed can be set at 30 seconds and the aperture wide open to allow in as much natural lighting as possible.
The opposite approach should be used for night shots. For night shots, use a slow shutter speed of 1 sec and close the aperture to reduce light ingress. This produces a bright image that makes details visible.