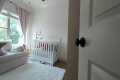
Watch as we fly our drone inside this house to produce a video showcasing the interior and exterior!
By: The BQ Drone Guy Title: Real Estate Interior and Exterior Drone Video Sourced From: www.youtube.com/watch?v=5hqZ_UWT-YA
Check out the 3 most popular drones on Amazon in 2022
Frequently Asked Questions
You can make money with drone photography
For photographers trying to make money with drones, the biggest problem is that there aren’t any products that can solve the problems associated with them. It's not easy to enjoy the experience if you don't have quality equipment or software.
You also have to worry about insurance costs and liability issues, so most photographers will stick to taking pictures from the ground. You could get paid for your efforts if you use a totally new method of photographing images.
Drones capture light in a similar way to video cameras. Why not make amazing photos with the same technology?
Companies are making huge strides towards creating high-quality photos taken from the sky. We've already talked about DJI and GoPro. Now, we are seeing more companies join the space.
These cameras can be used for aerial photography but are also very useful on the ground. The major manufacturers have invested heavily in the development of their imaging technologies.
You'll soon be able buy a drone capable of taking incredible photos and 4K video. We might already be witnessing this happening. DJI is one of the companies that has started to release higher-resolution Phantom series drones.
DJI recently launched the Inspire 2, a 12-megapixel camera capable of taking photos at 5120x3456 pixels. If you prefer to shoot in RAW format you can capture 8-bit files at 30 frames a second.
You can indeed make money selling drone photos.
How much money do drone photographers make?
A photographer can make more than $10k per gig, depending on how much time he/she travels and where he/she photographs. If you shoot in remote areas such as national parks or forests, you could earn upwards of $20-30 an hour.
An average person makes $15-$25 per hour in retail. This means that you could make $50-$75 flying drones, if you so desired. There are many opportunities to make even more. Most drone pilots fly for companies that require them travel throughout the country, or internationally.
Prices for flights can range from $100 to $300 depending on the amount of time spent flying and the distance covered. Although this can quickly add up, if you are passionate about photography and enjoy flying, it could be worthwhile.
What are some of the cons to using drone photography for your photos?
Drone photography is a great way to capture images as well as video. You should be aware of the potential downsides of flying a small aircraft.
Drone flying is expensive. It all depends on what type of drone you choose. You could end up spending hundreds of thousands or even thousands.
Drone flying requires certification and training. You'll need to spend time and money learning how to safely operate them.
Safety is another downside. Drones can be dangerous as they need to be repaired and maintained constantly. If you lose control of your drone while taking photos or filming videos, it could cause serious property damage or injure someone.
It is possible that you spend more time flying a drone than taking photos or filming footage. A drone can be difficult to fly because of limited airspace.
You can only fly your unmanned air vehicle within certain areas. You cannot fly higher than 400 feet, or within five miles of any stadiums, hospitals or schools.
Drones are not for everyone. These machines can cause anxiety for some people who fear that they may crash or fall from the skies. Others fear that they could accidentally hit an object or person.
If you're not comfortable flying a drone, then maybe you should stick to traditional aerial photography and videography methods instead.
Statistics
Homes with aerial images sold 68% faster than homes with standard images. (alexdronephotography.com)
Regional & Super Regional Centers pricing per center (400,000+ sq ft) PLACE ORDER (dronebase.com)
Again, no stabilization is applied, and the 50% throttle stick position cuts the power to the motors. (photographypro.com)
60 second video with branding, captions, contact information, and music Strip / Convenience / Neighborhood / Community Centers pricing per center (up to 400,000 sq ft) PLACE ORDER (dronebase.com)
Here's proof: according to an analysis of FAA drone registration numbers by drone market research and data group Drone Industry Insights, DJI had a 76.8% market share in the U.S. (thedronegirl.com)
There are two types of cameras that can be used for time-lapse photography: DSLRs (Digital Single Lens Reflex) and point-and-shoot digital camera.
Because of the way light enters a DSLR camera, it tends to produce higher quality images. They are not ideal for video because they require manual focus, exposure and exposure settings.
For beginners, point-and-shoot cameras such as the GoPro are simpler to use. Videos will look grainy because of the lower resolution.
A consumer drone is the best camera for time-lapsing. These small flying robots are popular because they provide an affordable alternative to professional drones.
A drone, a remote controlled aircraft, is one that can fly independently of human intervention. Although quadcopter drones might have multiple propellers to fly, a drone uses a single propeller.
Drones can be used to capture cinematic footage from a bird's-eye view. You can equip your drone with a stabiliser to capture smooth handheld footage.
If you want to create a timelapse, record while the drone hovers just above your subject. If the sun is not directly overhead, the sky will not appear dark during the shot.
To achieve the desired effect, you can adjust the aperture and shutter speed. For example, you could set your shutter speed to 30 seconds for a sunset shot and keep the aperture wide open in order to capture as much natural daylight as possible.
The opposite approach should be used for night shots. Use a slow shutter speed of 1 second and close the aperture to reduce the amount of light entering the camera. This creates bright images where details can be clearly seen.