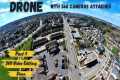
Explore the vibrant nightscape of Sarjapur, Bengaluru, through this captivating drone footage video, showcasing stunning aerial views of key locations like D-Mart, Babai, Kharva, Sompura Gate, and the prestigious Prestige City. This modern and rapidly growing area comes to life under the night sky, offering a breathtaking perspective of one of Bengaluru’s most dynamic neighborhoods.
In this high-definition video, take a virtual tour through Sarjapur’s illuminated streets, modern infrastructure, and iconic landmarks. The drone footage highlights the beautiful contrast of city lights and serene surroundings, giving you an exclusive bird's-eye view of the area’s development. Whether you're admiring the growth of Bengaluru or simply enjoying the mesmerizing aerial shots, this video offers a unique look at Sarjapur and its surroundings.
Don’t forget to like, comment, and subscribe for more incredible drone footage of Bengaluru’s evolving neighborhoods and iconic locations!
Location: Sarjapur, Bengaluru, Karnataka Coordinates: 562125 Drone Footage Quality: High Definition (HD) Attractions: D-Mart Sarjapur, Babai, Kharva, Sompura Gate, Prestige City Best Features: Illuminated Streets, Rapid Development, Modern Infrastructure Nearby Landmarks: Sarjapur, Outer Ring Road, Prestige City, Marathahalli
Sarjapur Bengaluru Drone View, Sarjapur Night Drone Footage, Prestige City Aerial View, Kharva Sompura Gate Sarjapur, D-Mart Sarjapur Aerial, Bengaluru City Lights Drone, Sarjapur Aerial Footage, Prestige City Bengaluru, Sarjapur Development, Drone Views Bengaluru, Sarjapur Bengaluru Real Estate, Bengaluru Nightlife Drone, Sarjapur Infrastructure, Aerial Footage Bengaluru
By: Drone Diaries India Title: Aerial Drone View of Sarjapur, Sompura Gate & Prestige City, Bengaluru | Stunning Night Footage Sourced From: www.youtube.com/watch?v=5H16f1DbJ7Y
Here are the 3 best drones on Amazon Today!
Frequently Asked Questions
How much money do drone photographers make?
Photographers can earn more than $10k depending on how long they fly and where they shoot. You could make as much as $20-30 per hour if you are able to shoot in remote areas like national parks and forests.
An average person makes $15-$25 per hour in retail. This means that you could make $50-$75 flying drones, if you so desired. There are plenty of ways to earn more. Drone pilots typically fly for companies that require them to travel across the country or even internationally.
You can charge anywhere from $100 to $300 per flight, depending on the time you spend flying and the distance you cover. It can quickly add up, but if your passion is photography and flying, this may be worth it.
Which drone can carry DSLR?
Drones are increasingly useful for everyday tasks. Drones already have cameras that allow for aerial photography.
Drones have been around since the beginning of time, but they are not practical for most people. Drones are expensive and noisy, making them difficult to control.
The Drone-A1 is a result of this. It's the world's first fully autonomous quadcopter designed specifically for photographers.
The Drone-A1 comes with an HD camera that can take stunning photos and videos. The Drone-A1 can follow a subject without human intervention thanks to its powerful onboard computer.
This allows you to concentrate entirely on capturing amazing images while the Drone-A1 takes over flying, hovering and following along with your subject.
Amazing shots can be captured with the Drone-A1 thanks to Smart Follow. Point the Drone-A1 toward your subject. It will automatically track them and maintain distance between you.
You'll have complete freedom and ease when shooting with the Drone-A1. It's no longer necessary to worry about holding the camera steady or knowing exactly where your subject will be.
The Drone- A1 also features a built-in GPS that allows you to share your photographs with friends and family. This allows everyone to view your photos from anywhere on the planet.
The Drone-A 1 is ideal for professionals and hobbyists who love to take pictures.
Can drones capture night shots?
The answer to that question is yes. It's something we have been doing for years. We have been taking photos at night for many decades.
But there is a catch. Night photography requires specialized equipment. There's no way to do it with any camera that costs less than $10k.
When light strikes an object, it bounces back in various wavelengths.
These wavelengths are combined to produce white light at very far distances from their source.
This is why our eyes can see colors even though the sun is millions of miles away.
The opposite is true. When light strikes an object very close to its source it reflects in narrow wavelengths. These wavelengths bounce right back to us without overlapping.
This means that objects appear brighter when they are closer to each other. This is how objects glow when exposed to black light.
The energy the object absorbs influences how much light is reflected. If light hits an object, it may reflect less red light than more blue.
The human eye is more sensitive to blue light than objects, so objects appear bluer when they are viewed under blacklight.
So what does this have to do with drones? A very bright light source is required if you are trying to capture dark areas, such as a forest, or cave.
A standard lamp will not provide enough illumination to illuminate the whole scene. It will only provide a shadowed view and not much else.
If you want a good picture, you'll need to use a strobe instead. You won't want to lug around a large flashgun so you will need a smaller one.
Speedlights are also known for their flashes of light that create a stroboscopic effect.
Stroboscopic means that the light pulses across the screen. The higher the speed, the better the picture.
This tutorial will not cover how to install a Speedlight. But you can find many tutorials online.
We'll tell you, to get a clear shot, ensure that your subject is well lit.
You should aim the beam at a 45 degree angle to achieve this. You can adjust light intensity by moving your flashgun's head.
Once you've found the perfect setting, keep the gun steady and press the shutter release button.
Just before the flashlight reaches your subject, you can press the shutter button again. This will activate the flashgun and fire another burst.
The first burst will illuminate the subject. However, the second burst will capture the moment after it has passed.
The result is a continuous exposure where both bursts of light are recorded.
Now that you are able to take photographs during the day, let us move on to night photography.
So far I have covered all you need to know about taking night photos.
The color balance is the last thing we need to address.
Most people assume that nighttime images will not be dark enough.
Yes, it is true. However, it can also be applied to daytime shots.
It doesn’t matter whether you’re shooting at dawn or at dusk. The camera will always record a darker shot.
How do you get started with drone photography
There are many ways to get started with drone photography. The first option is to buy a ready-made drone kit. You'll get everything you need. They vary from $200 up to $500, depending on which model.
You can also build your own drone. Although it is a complicated task, you can still make something that captures decent images and videos.
Quadcopters are the best option for those looking to build their drone. As found on conventional helicopters, a quadcopter has four rotors (or propellers) instead of two.
A quadcopter takes less time to assemble, and is more reliable than a traditional helicopter. It is also less expensive to buy and easier to transport.
First, select the right components. You'll need motors, batteries, controllers, and props. Make sure you pick the correct size and weight.
Next, you will need to choose which type of controller you want. Many different types are available, such as joysticks, touch screens, and remote controls. We recommend purchasing one with a built-in camera, so you don't have to attach a separate device to your drone.
Once you've chosen the right parts, you're ready to assemble your drone. Pre-assembled kits are recommended to make it easier. You can build your drone on your own by following these steps.
Step 1 Attach the battery pack
You'll need to connect the battery pack to the motor to start building your quadcopter. First, remove cover plate from bottom of battery pack. After that, slide in the battery.
Step 2 Connect the motors
Next, place the motors in their appropriate slots. Each motor should be installed in its own slot. When installing motors, ensure that they face forward while remaining perpendicular with the frame.
Step 3: Install the propeller
You will then need to attach your propellers onto the frame. Be sure to place them at equal distances.
Now it's time to test your new drone. If the engine does not move, ensure that the propellers are facing forward. Also, ensure that there aren’t obstructions between propellers.
Which drone is the best for photography?
Drones are an exciting technology that can be used for many purposes. These include aerial photography, filming movies, and even delivery of packages. What makes drones so useful? Drones have two main advantages. Drones are extremely versatile. There are many uses for drones. This means you can use them to do almost any type of task you normally use a camera for. They are also very simple to operate. You already know how easy it is to fly quadcopters if you've flown one before.
Drones also have the ability to capture stunning images. You can take stunning photos from places you wouldn’t normally go with a drone. These include remote locations where you may be exposed to danger.
Drones are simple to use, and anyone can quickly learn to fly one. After you have mastered the basics, your drone can be used to take amazing photos no matter where you are. If you're interested in better photos, take a look at our drone range.
Statistics
Among the biggest improvements, the Skydio 2+ has over the standard 2 is a 20% longer battery life, longer range if you add the Beacon, and a neat AI video creation tool called Keyframe. (thedronegirl.com)
Here's proof: according to an analysis of FAA drone registration numbers by drone market research and data group Drone Industry Insights, DJI had a 76.8% market share in the U.S. (thedronegirl.com)
A grey card is just a piece of thick paper that is a specific shade of grey (18%), which will be the foundation on which we choose our color temperature. (dronegenuity.com)
Homes with aerial images sold 68% faster than homes with standard images. (alexdronephotography.com)
Compared to the old days of the Phantom, this drone is super small, but it will likely require you to check a bag, the way a Mini 3 Pro could easily stow away in an oversized pocket. (thedronegirl.com)
A drone photo is a great way of capturing amazing images. The result can be more stunning than any image taken with a conventional camera if you do it correctly.
There are many ways to improve your images' quality. One is making sure to use the most appropriate settings for your model.
There are many apps and tools available that will help you to edit your photos once they have been taken. Adobe Photoshop Lightroom is one example. It allows you to import multiple files and then adjust each shot individually.
You can also crop and enhance individual parts of your image. You can also remove unwanted objects or adjust lighting and contrast.
Snapseed also offers basic editing tools such as cropping or brightness adjustments and color correcting.
Post-processing can be a time-consuming process. However, it is crucial that your final product looks professional.
This involves knowing how your camera works and how to position yourself correctly.
You must also ensure that your lens settings are correct. If you are shooting landscapes, you should choose a longer focal length (such 200mm), while for close-ups you should opt for a shorter focal (such 50mm).
You can also learn to shoot in RAW format so you have more control over your final image.
Once you've mastered these techniques, you can create stunning drone images that will turn heads.